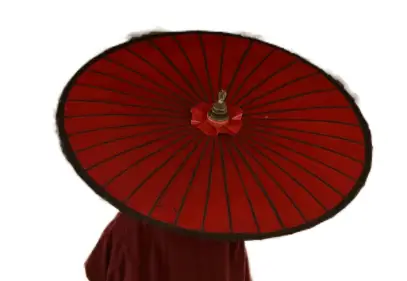
Sometimes you want to remove a specific color from the photo you took. Maybe it doesn’t fit there anymore, or maybe you simply just do not need it?
With this article, I will help you to remove specific colors in Photoshop, step-by-step, quickly and easily.
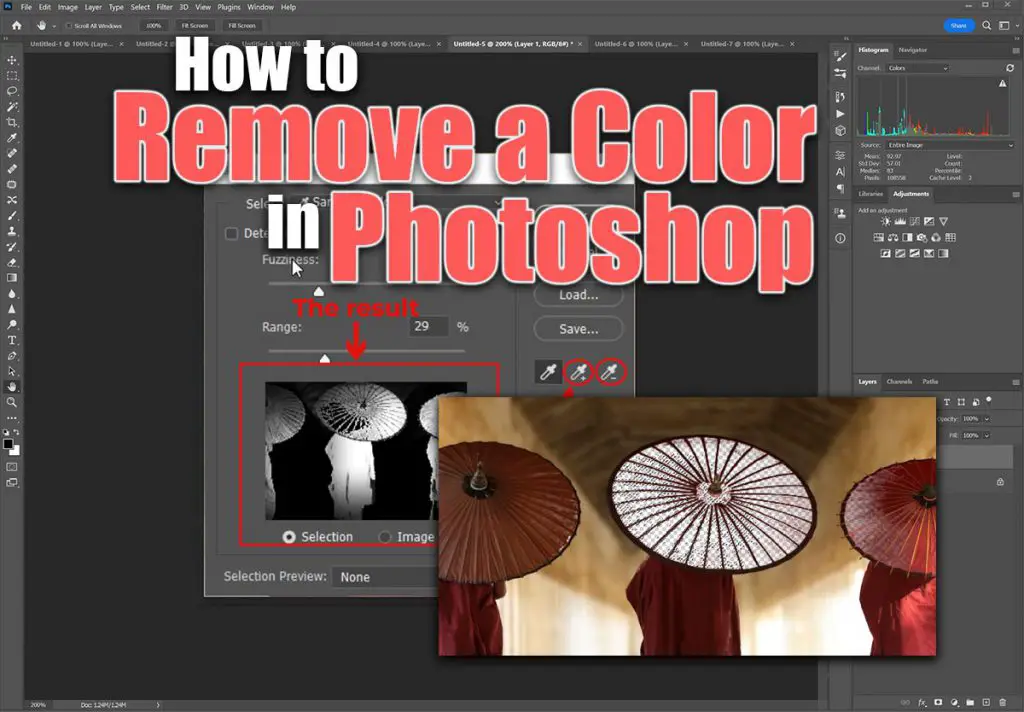
How to Remove a Specific Color in Photoshop?
A specific color can be removed by selecting it with the selection tools such as the Magic Wand or Quick Selection (keyboard shortcut: W), then deleting or masking it out, or with the Color Range tool (menu: Select -> Color Range) better for complex edits where you cannot easily remove the color by hand.
Remove a Color with the Magic Wand Tool
Among the various selection tools included in Photoshop, there is one that works like magic.
A powerful tool for you as an editor, the Magic Wand makes a selection of pixels that have the same range of colors.
With the magic wand, you can select all of the colored pixels in the image that is similar to any color you click on. It is, therefore, the most effective way to remove a single color.
Where to find the Magic Wand
Open your image in Photoshop and select the Magic Wand Tool. You can find it in the Toolbar bound to the Quick Selection Tool. Right-click on the icon and change it to Magic Wand.
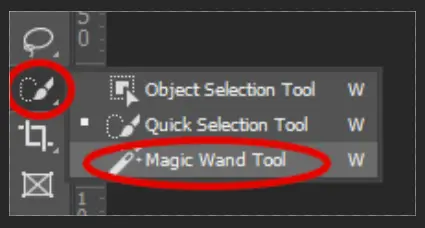
Or you can press the W button on your keyboard to activate the Tool.
How to select free hand with the Magic Wand
Now that you have selected the magic wand tool, you will have to set the tolerance and start selecting the colors you want to be removed. Let’s see how to do that.
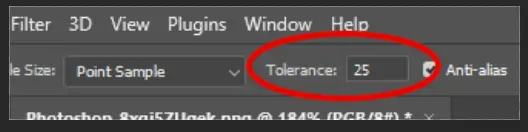
Set the tolerance
Even the same color may have many hues in the image depending on the lighting. By setting a Tolerance, you can determine how sensitive the Magic Wand tool is by deciding how many different tones you can select.
Set your Tolerance to a range between 0 and 255 in the Magic Wand settings in the Options Bar to include hue variations in your selection. When the number is higher, the selection will be larger.
If the selection doesn’t seem to work very well for you, it’s almost certainly the Tolerance that needs to be changed.
Make the selection
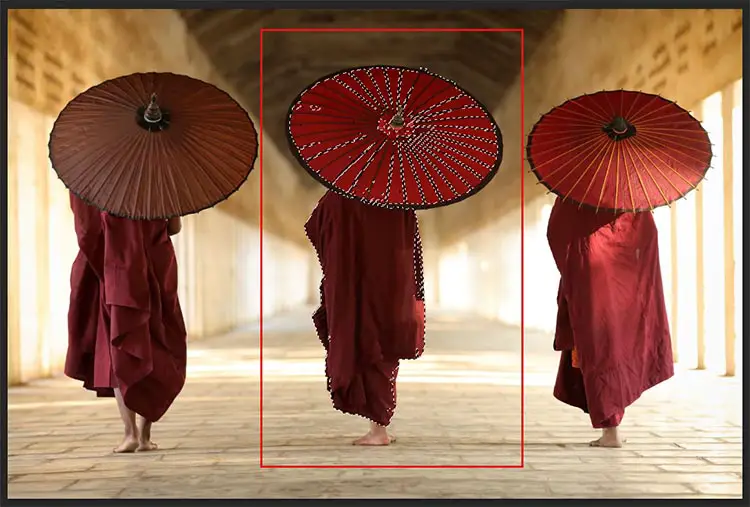
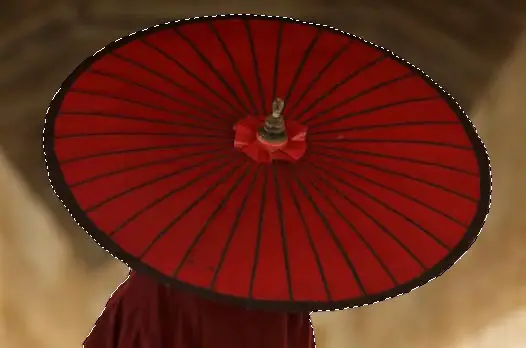
While you have the Wand Tool selected, click on the color that you want to remove. When the hues of an image are uniform, the Magic Wand will pick up all the colors in that area.
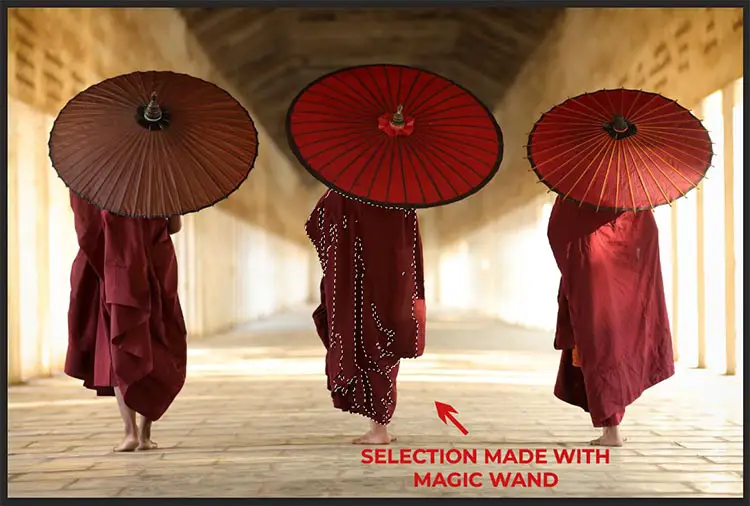
You will need to Adjust the Selection because it often happens that the Wand Tool misses out areas that need to be selected, or also it can overdo the selection. You don’t have to select everything perfectly at this stage, but make sure not to forget large parts.
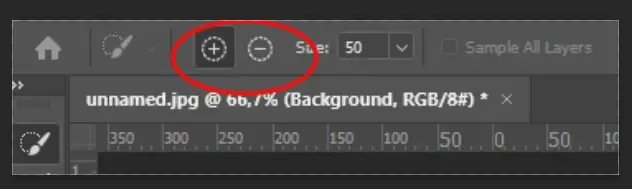
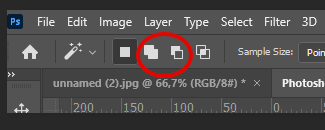
You can add or subtract from the selection using the Add to Selection and Subtract from Selection buttons at the top of the screen in the Options Bar.

Or you can use the shortcuts. Hold down the Shift button and click on the area you need to be selected.
Or subtract the area by holding ALT/OPT and clicking on the area that needs to be removed.
You can change the Tolerance here too, if the Magic Wand Tool grabs too much or too little.
Select and Mask to Refine Edges
Now that you are done with the freehand selection with the Magic Wand Tool, you will need to refine the selection.
You can do that with the Select and Mask option.
How to Select and Mask?
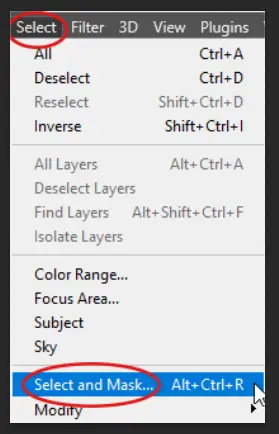
Go to the Select Menu and choose the Select and Mask option.
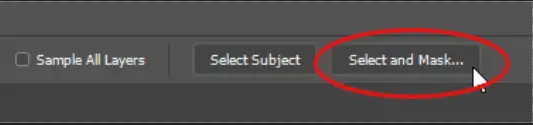
Or, in the Options Bar menu, there is a Select and Mask button, click it.
You can also use the shortcut:
For Windows:
Ctrl+Alt+R
For Mac:
Cmd+Opt+R
Once you click the Select and Mask button, the Select and Mask workspace will show up.
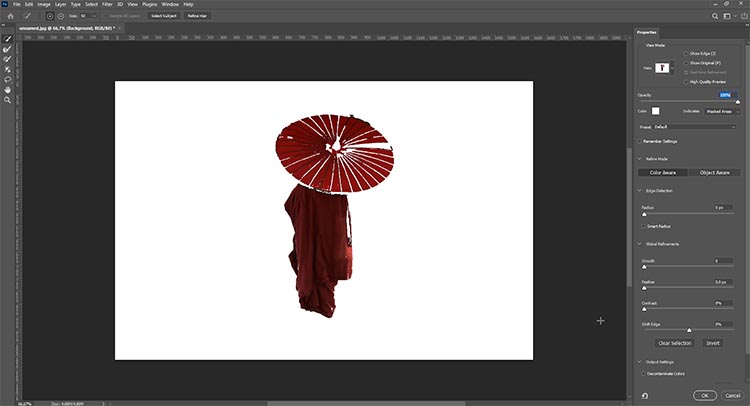
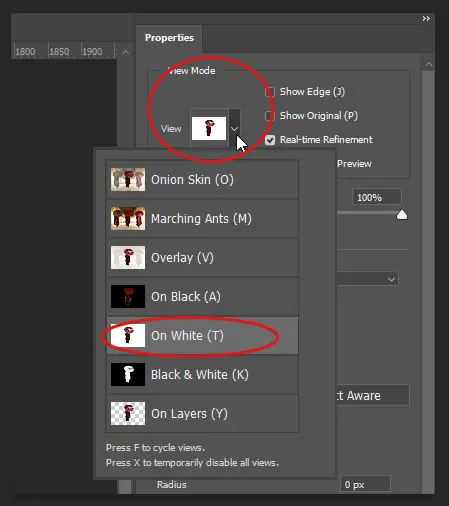
According to the colors of your photo, choose a Select and Mask View Mode.
I find it easiest to see the selection and what I am doing on a white background.
You should experiment with different modes to find out which one works the best for your needs.
You can find the View Modes in the Properties Window.
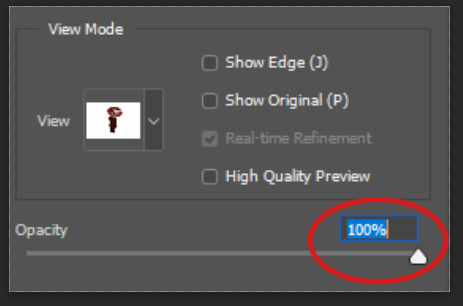
Once you’ve selected the View Mode, you will have to make sure the opacity of the layer is right, in my case at 100%, so you can only see the selection on a white background.
Now once you have set the workspace, you can see that the selection is not as complete as we would like, so let’s work on that.
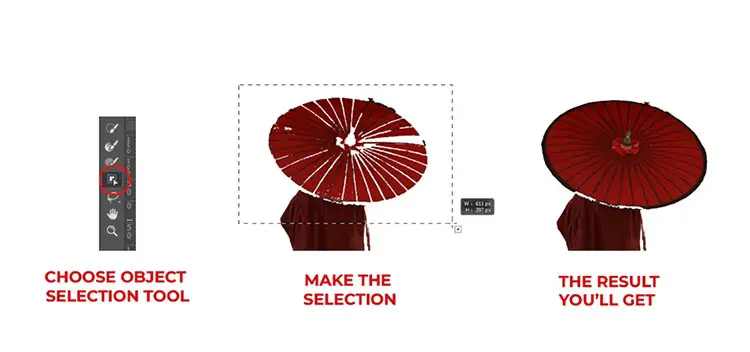
Using the Object Selection Tool, you can draw a rectangular or freeform marquee over a subject/area, and Photoshop will automatically determine which pixels need to be selected.
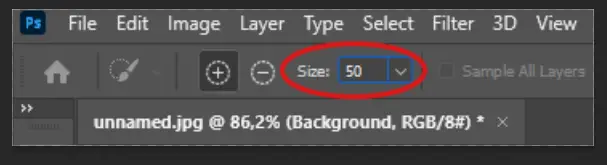
You can modify the selection by using the Add or Subtract options. There are also options for controlling the brush size in the Tool Options, next to the add and subtract options.
You can also use the shortcuts:
Add to Selection with Shift+Left Click
Subtract from Selection with Alt/Opt+Left Click
Or you can also do that by repeating the same selection process with the Object Selection tool a few times until you select the entire subject/area.

I have made a good selection in my example, but it still needs improvement. The edges are rough, and there are still gray areas. If you adjust the edges, you will be able to fix these issues.
How to fix the edges?
Back within the Select and Mask window, firstly, you might want to start with the Radius (Y) option. You can find it in the Properties Menu.
Also, you might want the Smart Radius option checked. With Smart Radius, you can refine the edges of your selection by varying the width.
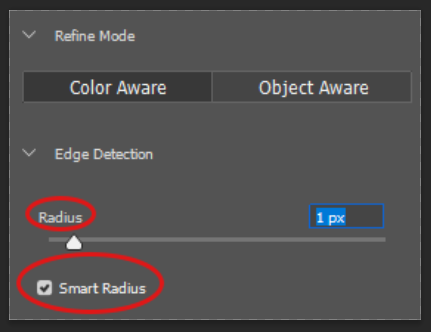
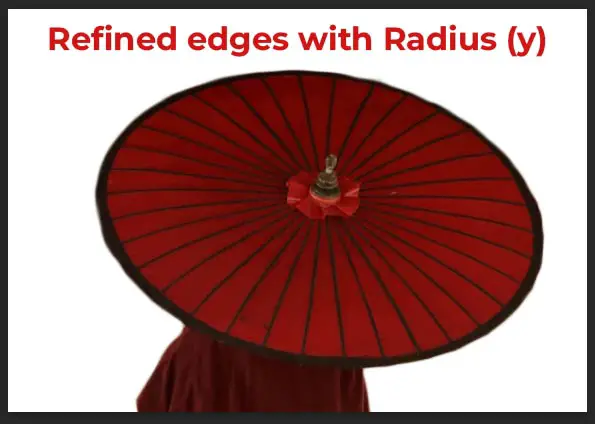
By increasing the value of the slider, the selection edges will appear softer and more natural.
In the Global Refinements section, there are four more options you can work on, so you will get a more natural result.
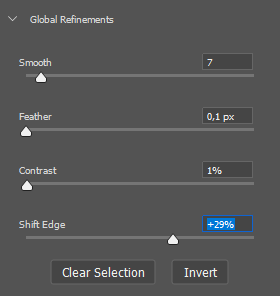
- With the Smooth slider, you can smooth out the edges. Try to keep it low so it does not take away from your selection.
- While using the Feather slider, the selection can be blended better into its background. Also, keep the slider at a low setting.
- You can add more definition to your edge by adjusting the Contrast slider. However, if you use it too much, you will get harsh edges.
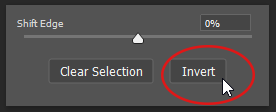
- By adjusting the Shift Edge, you can shrink or expand the selection.
Refine the selection
But what if Select and Mask does not make a precise selection? At that point, it will be necessary to refine the selection further.
One way to do that is by using the Quick Selection Tool and brushing over the leftover parts.
You can add areas to your selection by holding Shift and left-clicking, and by pressing Alt/Opt+left click you can remove details you don’t want to include.

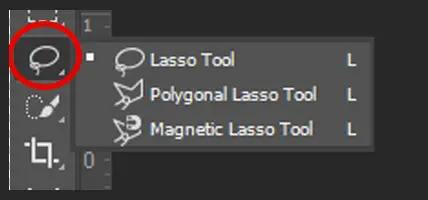
You can now exit the Select and Mask workspace by pressing OK. Edit your selection manually using the Lasso, Polygonal, or Magnetic Lasso.
You can add or subtract manually from the selection using the Add to Selection and Subtract from Selection buttons at the top of the screen in the Options Bar.
Or, you can add a section by holding the Shift key as you click around. And, to remove a section, hold down the Alt/Opt key and click it.
You should be as precise as you can be during this process and pay attention to all corners and edges.
Perhaps you are asking yourself, why not let Refine Edge Tool handle such a job for you instead?
The answer is because you might end up with inaccurate samples if the selection is too rough. By creating a small, precise selection, you will be able to enable the Refine Edge Tool to see the “edge” better.
Now, you can go back to the Select and Mask workspace by clicking Select and Mask again.
For final touches, if needed, you can use the Refine Edge Brush Tool (R).
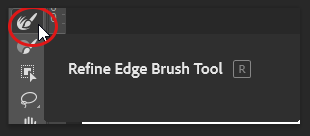
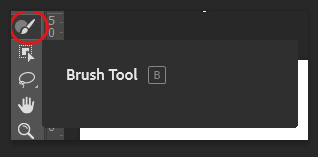
To improve the edge, brush over specific areas of the selection edge when it is needed. That way, Photoshop will know where to improve the edges. And finally, you can finalize or clean up details with the Brush Tool (B).
When you are done, click OK and go back to the Main Photoshop Workspace.
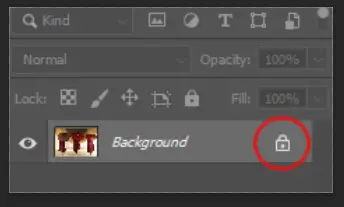
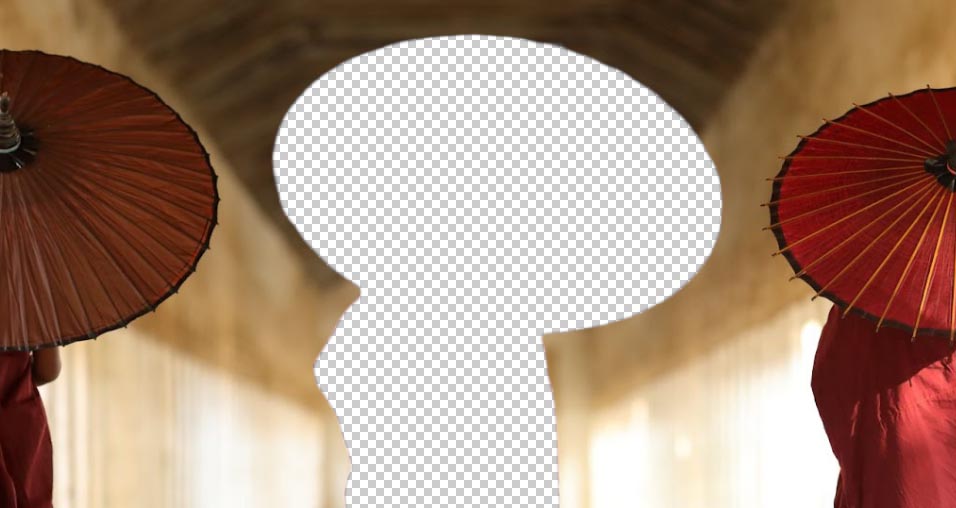
You will need to Unlock the Background Layer before you Output the selection, if you want to fully remove the color, leaving a blank space where it used to be.
You can do that by clicking on the Padlock Icon of the Background Layer in the Layers Panel.
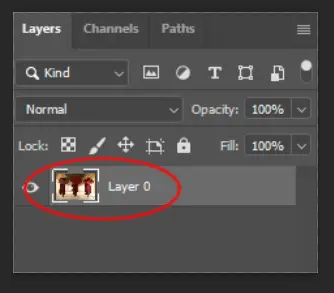
You will know that it is unlocked when it changes the name to Layer 0, and the padlock icon is gone.
Now, you can go back to the Select and Mask workspace and Output the Selection.
How to Output the Selection
Before you Output the selection, you can use the Decontaminate Colors option for color fringe removal. You can find the option at the bottom of the screen in the Output Settings.
You can regulate the color fringe removal by moving the slider. In my case, 100% works well.

Now, make sure you Invert the Selection if you are going to output a layer mask. Otherwise, do not invert it.
The final step is to choose an output option.
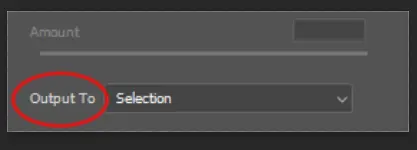
Finalize the selections by selecting one of the output options. You can choose the desired output setting for the new selection from the Drop-Down Menu in the Output To section at the bottom of the screen.
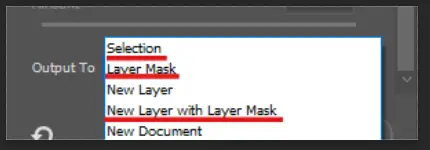
There are few ways to output the selection. By choosing Selection, Layer Mask or New Layer with Layer Mask.
- Selection – will update the current selection.
- Layer Mask – will convert the current selection to a layer mask in a non destructive way.
- New Layer with Layer Mask – will duplicate the background layer and apply a layer mask on it. You will have to disable the background layer to remove the color.
Usually, it is best to create a New Layer with a Layer Mask. This will allow you to make further adjustments without affecting the original image.
Once you’ve chosen the selection. Press OK.
And you have successfully removed the color from the photo.

Removing the Color by Using Delete or a Layer Mask
There are a couple of other options to remove a single color in Photoshop.
In addition to using the Layer Mask option from Select and Mask, you can also create a custom mask by selecting the color/area you want to remove and turning this into a mask.
Create a layer mask
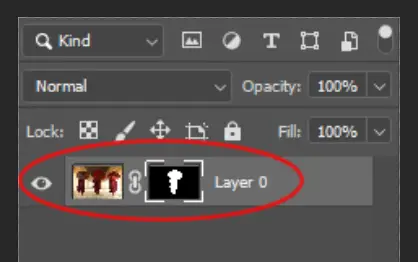
Once you have selected the color you want to remove, unlock the layer as you did before, and make a mask. You can make a mask by pressing the Layer Mask Icon at the bottom of the screen.

Once you click it, a mask will show up next to the Background Layer.
For the color to be removed, you need to Invert the mask first.
You can do that by going to the Image Menu, selecting Adjustments, and choosing the Invert option.

Or you can use the shortcut while your mask is selected.
For Windows:
Ctrl+I
For Mac:
Cmd+I
Delete all pixels of a certain color
Another way to do it is by simply clicking the Delete button. For this to work properly, in the Select and Mask workspace, you need to set the Output to Selection.
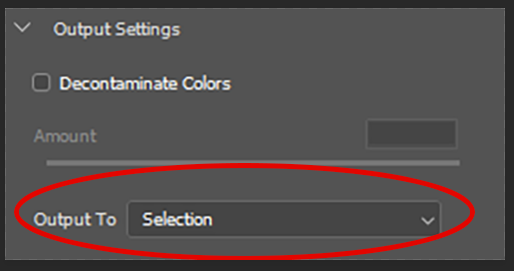
Make sure you untick Decontaminate Colors, in order to be able to Output a Selection.
That will update the current selection. Now while the updated selection is active, you can press the Delete button on your keyboard, and you will have successfully deleted the selected color.
Or you can do it by simply clicking the Delete button when you have already made the selection with the Selection Tool. But do know that this is a rough removal. It will not be as precise as it is with the masking.
How to Remove Color with the Color Range Tool
One more way to remove a specific color from an image is by using the Color Range Tool.
In order to do this, the Color Range tool comes with a feature that allows you to select and manipulate a subset of colors within an image. After defining your selection, you can easily replace or delete it.
Even though it is not the easiest feature to use, it is convenient, and you can understand how it works after just a few tries.
So, once you open the image in Photoshop, make sure you unlock the Background Layer and zoom in to the parts you want to be removed, to make it easier to see what’s going on.
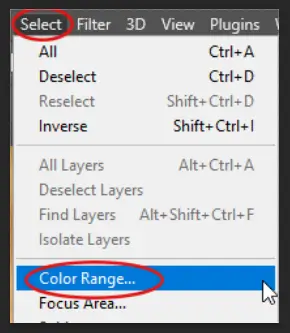
Once you have selected the color/area you want to be removed, go to the Select Menu and choose the Color Range option.
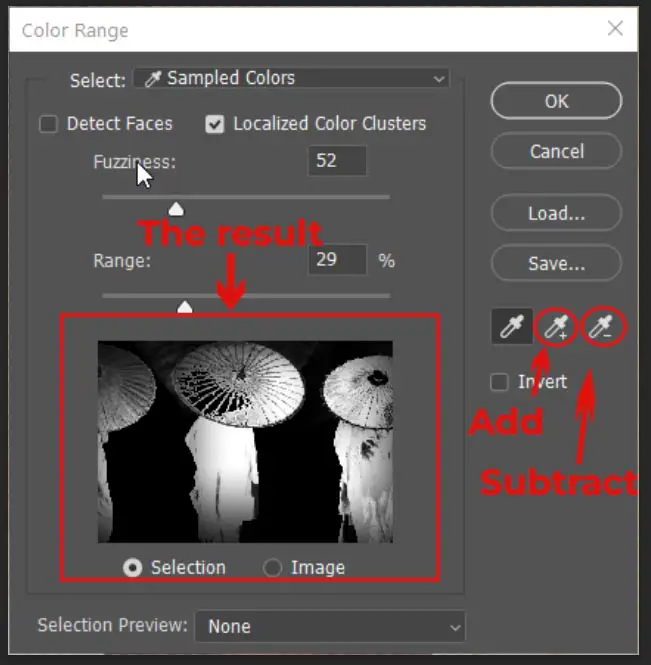
With this tool, you’ll find a range of options that you can customize in order to remove specific colors efficiently. In this case, to remove a color, you will need to select the Eyedropper Tool (the regular one) and click on the color you wish to remove.
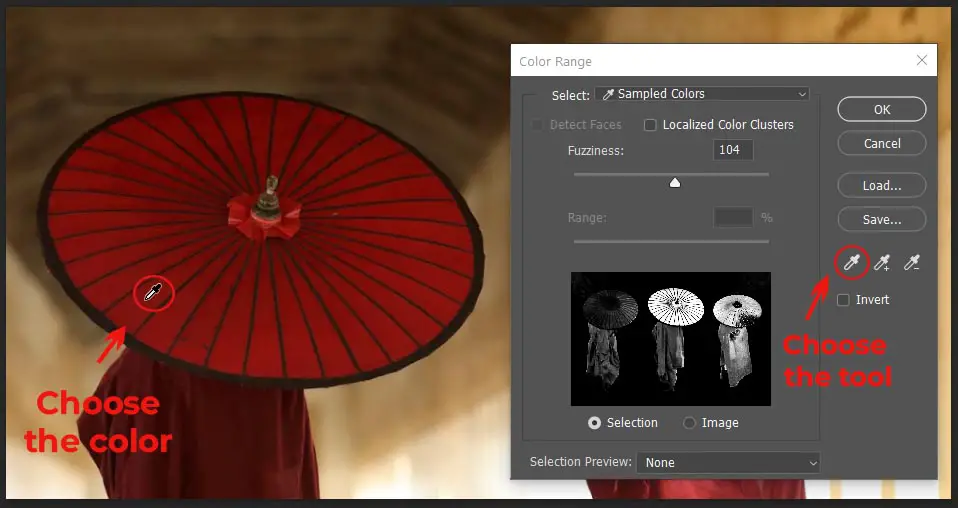
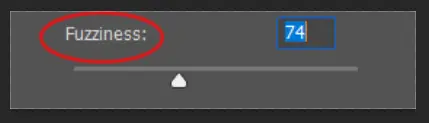
To make the selection more accurate, adjust the Fuzziness. By doing that, you adjust the color range and change how many pixels are selected. You may need to experiment a little with this, so feel free to do so.
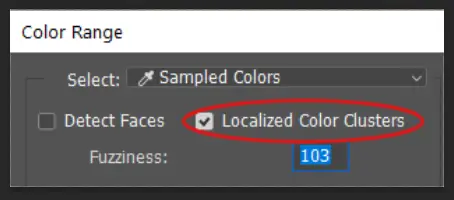
You can also use the Localized Color Cluster option. It controls the distance between the sample point and the colors you want to be removed.
It is very useful if there are several elements that are nearly the same colors, and you want them all to be included or excluded from the selection.
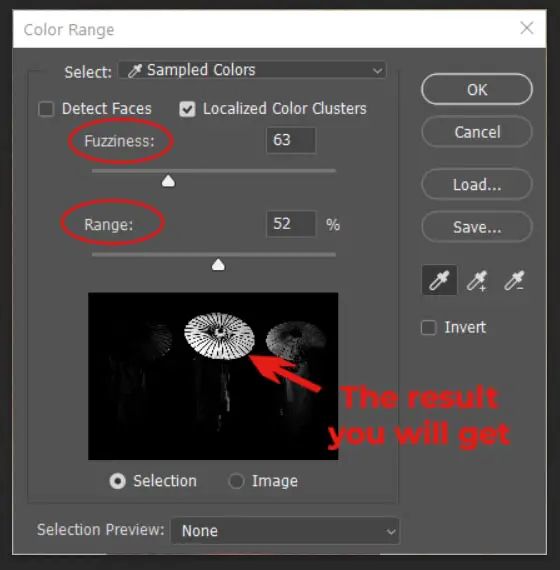
You can refine the selection by moving the Fuzziness and Range slider. The range slider controls the radius of the selection from the sampling point. This lets you limit the selection to a soft circle around the point where you sampled the color from.
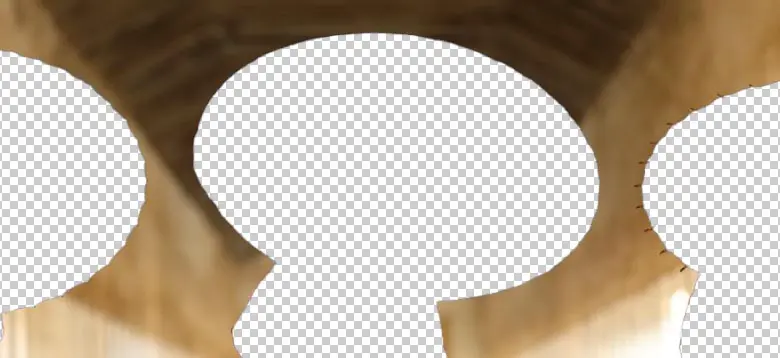
After adjusting all the parameters, Click OK. Once you get back to the picture, and your selection becomes active, you can press the Delete button on your keyboard to delete all the pixels of that particular color.
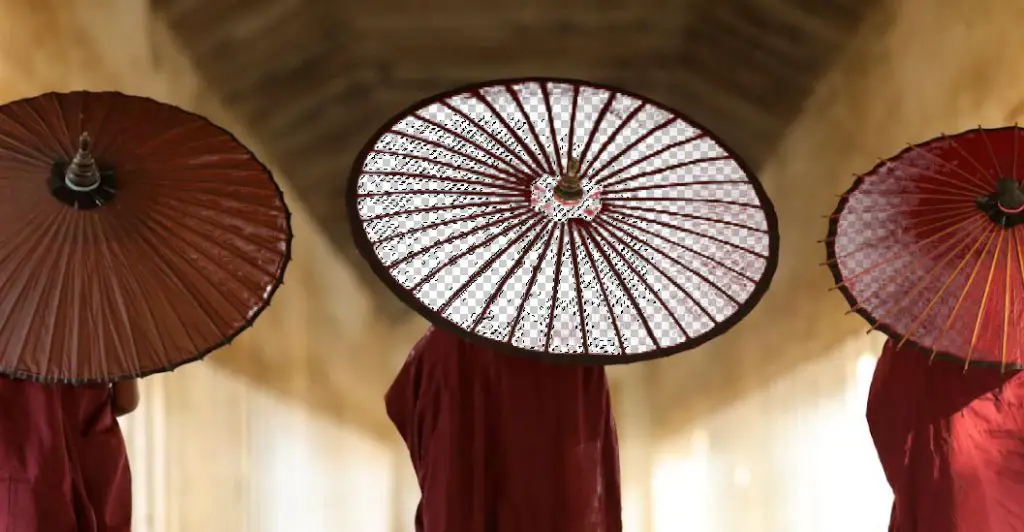
You can see that the color is not fully removed.
To do this, go back into the Color Range tool and you can use the Add to Sample Tool to add areas to your initial selection along with changing the Fuzziness value. Or, you can use the Subtract from Sample Tool to remove specific areas from the selection.
Instead of clicking the icons, you can also do that the shorter way. Make sure you are holding the Shift button, and click on the colors you want to be selected. That way, you can add to the selection. Ensure that your selection is sharp and clearly defined by repeating this step several times.
Or you can press the Alt/Opt button on your keyboard and click on the colors you want to be removed. In order to refine the selection, make sure the selection is precise by clicking around in different areas that contain the tones you want removed.
When you are done with the selection, press OK, then the Delete button, and repeat the process until you are satisfied.
Save as PNG to Preserve Transparency
Now that you have removed the color you wanted, you need to save it while keeping it transparent. In order to do that, you need to save the file as PNG.
If you save as a JPEG, then the transparent background will be filled with white.
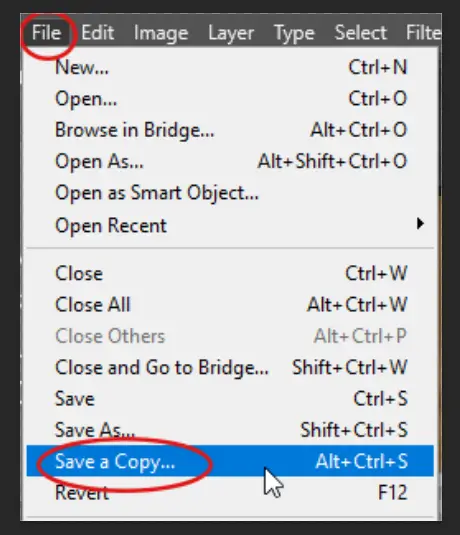
Go to the File Menu at the top of the screen, and choose the Save a Copy option.
Or use the shortcut:
For Windows:
Alt+Ctrl+S
For Mac:
Opt+Cmd+S
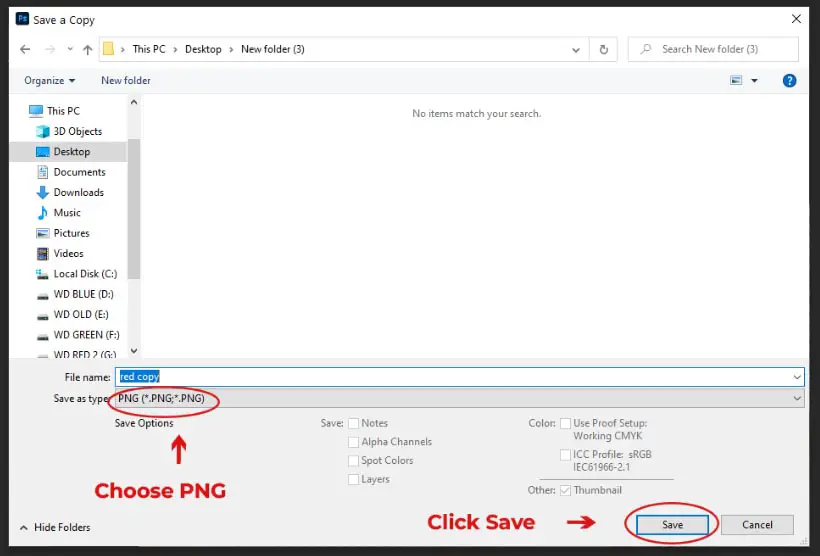
When the Explore Window shows up, choose the PNG file type from the Drop Down menu and click Save.
The process of removing all the same colors from an image isn’t easy to do at first, and as with any Photoshop task, there are multiple ways to do the same thing.
Although it might seem complicated at first, having done this a couple of times, it will become intuitive to you, and you will soon be able to do it in no time.
Read More:
How to remove a white background in Photoshop
Photoshop filter gallery grayed out?


![Photoshop Move Tool Not Working? [8 SOLUTIONS]](https://www.lapseoftheshutter.com/wp-content/uploads/2022/06/photoshop-move-tool-not-working-340x226.jpg)

Leave a Reply