Stretching an image, in essence, is resizing it with or without changing the proportions. That is useful if you need to change the proportions or image size. It is important to differentiate the various ways of doing this since all of them produce different results.
This article will explore the most common ways to stretch an image, including shortcuts (where applicable) for it.
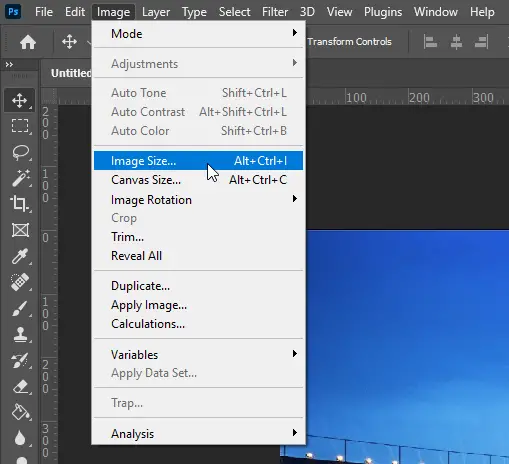
1. Use Image Size to Stretch an Image in Photoshop
When you use Image Size to stretch the image, you change the dimensions of the whole document you have open in Photoshop. That means that it affects all layers equally.
Additionally, you can change the image size proportionally or disproportionally.
Let us take a look at how to achieve this.
Once you have your image open in Photoshop all you need to do is to press:
For Windows:
Alt+Ctrl+I
For Mac:
Cmd+Option+I
Or you can go to the Image menu and then select Image Size.
Then, the image size dialog window will appear:
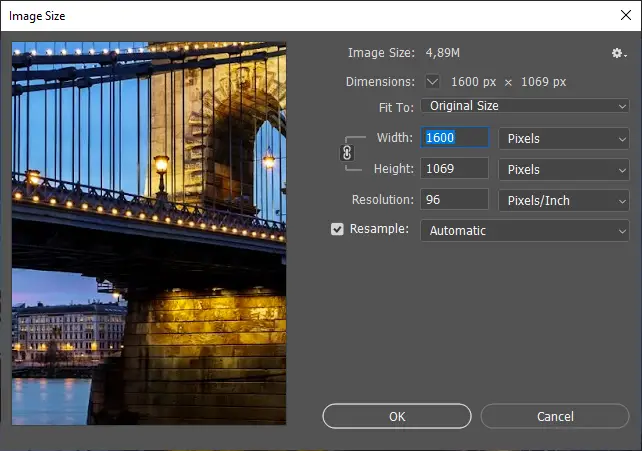
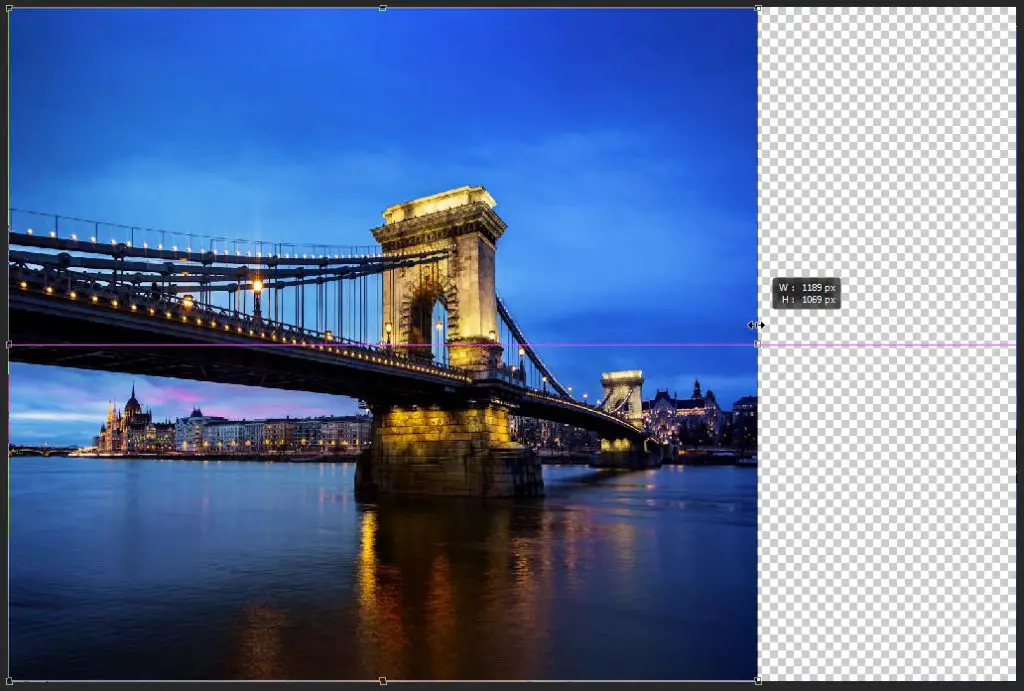
Here you can change the width and height of the image. When the link button is activated, if you change one dimension, Photoshop automatically calculates the other. That keeps the image proportions fixed.
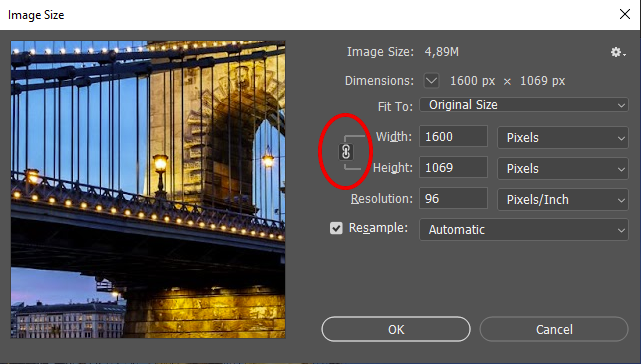
If the link button is not activated, you can change the dimensions to whatever value you want. That way, the image will be stretched to the dimensions you entered.
Note that the Resolution value will not impact the image dimensions. It only affects how dense the pixels will be if you print the image. Leave this as it is.
Additionally, leave Resample to Automatic. That chooses the best resizing algorithm for the current action. Some algorithms work better with increasing resolution, while others work better with decreasing resolution. Photoshop chooses the right one when set to Automatic.
Now, click OK, and your image will get resized.
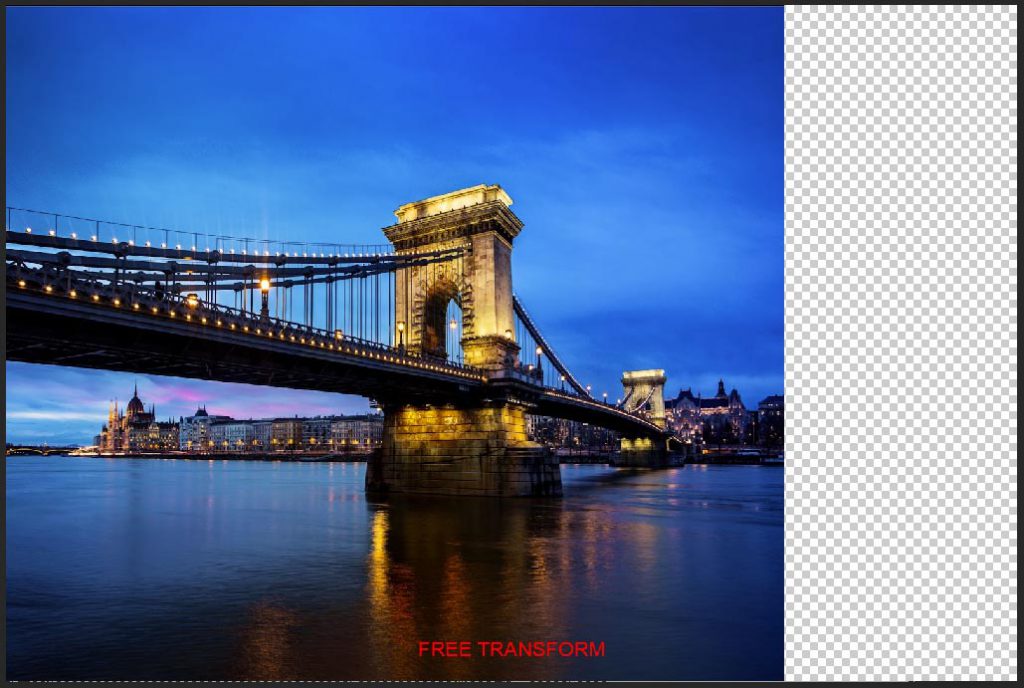
2. Use Free Transform to Stretch an Image or a Layer in Photoshop
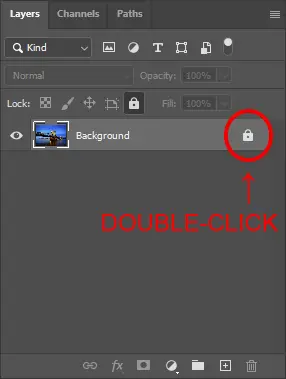
When you first open an image in Photoshop, the layer with the image is named Background. By default, the background layer is locked. If you want to re-size this background layer using Free Transform, you need to unlock the layer first. This does not apply to any other layers, as they will not be locked by default.
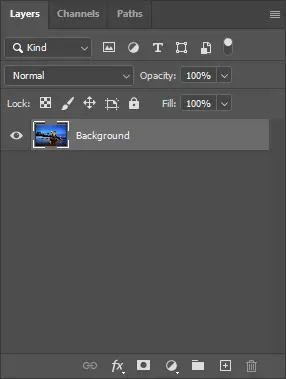
To unlock the background layer, you need to double-click the padlock icon on the layer itself. If you’ve done this successfully, the padlock icon should be gone.
Now, make sure the layer is selected, and use the following shortcut:
For Windows:
Ctrl+T
For Mac:
Cmd+T
Now you should see the square outline of the image with the tiny square handles for transforming.
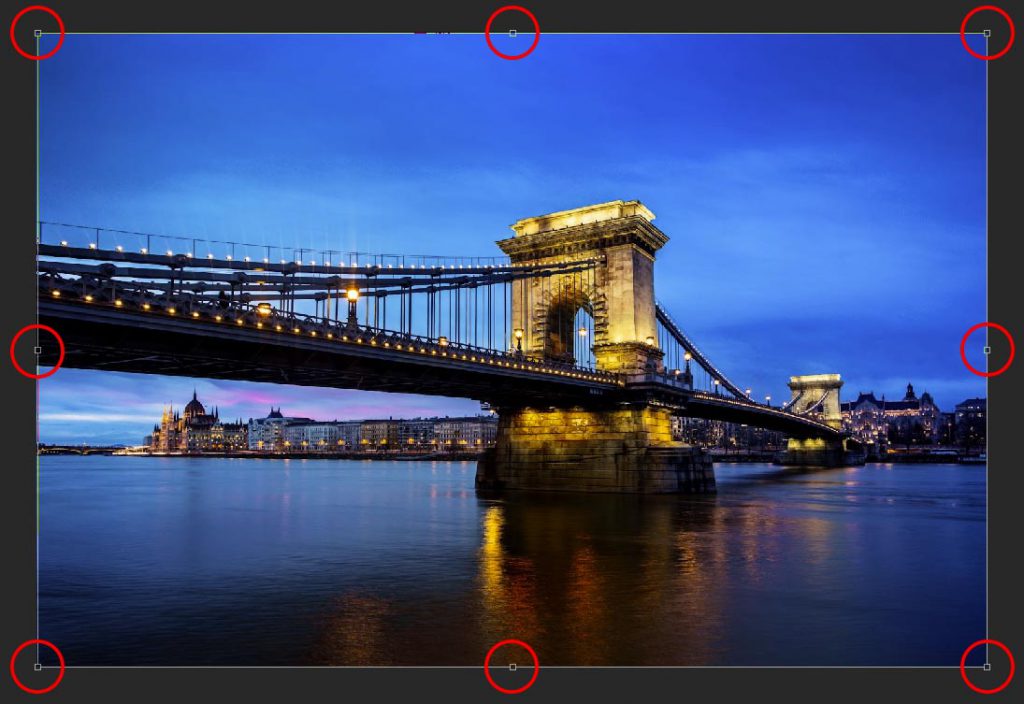
By default, Photoshop maintains the aspect ratio of the Free Transform. If you click and drag on any of these handles and move it in any direction, the photo will remain proportional. It will only change the size.
If you want to change the proportions, you should hold the Shift button while clicking and dragging the handles.
There is another way of changing the settings instead of holding the Shift button. The status of the Aspect Ratio Link button is inverted while you hold the Shift button. Photoshop has this button active by default, but you can manually deactivate the button by clicking it.

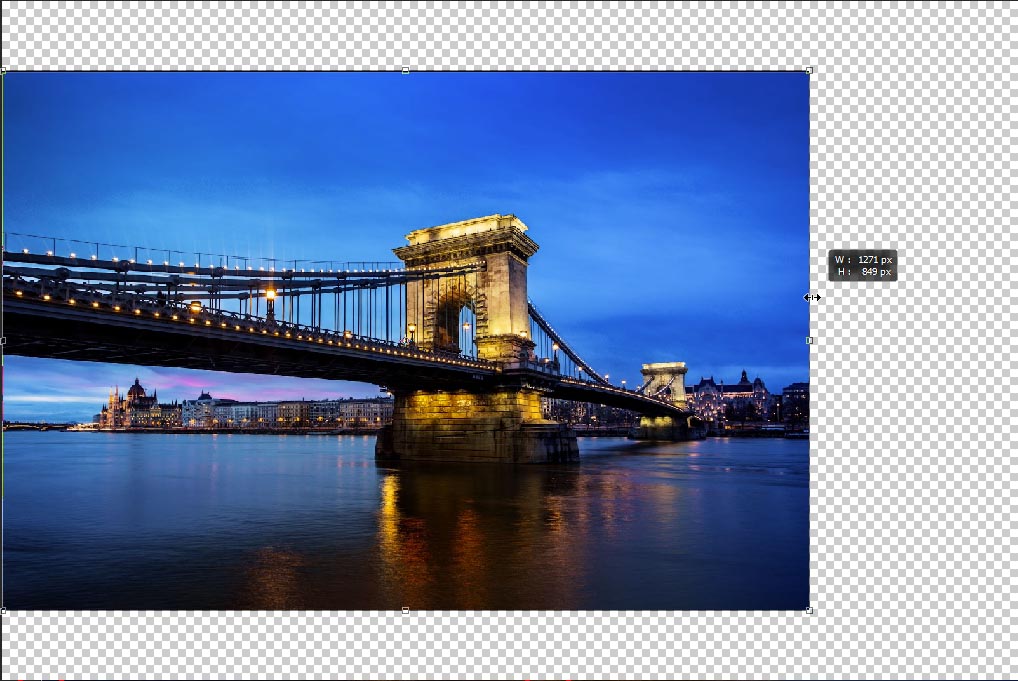
Once you are satisfied with the image stretch, press the Enter button. Or, you can press the Tick button in the toolbar.

Now you are faced with one of two situations:
1. Your image is smaller than the canvas.
2. Your image is bigger than the canvas.
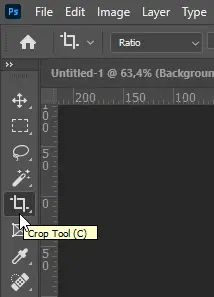
If your image is smaller than the canvas, all you need to do is Crop the image. The shortcut key for the crop tool is C, or you can click the Crop Tool.
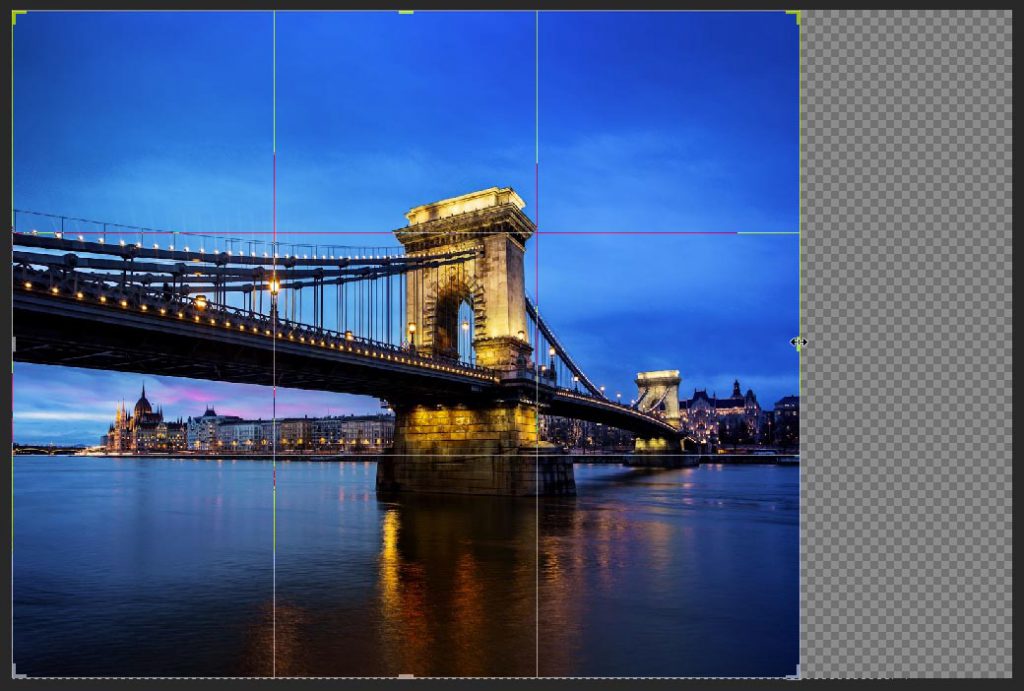
Activating the crop tool will get you similar handles to the Free Transform ones. The difference is that they crop the canvas as needed.

Just drag the handles in the desired directions until you do not see any of the checkered areas.
Now press the Enter or the Tick button, and you are finished.
Alternatively, if your image is larger than the canvas, increase the canvas by moving the crop handles outwards until they wrap the image completely.
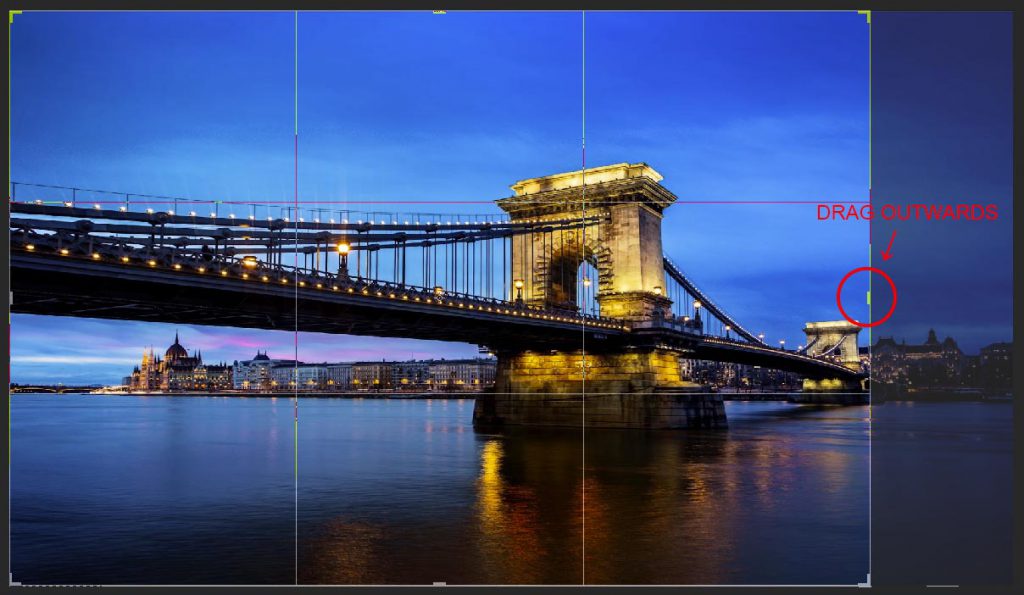
Make sure that you have the Delete Cropped Pixels box unchecked. That allows you to change the crop if cropped in too tight, and you have confirmed the crop.
Now just hit the Enter key on your keyboard or the Tick button in the toolbar.
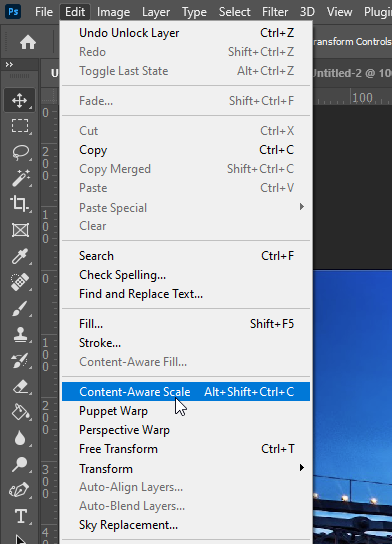
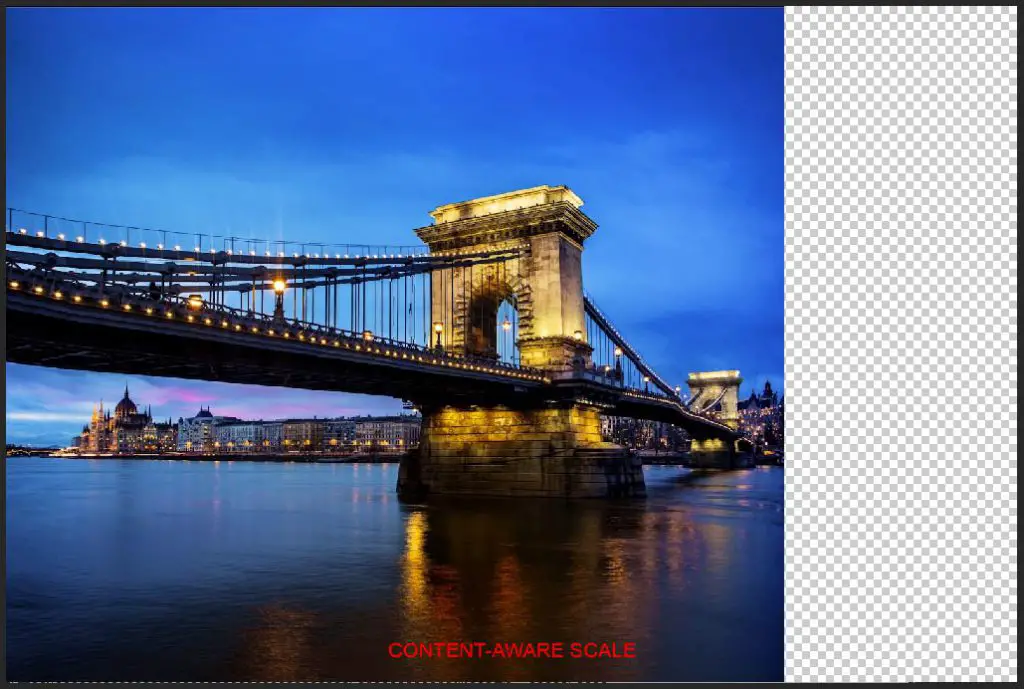
3. Use Content-Aware Scale
Content-Aware Scale uses Adobe’s Content-Aware engine to stretch images with little to no distortion. In essence, it uses algorithms to move around content within the image. That way, the image has different proportions without distortion.
To use this tool, you need to open the image in Photoshop. Just like using Free Transform, you need to unlock the Background Layer.
To activate the Content-Aware Scale tool, you can use the following shortcut:
For Windows:
Alt+Shift+Ctrl+C
For Mac:
Option+Shift+Cmd+C
Alternatively, you can click on Edit → Content-Aware Scale.
Content-Aware Scale will get you the same handles around the image as you had with Free Transform.
Since the same principles as Free Transform apply, you click and drag any of the handles to stretch the image. When you are satisfied with the stretch, press the Enter key.
This time, however, the result will be quite different. Free Transform stretches or squishes the image, regardless of the content inside.
Content-Aware Scale will try to keep the content in the image as natural as possible, even if you change the image dimensions. Of course, this is not a perfect tool, and it will generate some artifacts here and there. But if you do not stretch or squish the image too much, the result will be quite pleasing.
Akin to using the Free Transform tool, when you finish using the Content-Aware Scale tool, you will have a canvas that is too big or too small for the image.
That said, the solution is the same. Pick the Crop tool, and either crop the canvas, or expand it to fit the image. Press Enter on your keyboard to confirm the crop, and you are finished.
Read More:
How to remove the white background in Photoshop


![How to Save & Export SVG from Photoshop [4 EASY Methods!]](https://www.lapseoftheshutter.com/wp-content/uploads/2022/06/export-svg-from-photoshop-340x226.jpg)
Leave a Reply