This site is part of various affiliate programs. Links may give us a small compensation for any purchases you make, at no additional cost to you. Please read the disclaimer policy for full details.
Skylum has been in the forefront of developing AI-powered photo editing software for quite some time now. When Luminar AI came out towards the end of 2020, we got a taste of how capable the software was.
Now, with the announcement of Luminar Neo, Skylum is claiming a significant performance boost over Luminar AI. Luminar Neo even packs a bunch of new AI-powered photo editing features and that’s something I was really excited about.
Luminar Neo features almost every major editing module that Luminar AI boasts of. And on top of that it is loaded with brand new AI-features and workflow improvements that really sound great on paper.
But how do they translate in the real-world?
In this detailed Luminar Neo review, I’ll take you through all the new features and share how they perform.
Luminar Neo Quick Overview
Luminar Neo is a photo editing program designed specifically around AI-guided tools, with features like the automatic removal of powerlines, sky replacements using auto-generated masks, and portrait editing tools which can recognize human faces, applying changes to only specific parts at the click of a button.
In terms of functionality, it sits somewhere between Lightroom and Photoshop, but probably most closely resembles Capture One, with similar basic catalog elements and a single screen edit mode, along with layer functionality that exceeds Lightroom, but doesn’t yet match Photoshop.
Ideally, Luminar Neo is for portrait photographers who want to make quick and easy changes like re-lighting a face or other subtle changes without worrying about having to create complex masks or otherwise wasting their time, or it’s for landscape photographers who want to switch out a sky or change the light balance of a scene with a one-click solution.
- Pros:
- Easy to use
- Brilliant execution of history management feature
- Clean user interface
- Ability to work with layers
- Clever AI-powered tools cover complex masking, like sky replacement
- Cons:
- Lacks cataloging features such as rating or keyword tagging
- Layers do not support features like layer adjustments and text layers
- Performance not yet up to par
Get $10 off Luminar Neo with code TimDaniels10
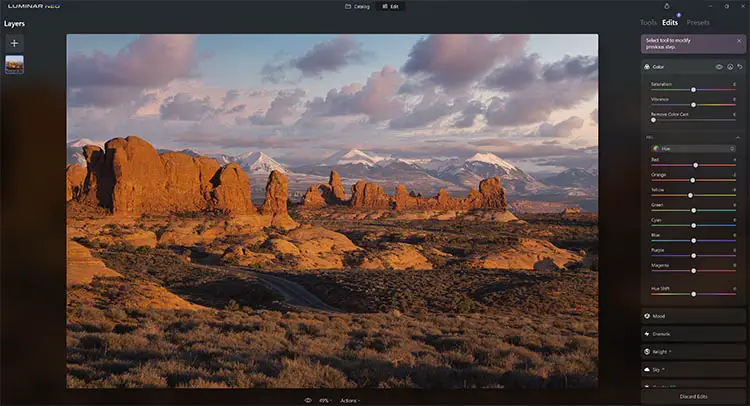
Luminar Neo: Key New Features
In addition to the existing Luminar features that are preserved in Neo, and which we will cover towards the end of the article, there are a few key new features that help increase the usability of Luminar Neo.
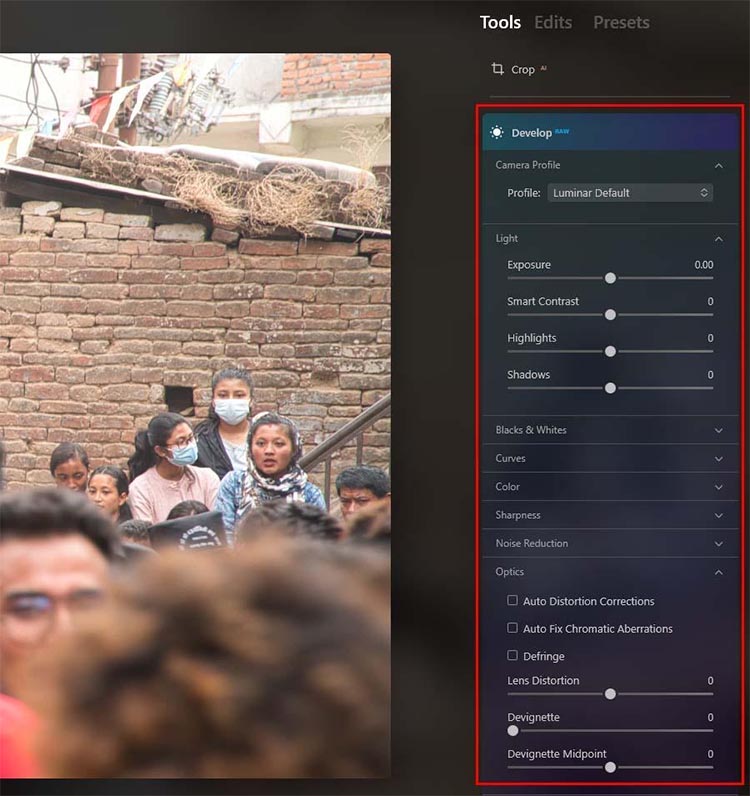
Develop Module
If you’re acquainted with any other photo editing software like Lightroom or Capture One, you’ll know how the develop module lays the foundation for the editing work. Finally, Luminar Neo too features this module which clubs together all the essential adjustments to get started with the editing process.
You can choose the camera profile, make exposure, color, and details adjustments, and even apply lens profile to reduce distortions.
Layers
Who doesn’t love working with layers when editing an image? It makes the entire process non-destructive, and also lets us make separate adjustments on individual layers.
At least that’s what I expected layers to do in Luminar Neo. But things are a little different here.
I was easily able to add another image, and the different overlays that Luminar Neo provides by default on top of my image. Making individual adjustments to each of those added image/overlays is also not an issue.
However, I was really surprised when I couldn’t find an option to add an adjustment layer. Even adding a separate text layer, like in Photoshop, is not possible.
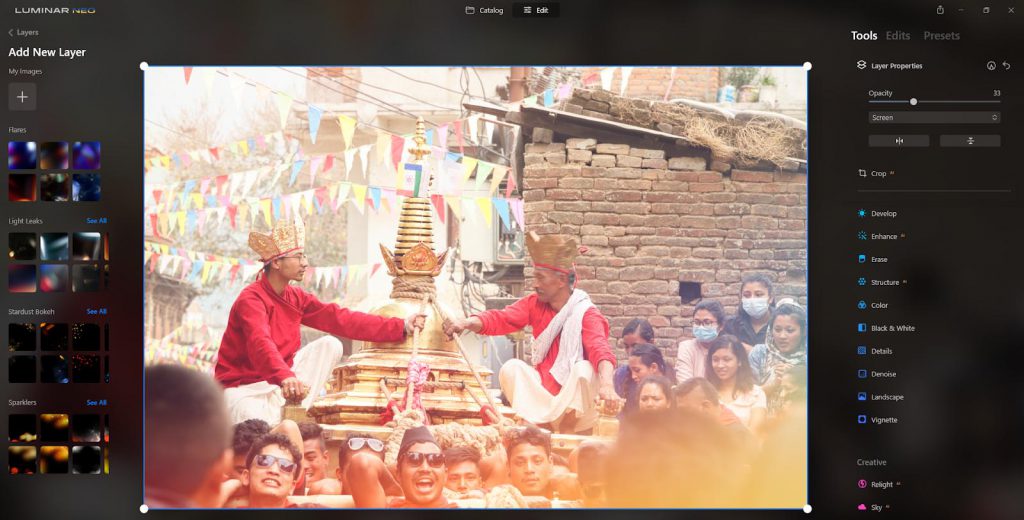
While Skylum has taken the right step by introducing the feature to work with layers, it seems they’re still an update or two away from catching up with the big boys.
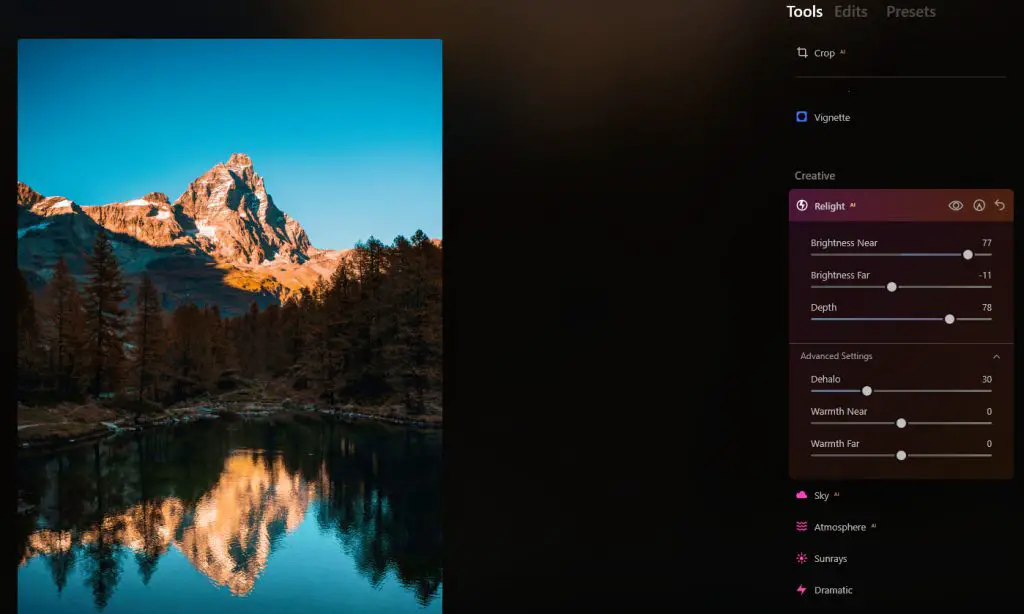
Relight AI
When photographing landscapes, especially during the daytime, we often have to be cautious about the high dynamic range in the scene.
Maintaining a balance between the bright sky and the foreground in one shot can be a challenge. So, it’s either best to use a graduated neutral density filter, or use a gradient filter in post.
The Relight AI feature in Luminar Neo tackles the latter in a genius way.
With this feature, Luminar Neo is able to cleverly distinguish the foreground and background elements in the frame. Then, it allows us to separately adjust the brightness and the color temperature for the foreground and the background.
And in case the software does miscalculate the depth (which rarely happened in my case), the software even lets you manually adjust it.
Here’s a quick comparison of the images before and after the Relight AI adjustments.

Note the relighting on the trees
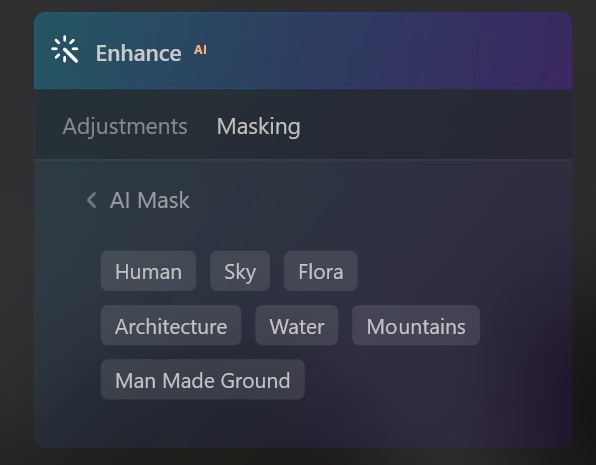
AI Masking
One of the most useful features of Luminar Neo is the AI masking tools, which can automatically create masks for your images without you having to life a finger.
Currently, the software can create masks for:
- People
- Sky
- Flora
- Architecture
- Water
- Mountains
- Man Made Ground
These masks can be applied to most of the individual editing features that you use, and can be easily perfected by hand when they don’t quite work.
Generally though, this AI masking is very powerful and does a good job of selecting the right bits of images. Below is an example of selecting man made ground:
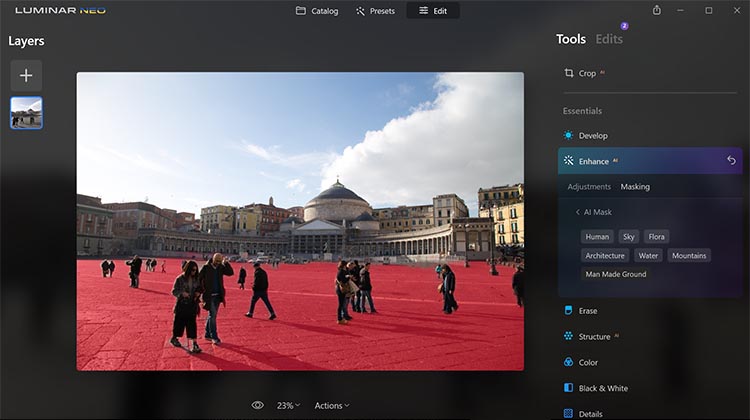
(Image by Tim Daniels)
You can see how the mask above has avoided the people. This would be a much more time consuming process to create in Photoshop or by hand, but in Neo it’s just a case of clicking a button.
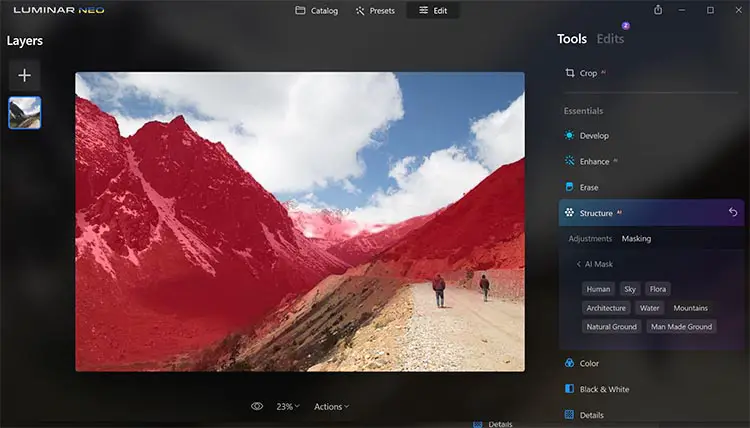
Below, the selecion is for mountains, and you can see how Neo has captured both the foreground and background mountains in the mask.
(Image by Tim Daniels)
Overall, AI masking is a very powerful tool that is sure to come in handy for pretty much all landscape photographers.
Objects Removal
With any software, getting rid of objects requires messing around with masks. Luminar Neo, on the other hand, is looking to change this completely. By introducing two unique features: powerline removal and dust spots removal, it is now just a matter of a single click to get rid of hideous power lines and distracting sensor dust – at least on paper.
Remove Power Lines
Street photographers, travel photographers, and architecture photographers, amongst others, know exactly how frustrating it can get when the power lines creep into the composition. Even getting rid of them in post takes quite a significant amount of time.
With the powerline removal feature, Skylum has tried to address this challenge and seems to have done so with quite a bit of success. It is as easy as opening the image in Luminar Neo, heading to Erase – Objects Removal – Remove Powerlines.
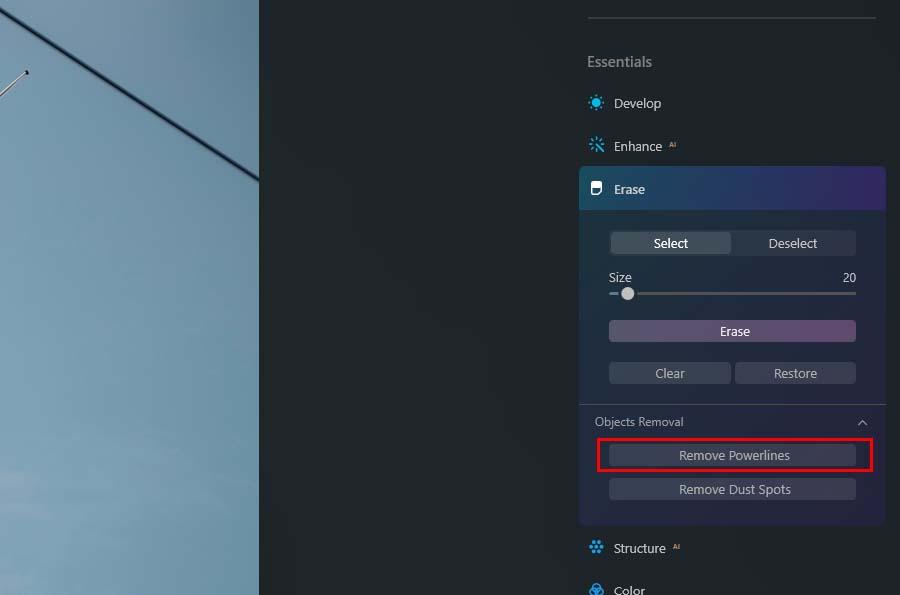
While this is definitely a challenging task, Luminar Neo does a decent job. During the time I spent using this feature, I however found myself having to manually intervene quite often to get the perfect results. Nevertheless, Luminar Neo does most of the heavy lifting and cleaning up is much quicker.
Check out the comparison below.

(Image credit: Maxim Hopman on Unsplash)

It did a great job of getting rid of the powerline over the structure, but I wonder why it failed on the easy areas? Also notice that it has removed the empty flag pole.
I had to get rid of the ghostly wires using the erase tool, and here’s how the image looks finally.

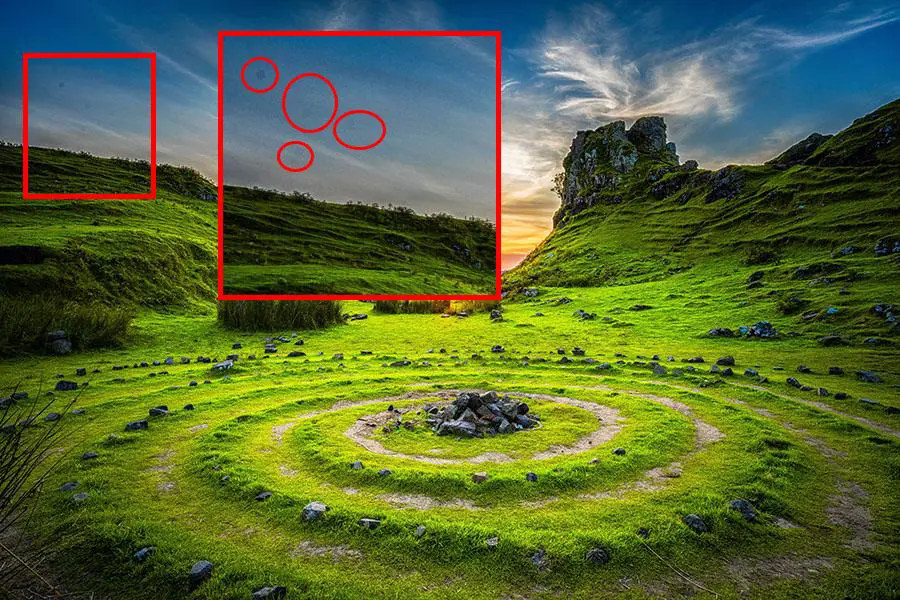
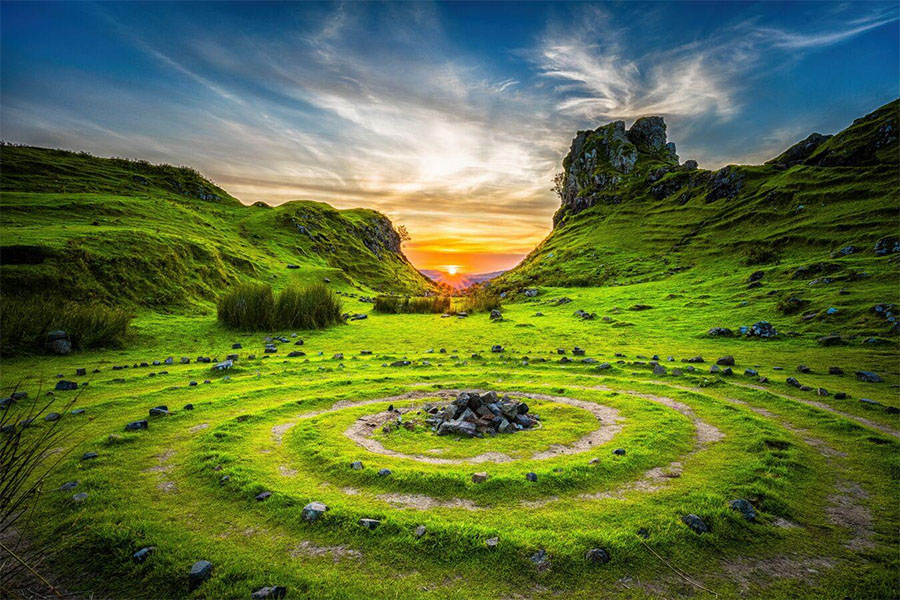
Remove Dust Spots
Although many of us face problems with dust spots making their way into the image, mirrorless camera users who usually need to travel to dusty areas will find this feature handy. With the click of a button, Luminar Neo will get rid of any dust spots in your image.
And unlike the Remove Power Lines features, I found that this feature worked remarkably well.
For instance, here’s a beautiful landscape image that just happens to be infested by sensor dust.
And here it is again after I ran the image through the Remove Dust Spots feature. The best thing that I like about this feature is that you don’t even need to tell the software where the dust spots are. Luminar Neo finds and gets rid of them automatically.
History Management
Luminar Neo keeps a record of all the adjustments that we make to an image in the Edits panel in chronological order. And the best part is that you can easily jump over to any of the edits and re-tweak it whilst all of the other changes remain intact. For me, this is one of the best executions and something that other photo-editing software can learn from.
Presets
What were previously known as Templates in Luminar AI are now called Presets. They work exactly the same way and do a decent job of uplifting the mood and look of your images with a single click. With the earlier versions of Luminar Neo, the only adjustment that you could tweak for any particular preset was its intensity.

Now, once you apply a preset to your image, you can further fine-tune it to your liking by tweaking the various adjustments in the Edits tab, which contains all the individual adjustments from the preset.

By default, Luminar Neo is packed with a bunch of presets that’s suitable for many circumstances. Some of them include landscape, nature, portrait, macro, cinematic, lifestyle amongst others. You can even manually add any presets that you might have purchased to the list.
The software also recommends a preset by analyzing the image, however, I never found them relevant or useful. That made me wonder about how the software chooses its recommendations.
More About Luminar Neo:
Get $10 off Luminar Neo with code TimDaniels10
Luminar Neo: General Features
Interface
Luminar Neo has a rather modern and clean looking interface. To start with, it just has three major tabs: Catalog, Presets and Edit.
The Catalog tab is where you can preview all the images that you import. On the left panel of the catalog tab, you also get the option to manage different folders containing images, and even create albums of your own.
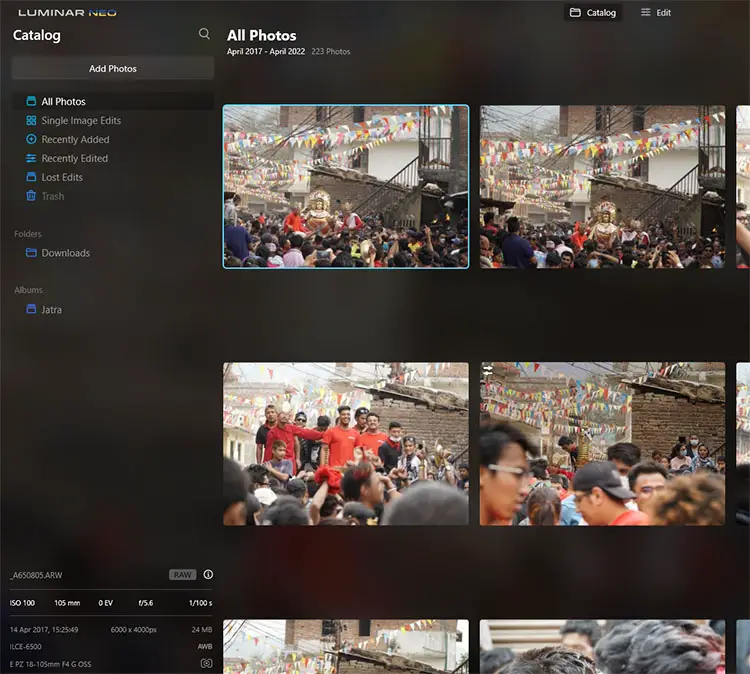
On the very bottom-left corner is where you can see the EXIF data. And that’s about it. There are still no options that let us rate or tag images. If you’re a professional, you will seriously miss this feature. Hopefully this is coming with future updates.
Next, the Edit tab is where all the fun things happen. You’ll find all the adjustment tools, including the AI-powered features here under the Tools menu.
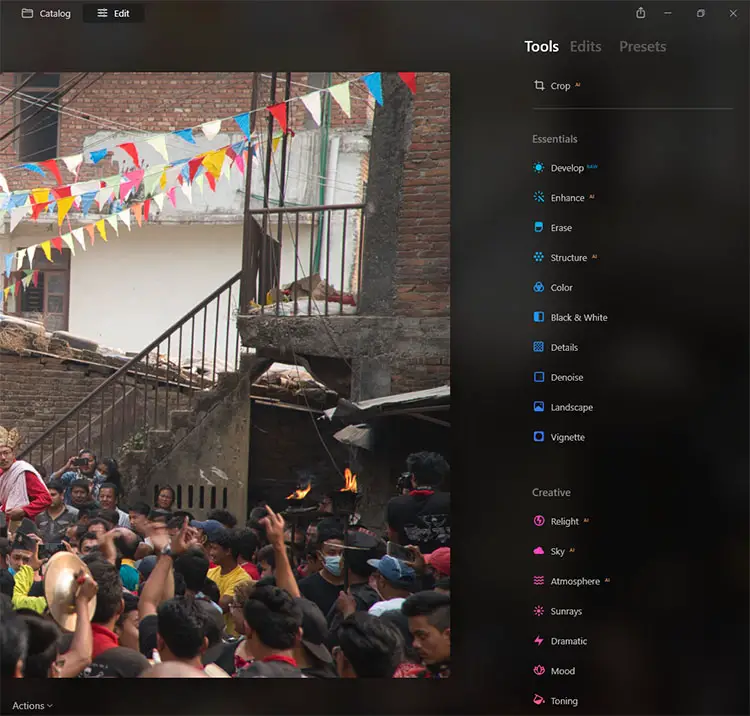
Let’s have a look at some of the features you’ll seriously love.
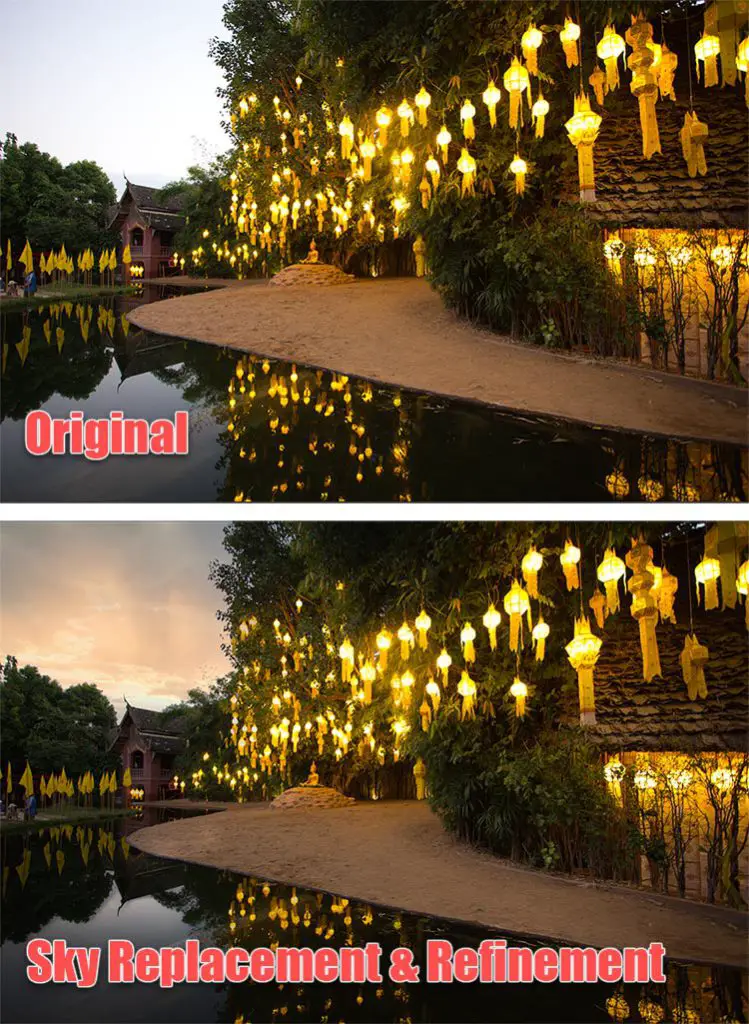
Sky Replacement
This is another area where Skylum has done a fantastic job. If you have a boring sky, adding drama to it has never been easier. Traditionally, you would have to create a mask over the sky and add the new sky, but with Luminar Neo, that is a thing of the past.
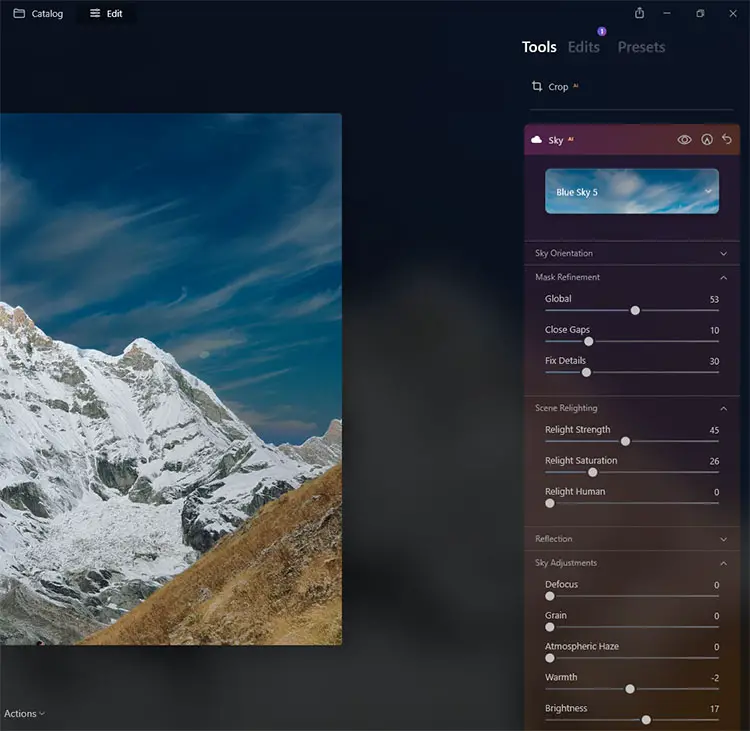
Although this feature was previously available in Luminar AI, I am glad that Skylum carried it over to Luminar Neo as well. By simply using the Sky Selection tool, you can give an overhaul to your image.
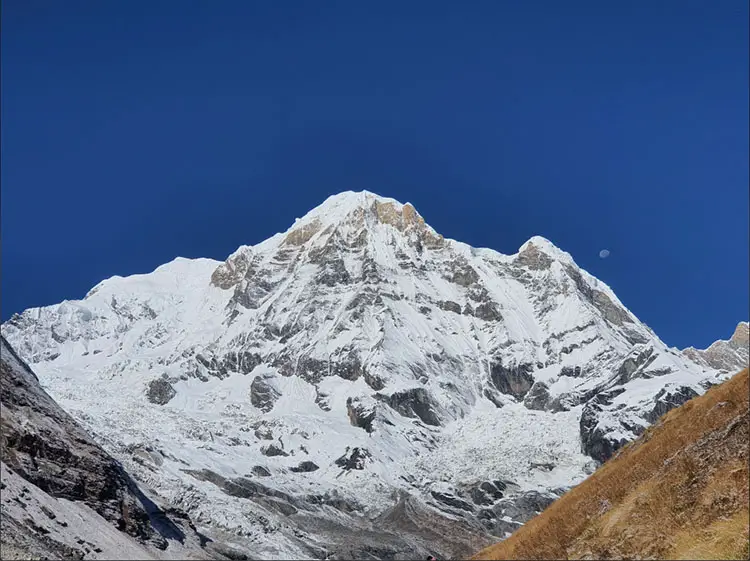
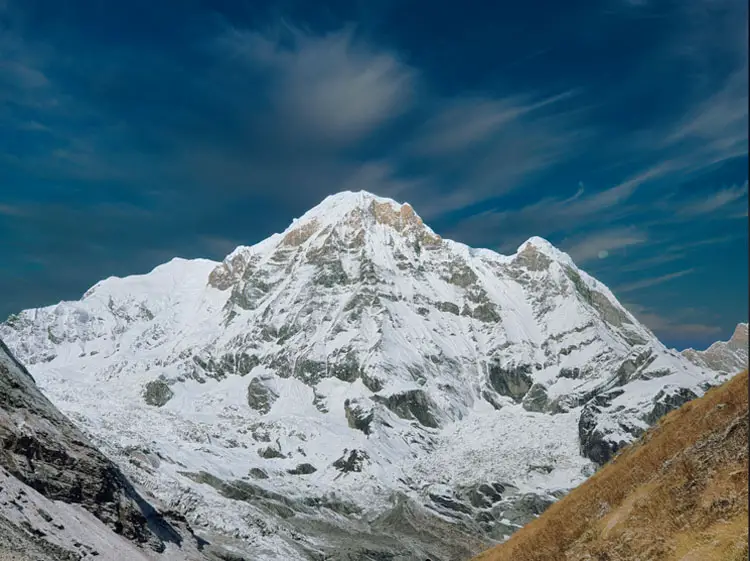
I have always been impressed with the ease with which the software replaces the sky. In this particular example, I was particularly impressed when the tiny moon beside the mountain was left intact even after the sky was replaced.
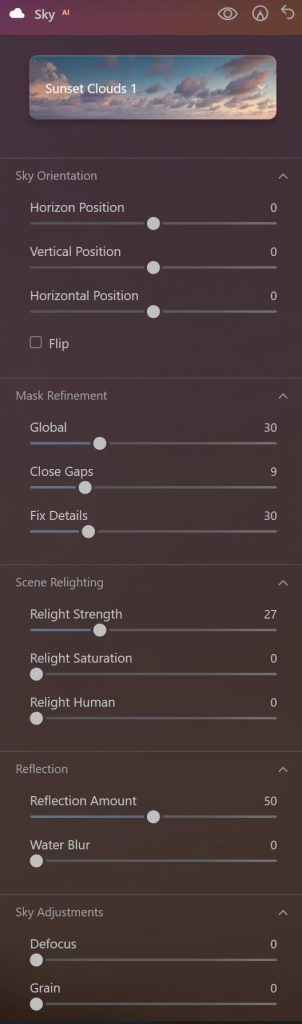
You also get to work with various mask refinement, scene relighting, and sky adjustment options that makes the replacement look so close to reality.
Here’s a quick before/after comparison of my image with the Sky Replacement feature in Luminar Neo.
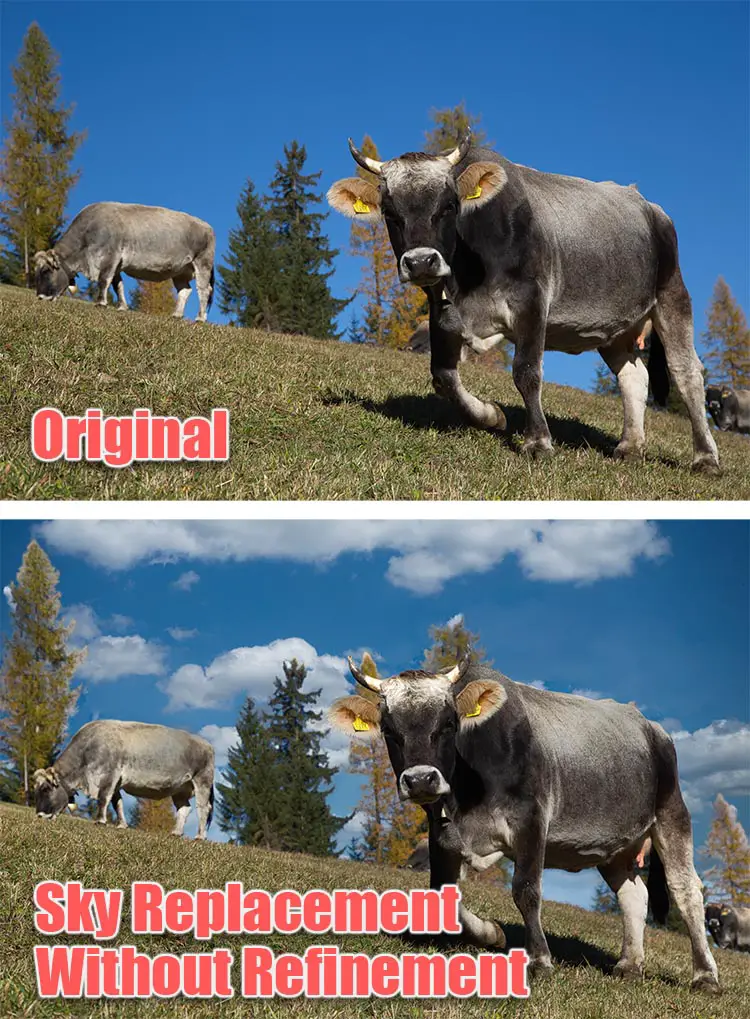
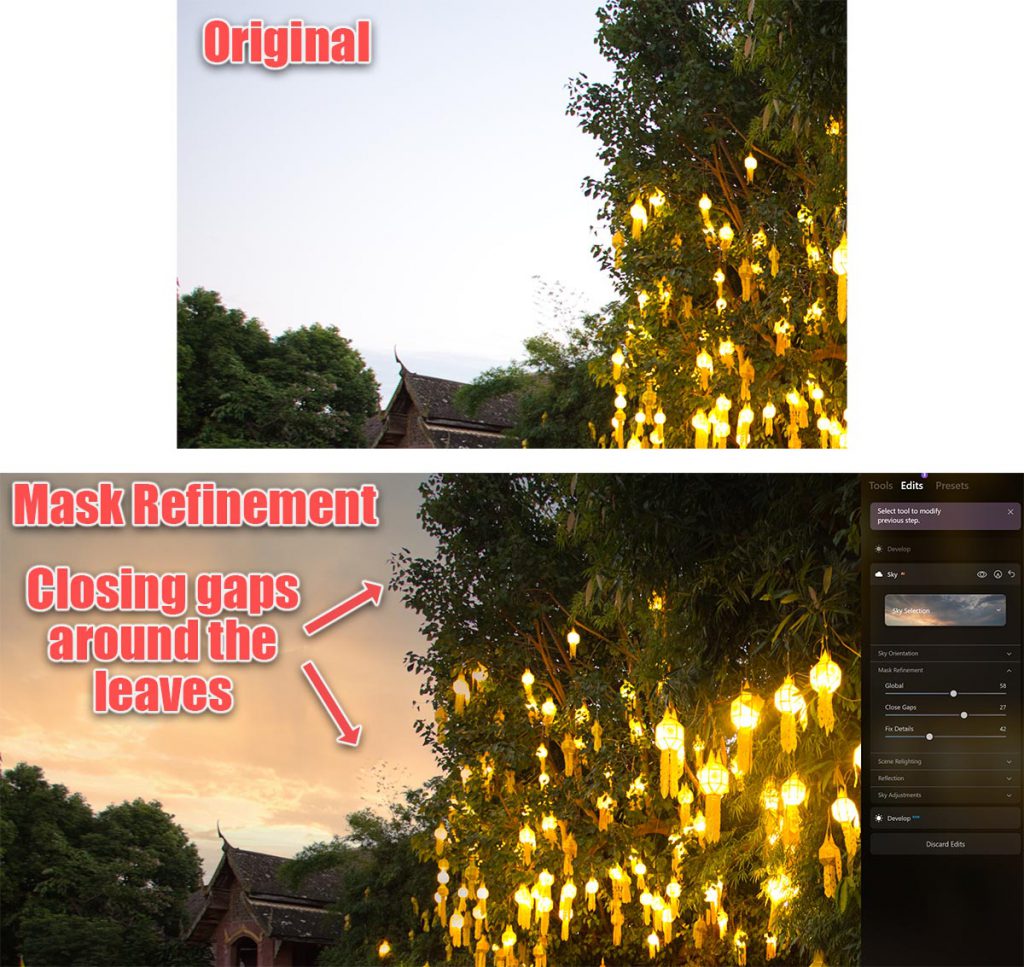
The sky replacement feature is also remarkably good at refining itself around complex edges, like the leaves of trees. There are multiple refinement sliders to help with this, but the default settings are often remarkably good.
Below is an example of applying a sky with no mask refinements made. Some of the tree edges at the extreme left and right are a little messy, but it is pretty incredible how good this is for a one-click solution.
Using the mask refinement sliders, you can close the gaps around the leaves and make a much more successful sky replacement.
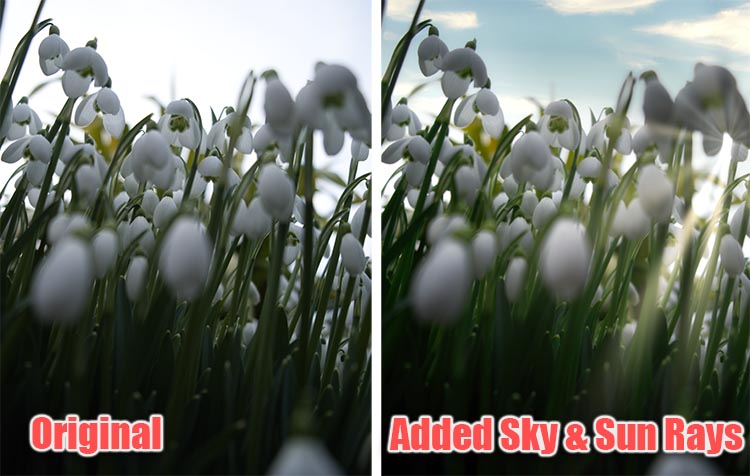
And with the scene relighting and water reflection sliders contained within the sky replacement feature, you can easily change the whole tone of your image.
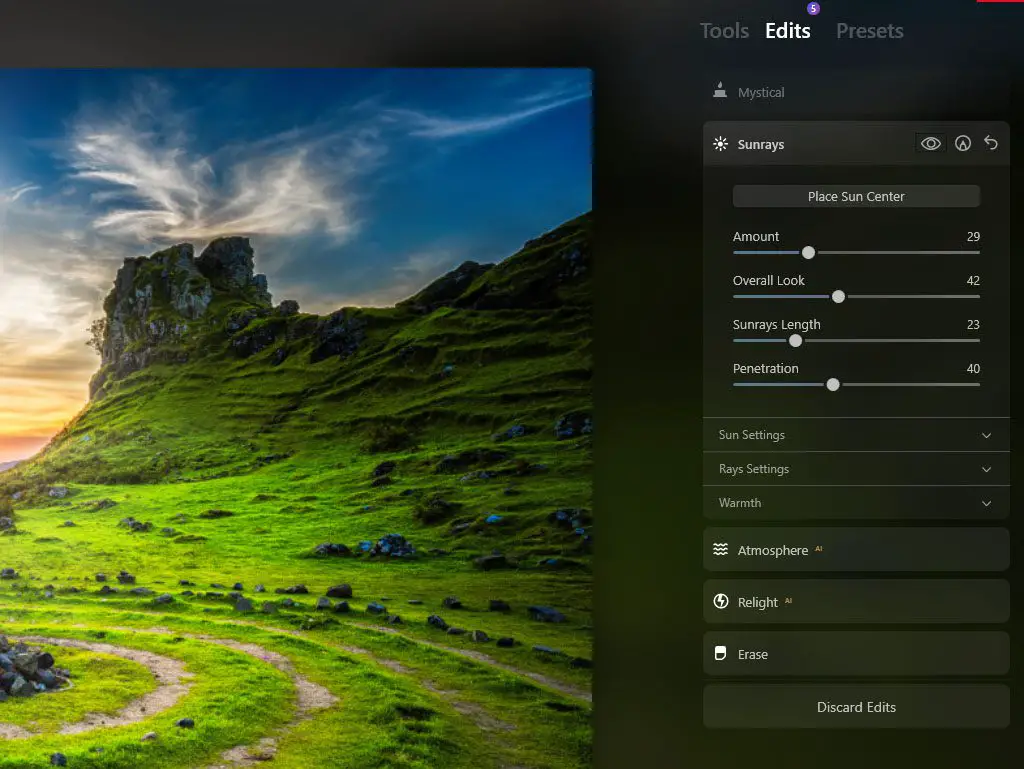
There’s also the option to add sunrays to an image, which respect pre-existing objects in your photo, so that they will not shine directly through leaves if you place the sun behind a tree, for example. This is a very strong feature if you need to enhance the sun in your images.
In the below example, you can see how the sun rays are being partially obstructed by the snowdrops.
Portrait Editing
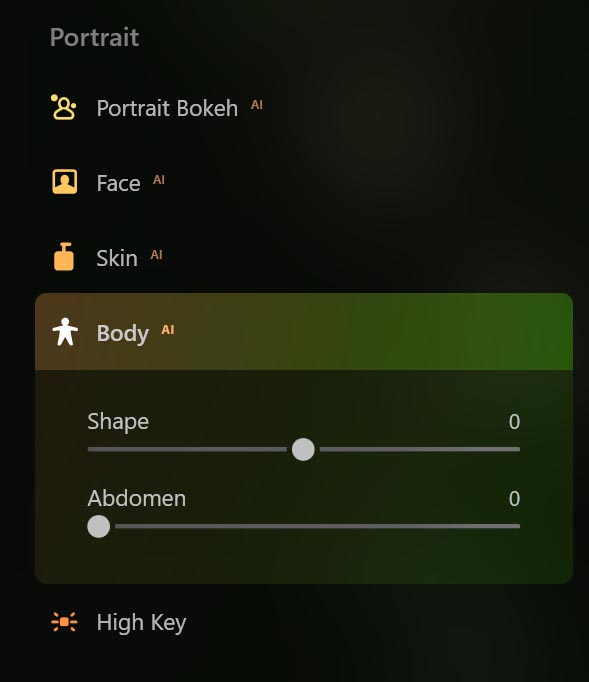
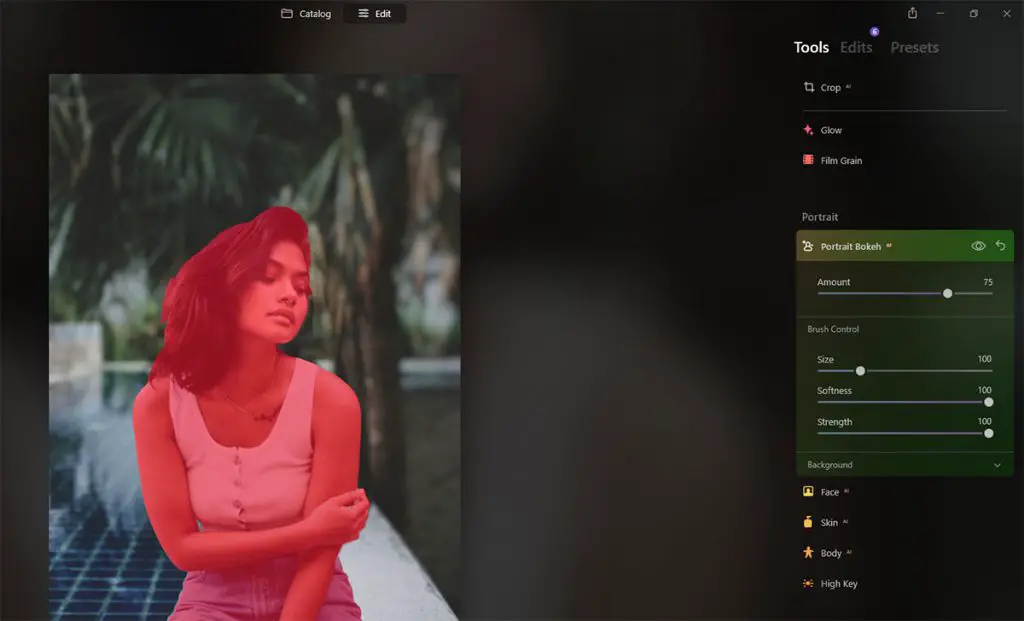
Another one of the key features that we need to look into has to be Luminar Neo’s portrait editing features. The software packs a bunch of features that makes editing portraits such an easy task.
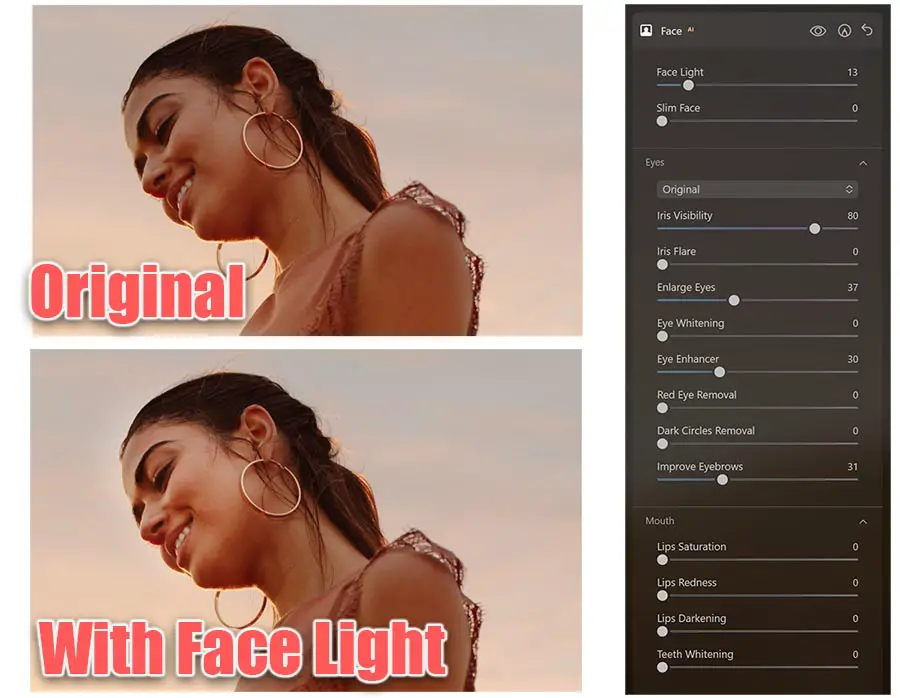
You can easily blur the busy background with the Portrait Bokeh feature, adjust the lighting on the face, and even tamper with the subject’s facial features. While the Portrait Bokeh feature took a while on my machine, the other effects took no time to be applied.
Fashion and portrait photographers will definitely love what Luminar Neo has to offer on this front, with the auto-mask applied by Luminar Neo easily picking out a subject.
Here’s a quick before/after comparison of the image after I edited it using the portrait tools in Luminar Neo.


The face re-lighting is a particularly useful feature, as it lets you add a subtle glow to your subject’s face, without you having to mess around with masking at all.
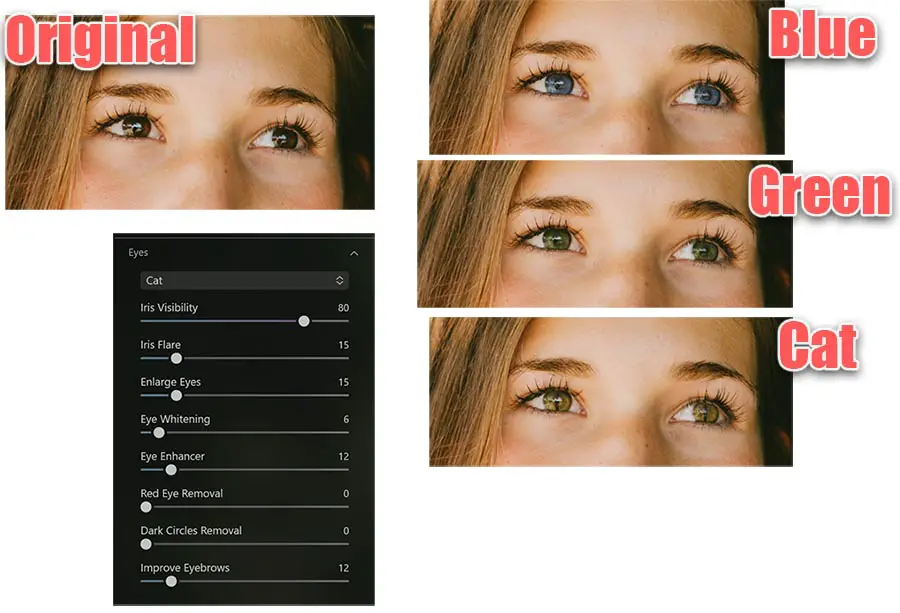
The ability to make even small changes to eyes and lips is a very powerful feature. The image below shows three different eye colors / types for the subject. Note how the glow in the eyes is unaffected, even as the color / shape of the irises changes.
Get $10 off Luminar Neo with code TimDaniels10
System Requirements for Luminar Neo
Skylum’s official website lists the following minimum system requirements for Luminar Neo.
Minimum System Requirements for Microsoft® Windows®:
- Windows-based hardware PC with mouse or similar input device
- OpenGL 3.3 or later compatible Graphics Cards
- Intel® or AMD® CPU with 2 cores
- 8 GB of RAM
- Operating System Windows 7® (only 64-bit OS), Windows 8.1® (only 64-bit OS), Windows 10® (only 64-bit OS)
- 2 GB free space for installation
- Microsoft® .NET Framework version 4.6.1+ for running the Luminar installer
- Monitor with 1280×768 resolution
Recommended System Requirements for Microsoft® Windows®:
- Intel® Core™ i7 7th generation or better, AMD Ryzen™ 7 2nd generation or better
- Discrete GPU with 4GB+ of RAM
- 16+ GB of RAM
- SSD as primary drive
- Calibrated monitor with at least 1920×1200 resolution
Minimum System Requirements for Apple® Macintosh®:
- Intel® CPU with 2 cores
- 8 GB of RAM
- macOS Catalina 10.15, Mojave 10.14.6, High Sierra 10.13.1, Sierra 10.12.6, El Capitan 10.11.6
- 1 GB free space for installation
Recommended System Requirements for Apple® Macintosh®:
- Intel® Core™ i7 CPU with 4+ cores or better
- 16+ GB of RAM
- Discrete GPU with 4GB+ of RAM
- SSD as primary drive
My Windows machine easily fulfills the recommended requirements; however, I was still not satisfied with the performance of the software.
I’m not sure if that’s because I’ve been working with the early release version of the software but certain functions definitely made me wait quite a bit.
Moreover, the frustrating part is that there’s no way to tell that the software is working in the background. Some sort of a progress indicator would definitely be appreciated in the future updates.
Final Words
There’s no doubt that Luminar Neo has a lot of potential. Whether you are a seasoned pro or an amateur, you can easily make your photos count with this photo editor.
There are corners that need to be ironed out though. For instance, while editing portraits is a breeze, serious portrait editors will be frustrated with the current lack of dodge and burn features.
Similarly, the absence of adjustment layers is something more serious photographers would laugh about. And the overall performance could definitely be much better.
Nevertheless, there’s a lot to be appreciated about Luminar Neo, particularly in the areas of auto-masking and sky replacement. I really hope that Skylum makes it even better and faster with the future updates.
Get $10 off Luminar Neo with code TimDaniels10
Read More:


Leave a Reply