If you are anything like me and are planning a trip to Norway, Iceland or Greenland, or anywhere else near the arctic circle, I’m sure that high on your wish list will be photographing the Northern Lights (Aurora Borealis).
If you are lucky enough to have seen them, you will know that you don’t always get long to prepare and photograph the Northern Lights, before they disappear behind clouds or the moon gets too bright, so it pays to read up on the best lens and camera settings so you are not caught out.
This guide will cover how to photograph the Northern Lights for beginners, from tips on scouting out the best time and place to take your pictures, to ensuring your camera equipment is set up to get perfect photos.
Table of Contents
Get the Free eBook!
Download this article as a free PDF eBook to take with you when you’re shooting the Northern Lights.
Put your email address in below to sign up for my newsletter and get sent a download link right now.
How to Photograph Northern Lights
1. How to See Northern Lights
If you want to know how to photograph the Aurora Borealis, you can’t skip learning how best to see it! Essentially, you need darkness with minimal light pollution from human sources and from the moon, at least some clear sky (as the Northern Lights are obviously way above the clouds), and some aurora activity.
I. When and Where to See Northern Lights
The Aurora Borealis appears in a ring approximating the arctic circle. It’s centred on the magnetic, rather than geographic, north pole, meaning that it extends further south over Canada and Alaska, when compared with Finland, Norway and Iceland. Bear in mind that if you go too far north, such as to Svalbard, your chances of seeing the Northern Lights actually decreases. Ideally, you want to be in a location around 67 degrees of latitude for the best chance.
Obviously, you need dark sky to see the Northern Lights. If aurora activity is low, they can be quite faint, and even a bright moon can overpower them. For the best shot, you want several hours of true night (not twilight), far from human light pollution, where the moon is not above the horizon for a large part of the night. This leaves us anytime between September and March as the best season to see Northern Lights.
II. How to Find Dark, Clear Skies to See the Aurora
There are a number of websites to help you find the ideal location at the right time, to see the aurora.
- Start by deciding the rough area you would like to go by checking for current cloud cover around the northern hemisphere. Infrared cloud maps from polar orbiting satellites will show you the total cloud cover over the last day or two, night and day. Ideally, you would want to look at historical cloud data for the dates of your planned trip, but this doesn’t seem to be reliably archived. So, take a look at maps such as the one at Wunderground. Or, for the Western Hemisphere only, there is good data available from the NOAA. This will hopefully give you an idea of the least cloudy areas to visit.
- You can then check for light pollution using the map at CIRES.
- Finally, take a look at the moon phases for the nearest city to your chosen location to get an idea of which days would be optimal for aurora viewing. Ideally, you are looking for a time around a new moon, if for no other reason than you will see a lot more stars behind the aurora.
Hopefully, you will now have decided on a country, if not a specific area of a country to visit. You can now move onto more specific websites for each area:
- For photographing the Northern Lights in Iceland, I found that the best website you can use is produced by the Icelandic Met Office, which will give you a composite picture of various heights of cloud cover, along with a basic aurora forecast.
- For photographing the Northern Lights in Norway, take a look at the Norwegian Met Office website. While not as useful for aurora viewing as the one from Iceland, I find the historical weather data to be particularly useful for planning a trip.
- For Finland, look at the Finnish Met Office Aurora info page, and their weather pages.
- For Alaska, try standard commercial weather websites. I find Wunderground to be the most accurate.
- For Greenland, you can be anywhere in the country for excellent views of the Northern Lights, including towns as light pollution is so small that streetlights won’t overwhelm the lights.

III. Aurora Borealis Activity Levels
It doesn’t matter if you have taken the trouble to find a dark place with a clear sky at 67 degrees of latitude if the aurora doesn’t show up. Luckily, there are plenty of resources to predict the aurora. Unfortunately, they are not terribly accurate, so should only be used as a rough guide. Most of the predictions come from an NOAA satellite in a stationary position between the Earth and the Sun, measuring the solar wind on the way to us, so predictions cannot run more than a few hours into the future.
Aurora activity is usually measured on the Kp scale. The higher the Kp number, the higher the activity level of the aurora.
Ideally, you are looking for a Kp number in the 4+ range to see some strong Northern Lights.
Associated with this is the geomagnetic storm index (prefixed ‘G’, followed by a number, the higher the better). Most of the best Northern Lights photos will have been taken during a geomagnetic storm. Unfortunately, you can’t predict them more than a day or two in advance, but if one hits where you are, be sure to do everything in your power to find clear sky – the results will be worth it.
The NOAA website contains the most detail on aurora predictions, although most of this is not too relevant. Pay attention to the bottom graph of the ‘Space Weather Overview’ box at the top, which contains the Kp number and the G number. The text box to the right of this graph gives you a breakdown of the next two days predictions in three-hour time chunks.
For a visual representation, take a look at the ‘Aurora Forecast’ about halfway down the page in the ‘Geospace’ section. This animation displays the likely chance of seeing the aurora for the northern hemisphere up to an hour or two in the future. Look at the ‘Hemispheric Power’ number (in GigaWatts) in the top-right of the animation for an idea of how strong the aurora is likely to be. Usually this is only around 10GW, but you can still see a good aurora at this level, so don’t worry!
There is also a basic website, which is useful for a quick glance, on the University of Alaska Fairbanks site.
2. Best Northern Lights Camera Equipment
To take powerful photographs of the Northern Lights, you only really require two key pieces of equipment.
I. Minimum Equipment Needed
A Camera that Can Be Set Manually
The best Northern Lights camera has full manual mode functionality. This means that you are able to independently set the aperture, shutter speed and ISO, amongst other settings.
You don’t need a full frame camera, but these are preferable due to the wider angle lenses that you can then use and the better overall picture quality. There is no appreciable difference in using Canon vs Nikon vs Sony digital cameras to take Northern Lights pictures – technique always takes precedence over equipment.
A Sturdy Tripod
It’s very important that both your tripod legs and the head, which the camera attaches to and which moves on top of the legs, are both rock solid when loaded and in use, particularly in windy conditions.
When you are shooting longer exposures, you don’t want any movement or slipping, which will create image blur. This is likely to occur on lower quality, cheaper tripods.
II. Optional Equipment
Ideally, you would also have the below. They are not necessary, but come highly recommended:
Wide Angle Lens
The wider the lens, the more of the sky and landscape you will be able to capture in one shot. The Northern Lights can take up most of the sky during a particularly strong magnetic storm, and you will want to get all of it in.
Within the lens choices, you want the widest aperture possible. Remember that the lower the number, the wider the aperture, and therefore the more light that reaches the lens. This means that you will be able to reduce ISO and get a higher quality photo.
The best lenses for aurora photography have f-stops (apertures) measured at f/2.8 or lower, although you can still take good photos with up to f/4.
Batteries
As you will be shooting near the arctic circle, it is likely to be cold. Rechargeable lithium-based batteries like those in your camera are very susceptible to cold weather – it reduces their working capacity.
You may see batteries running out quicker than you expect, so take spares. (You can get extra life out of lithium batteries by removing them from the camera and warming them up – tucking them under your armpit for a few minutes works well!)
Shutter Release Cable
If you press the shutter by hand, you can transfer unintentional vibrations to the camera, so it’s helpful to use a remote shutter release. Failing that, you can set the timer on your camera for 2 seconds.
3. Northern Lights Camera Settings
The best camera settings for Northern Lights photography are not the same as standard daytime, or nighttime photography. The aurora is constantly moving and varying in brightness, meaning you can’t prescribe one setting for shutter speed and ISO that will consistently work, but there are some good starting points below for photographing Northern Lights for beginners. You can set all other camera settings for Aurora Borealis in advance, as these should remain fixed during aurora photography.
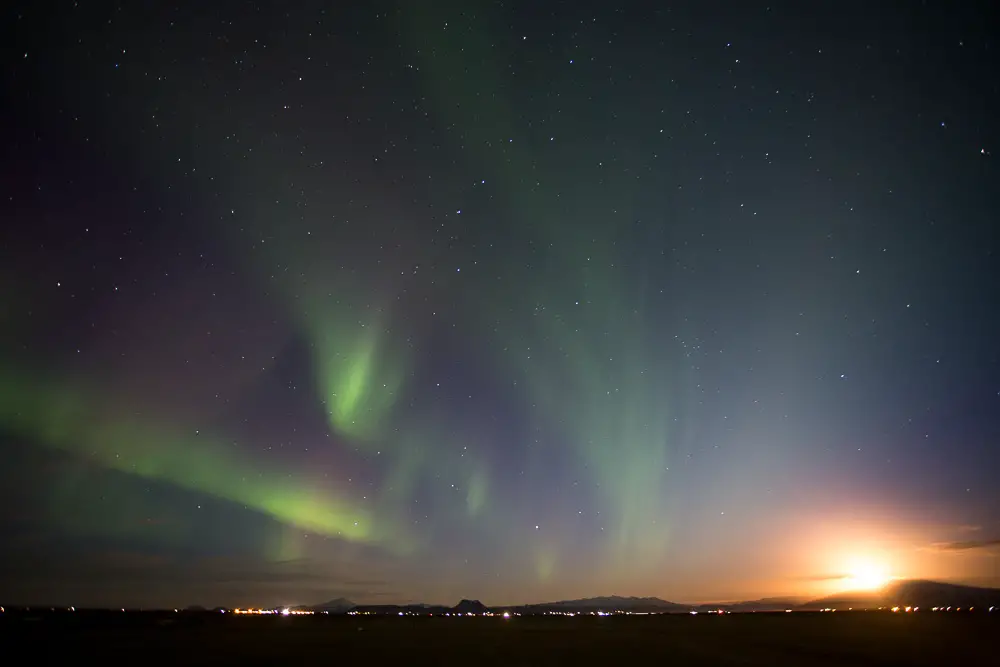
If the aurora is weak, it will initially appear colourless to your eyes, and will look more like a partially illuminated cloud, but moving quicker than you would expect. The colours of the aurora are much more visible to the camera than the eye, due to the longer exposure and greater sensitivity possible.
If you are not sure if the Northern Lights are showing above you, then before setting your camera up as below, I would suggest taking a photo of the sky with the ISO on auto and the aperture of your lens wide open. You should be able to take this photo hand-held, and it will give you a quick look at how strong the aurora is, and where best to point your camera.
I. At a Glance: Tips for How to Take Pictures of the Northern Lights (Aurora Borealis)
1. Basic Camera Settings for Northern Lights Photography – Photo Format , White Balance & Metering Mode
Set your camera to Manual Mode (M) so you have full control of all its settings.
Photo Format: You should try to use RAW for not just your Northern Lights photos, but all your photos in general, as you will then have access to all the data that your camera records. Shooting in RAW will make later processing of your photos much easier, and will give you more leeway if you get the exposure settings wrong in camera.
White Balance: If you shoot in RAW, white balance is irrelevant, as this can be set later once you get your photo into Lightroom or Photoshop. Usually, I will leave white balance in Auto mode in camera for this reason. If you want to get a better idea of how the final photo will look and Auto is not working for you, try setting a custom white balance of about 4000 – 4500 Kelvin.
Metering Mode: This depends on how far away from light pollution you have been able to get, and how bright and concentrated the aurora is. Generally, I stick with a metering mode that looks at the whole scene to determine brightness, which is called Evaluative Metering / Matrix Metering / Multi Metering / Etc, depending on camera brand. You may find that Center weighted metering works better if the aurora is particularly strongly concentrated in one area.
2. Lens Focus
Unless you are taking pictures of people or a closeup landscape in the same frame as the aurora, you will want to set your lens as close to infinity as you can get.
To learn how to do this reliably in the dark (you can’t just set your lens to ∞) look at the guide below.
3. Aperture Settings (F-Stop) and Depth of Field
You can get away with a shallow depth of field if you are only photographing the aurora and any distant landscapes.
Therefore, you should set the aperture to its widest possible setting. This is likely to be between f/2.8 to f/4. It will be difficult to get good photos of the Northern Lights with a narrower aperture.
It’s possible to shoot the Northern Lights with a wider aperture than f/2.8, although bear in mind that the depth of field will be extremely narrow. Any knocks or inaccuracies on your focusing ring will ruin your pictures, but you might not be able to see this from the small screen on the back of your camera.
4. ISO
You want to keep ISO as low as possible. See the guide below for more details of how to get an accurate ISO for your situation. It will probably be in the range of ISO 800 – 2000 in most cases.
5. Shutter Speed
You can’t leave the shutter open for too long, or the Northern Lights will be blurred and probably over-exposed in parts where they overlap.
The best shutter speed for Northern Lights photography is anywhere between 1 – 30 seconds. Usually you will be using shutter speeds below 15 seconds, but there is more on this in the guide below.
II. How to Reliably Focus Your Lens to True Infinity
If you don’t have the focus of your lens spot on, you will see blur in your photos of the Northern Lights when you get them back to your computer. You may not see this blur on the camera screen, due to its size, but this will be noticeable on a monitor at home.
This is because the wide aperture you will use reduces the margin for error in your focussing.
The area of focus that your camera sees depends both on the focussing distance and on the aperture. Focus will be centred on the focussing distance you have set on the lens. There is an area that is in-focus surrounding this point, the size of which depends on aperture. The wider the aperture, the smaller this area of focus.
As you will be shooting at a wide aperture, the potential area of focus will be small, so it must be carefully centred on the Northern Lights, which are essentially at infinity.
You can use the in-the-field method, or preset the focus, both of which are detailed below:
1. Focus In-The-Field
You can easily focus your lens to infinity at night, even without any lighting.
I. Begin by switching your lens to manual focus, then moving the focus ring until the infinity symbol (∞) lines up with the lens focal point marking. If you can’t see the infinity symbol, then take a guess. This should be approximately correct, but may not be good enough for our purposes, as these markings are not 100% reliable due to varying construction quality of the lens.
II. Activate live view and zoom in to the maximum on the screen, then point your lens at a bright star or planet. If you are using a zoom lens, zooming in to the maximum on the lens will make this easier.
III. You should see the star appear as a white blob. Stars are so far away that they are point sources of light, meaning that they should never appear to you as anything other than a small dot. They will only appear larger through your camera when the focus is off, as the lens blur will increase their apparent size. So, make small adjustments to the lens focus ring to minimise the size of the star.
IV. When the star has reached its smallest apparent size when viewed through your camera’s screen, this is the point at which your lens is focussed on infinity.
2. Preset the Focus in Advance
You can permanently mark your lens with the true infinity point, before heading out to see the Northern Lights, if you prefer.
I. In the daytime, point your camera at the horizon or a distant object. You can do this from the window of your house if you like, as long as the object you select is sufficiently far away.
II. Set the lens to manual focus, and set the focussing ring to the infinity focal point – ∞.
III. The distant object you are looking at should be relatively clear. Make small adjustments to the focus around infinity until the distant object is perfectly clear, with no blur visible. If possible, use live view on your camera and zoom in on the screen to the maximum extent to make this easier.
IV. Mark the focussing position on the barrel of your lens with a pen. Using bright or fluorescent ink is best, so that you will be able to see it at night.
When you finally make it to photographing the Northern Lights, set the focus to the position you marked on your lens, and you know that you are focussed at true infinity.
III. Getting the Correct Exposure Settings for the Northern Lights (Shutter Speed + ISO)
The real difficulty that I found on first shooting the Northern Lights was the balancing act you have to perform between shutter speed and ISO, to get a properly exposed picture. I wasted time figuring this out on the ground, but you can use my trial and error approach to make sure you don’t have the same wasted opportunities.
Brightness and Speed of the Aurora
The two key parts of the Aurora Borealis that you will be unable to predict are the speed with which the ribbons of light move, and their brightness. Theoretically at least, they both increase with higher levels of aurora activity, but as determining aurora activity is something of a guessing game, you can’t rely on this.
As you are shooting at night, you might think that a longer exposure with a lower ISO would always be ideal, to reduce grain in the image. But, the Northern Lights are often moving too fast for this to be viable.
Think about photographing streams and waterfalls. If you use a long exposure, you get a silky trail of water with no detail, but using a fast shutter speed, you can isolate individual droplets of water and get a freeze frame of the water in motion, much closer to what we see with our eyes.
It’s the same when shooting the aurora. A long exposure causes a loss of detail as the trails of light move over one another, creating a coloured blob in the sky that can also end up over-exposed because of the converging light trails.
Therefore, you need to keep shutter speed relatively short, in the range of 1 – 5 seconds for faster moving auroras to 15 – 30 seconds for slower auroras. Remember that the wider the lens you use, the longer the shutter speed can be before you will see movement and loss of detail in the aurora.
With a relatively fixed shutter speed and a fixed aperture, I’m sure you’ve realised that the only way you can easily get a correctly exposed photo during the varying levels of brightness of the Northern Lights is through changing the ISO.
As you increase the ISO, the picture as a whole will get lighter. Ideally, you want the ISO at the lowest level possible while still ensuring that you capture enough detail in the dark parts of the image.
You’ll find it quite easy to reliably do this, if you follow the steps below:
- Set the shutter speed and every setting other than ISO according to the guide above.
- Switch the ISO onto Auto, and take a photo.
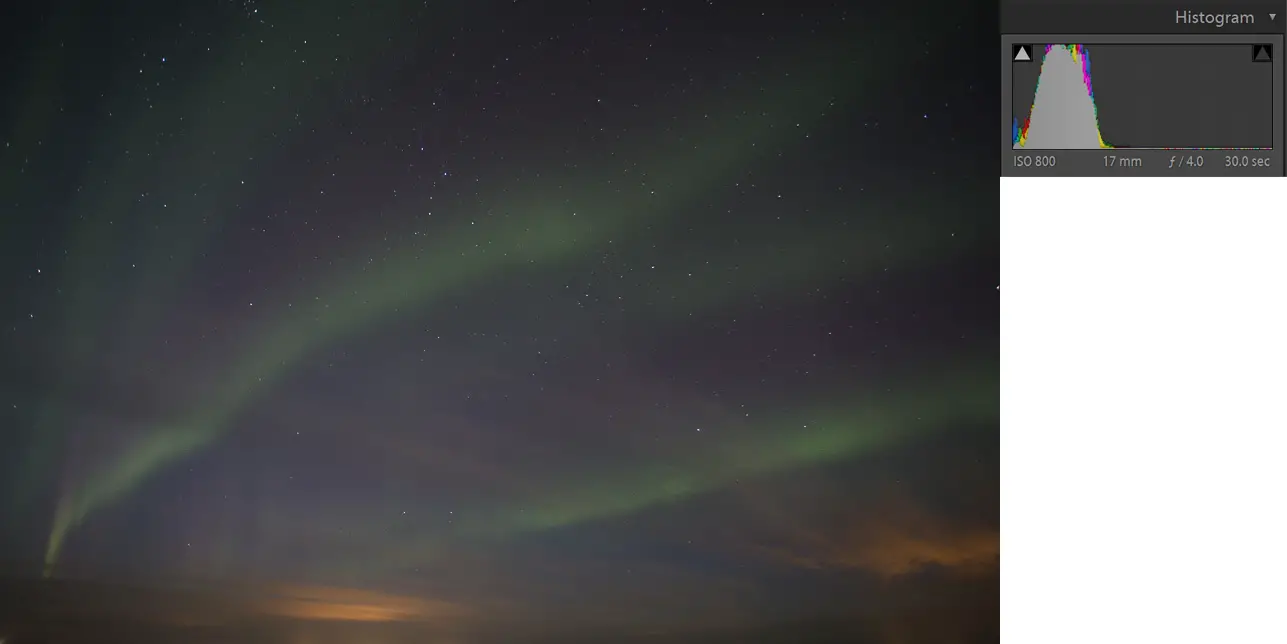
- Look at the histogram for that photo on the back of your camera. Confirm that the histogram is evenly balanced towards the centre, and you’re not losing anything off the left or right sides.
- Note the ISO your camera selected to produce this histogram, and switch to manual ISO.
- Choose an ISO that is two stops below the ISO selected by your camera, and take another photo.
- Continue this process of reducing ISO until you begin to lose detail from the left hand side of the histogram. You are looking to stop at the ISO setting before this happens.
By the end of this process, you should have a photo that is technically under-exposed. This is not a problem, as you can recover a remarkable amount of shadow detail in Lightroom and Photoshop.
The takeaway is that you must reduce ISO until nearly the entire histogram is on the left hand side, but with a minimal amount off the left hand side.
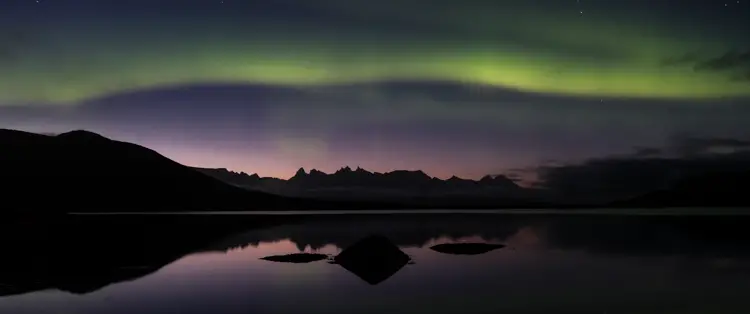
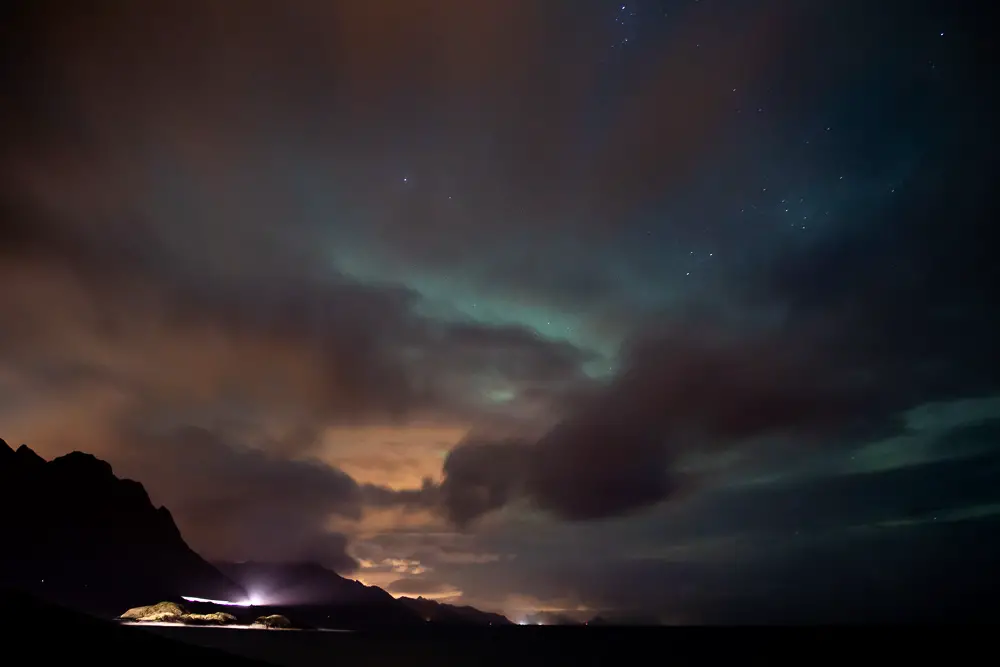
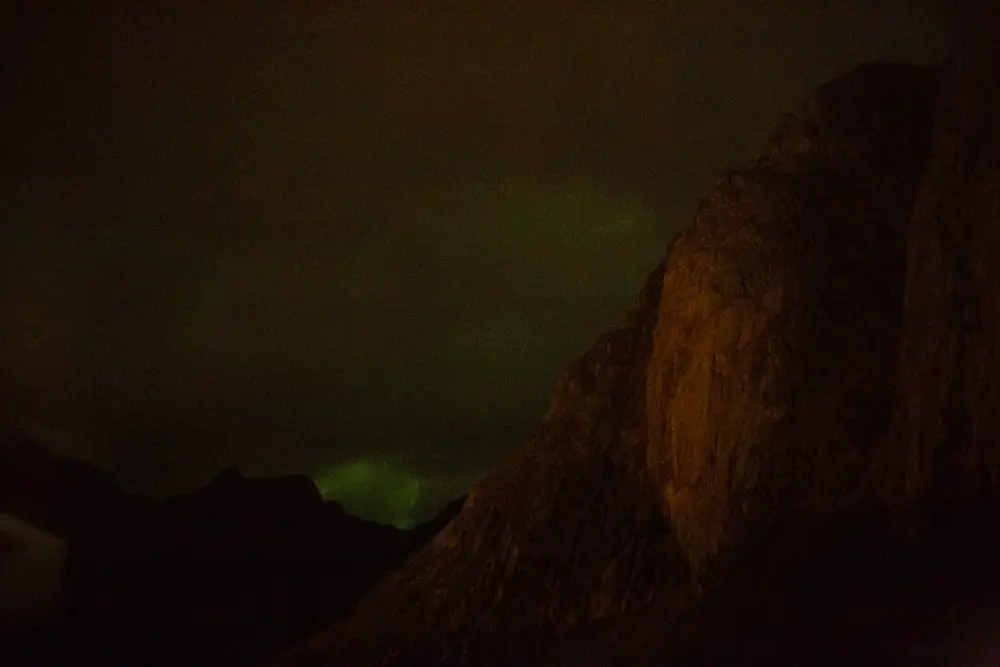
Here’s an example of what I mean, straight out of the camera, with no processing applied.
And you can then recover a lot of the darker areas in Lightroom. Below I have used a one-click preset from the free Lightroom Develop System to quickly boost this photo.
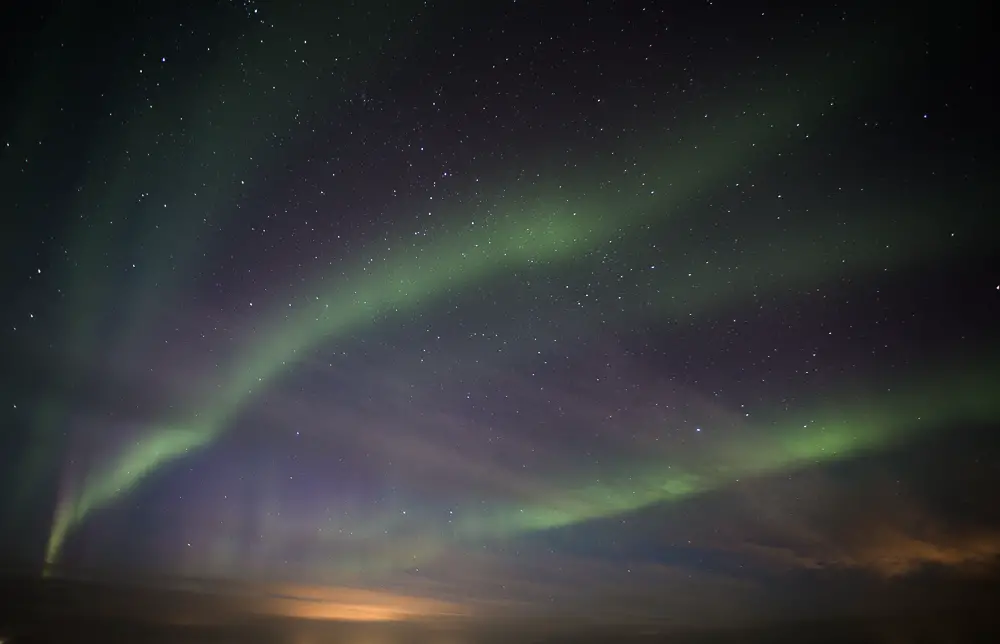
So, the best way to photograph the Northern Lights is to shoot underexposed, so you don’t blow out the aurora.
4. Photo Editing Techniques
Once you have been able to photograph the Northern Lights using the tips and tricks in this guide, you will then be able to think about how to post-process them.
This is a very important step, as the photos straight out of the camera will not have the power and impact you are looking for.
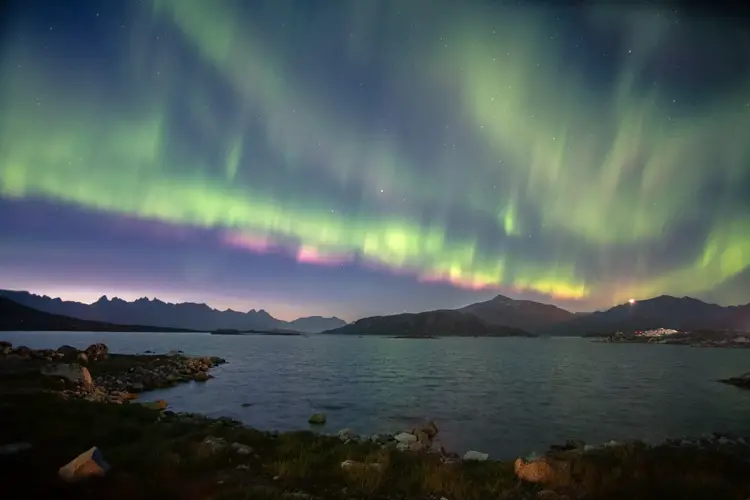
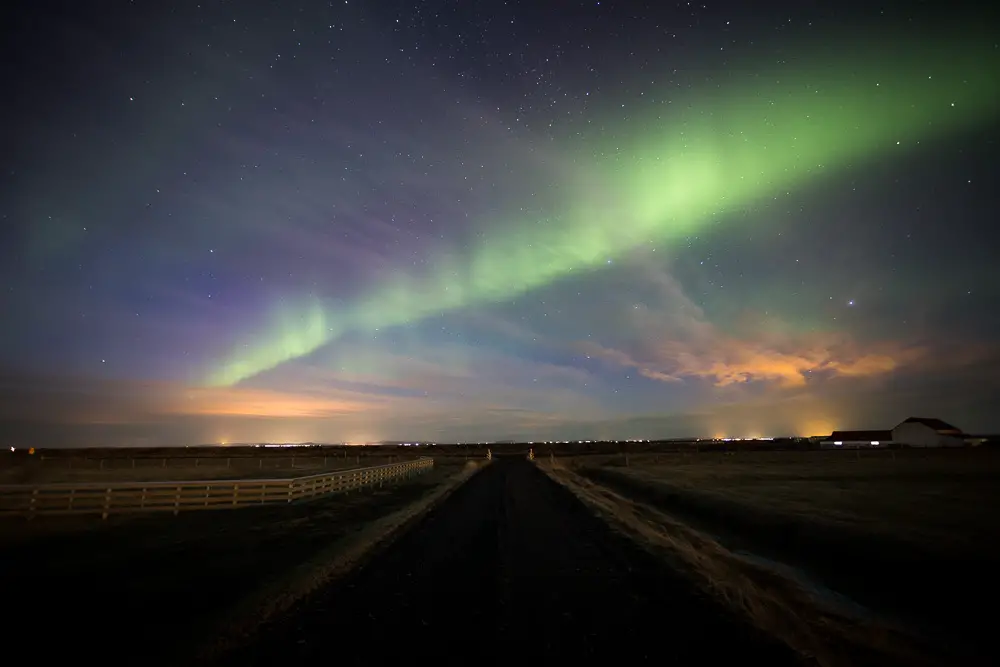
I use Lightroom and Photoshop to run a basic workflow to process my aurora photographs. The picture below is a pano of about a 180 degree arc of the sky, created in Lightroom from nine exposures, blended using the photo merge function in Lightroom, with some manual blending then performed by hand in Photoshop. For more, read my guide on how to blend any two photos.
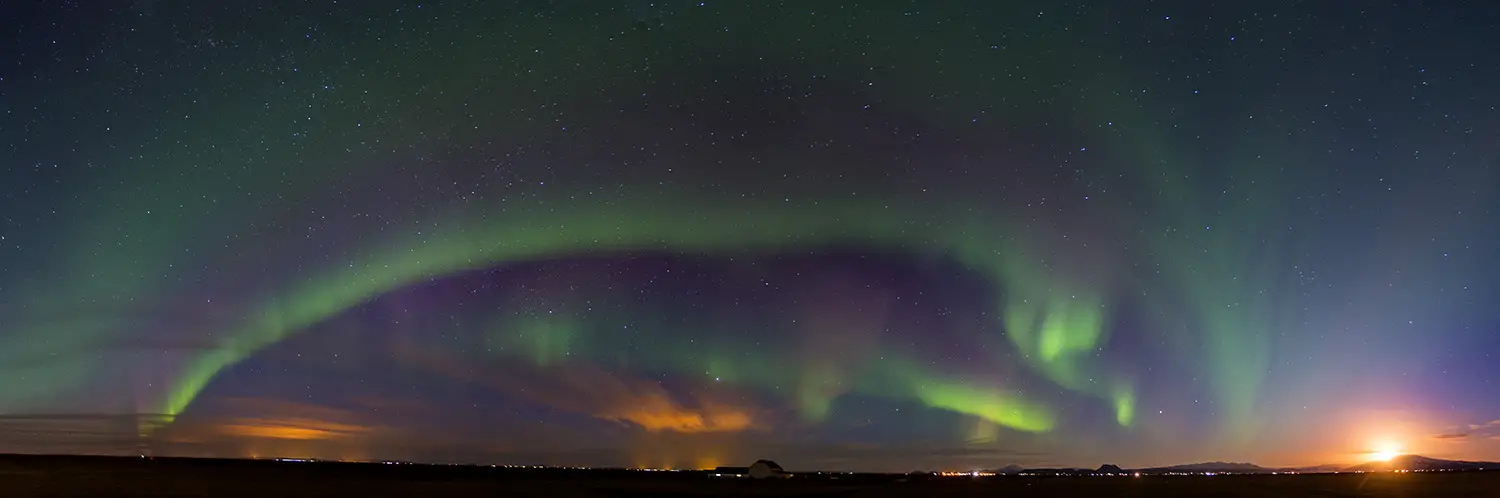
If we ignore the pano creation, the processing for this photo was completed in two simple steps:
- In Lightroom, I gave the tone curve a subtle s-shape to boost contrast, then reduced Highlights and Blacks, and increased Shadows and Whites. This has the effect of increasing dynamic range in both the brightest and darkest areas of the photo, recovering the under-exposure and increasing contrast to help the Northern Lights stand out from the sky. To make my life easier, I used the ‘High Contrast HDR’ recipe from the free Lightroom Develop System.
- And then in Photoshop, I added pro contrast and some subtle highlights glow using the free Photoshop Colour Control Action Pack.
I used to spend a lot of time making lots of small, fiddly changes in Lightroom and Photoshop like the above. To save my own time, and let me jump to final photos in just a couple of clicks, I decided to create a system of 1000 stackable presets in the Lightroom Develop System, and several actions in the Photoshop Colour Control Action Pack. I can now easily get the end photos I want, everytime. And I give these away for free, to you.
Enter your email address below to sign up for my newsletter and receive a download link for these free Lightroom and Photoshop resources:
5. Practical Northern Lights Photography Tips
Hopefully, this has answered your questions on how to take photos of the Northern Lights. There are a few additional, practical tips for photographing the Northern Lights below.
- Have access to your own transport. This applies particularly if you are taking pictures of the Aurora Borealis in Iceland or Norway, where cloud cover is the biggest obstacle to your photography. Often, you will be able to see gaps in the cloud on your weather maps that are just a few miles away. Having a car means the difference between seeing the lights and seeing only cloud.
- If the sky is clear, go outside and look around, even if the aurora forecast is for low activity. Aurora forecasting is tricky on a small scale, for the patch of sky above your head. You can see that most forecasting tools that I pointed out earlier are northern hemisphere-wide – they don’t go down to the local level. You could see the Northern lights, even if the Kp number is 1.
- Sort out your camera bag and all settings in advance. Sometimes the aurora is over and done in a few minutes. You want to shoot the Northern Lights, you don’t want to miss it playing with your camera.
- Dress warm. When you are near the arctic circle, it’s going to be cold. Dress in layers and don’t forget gloves. Personally, I prefer a thin pair of fingered gloves, with thicker mitts over the top. Mitts keep your hands much warmer than gloves with fingers, but you will struggle to use your camera, so you can take the mitts off when you need to, and you won’t get cold hands.
- Take a headlamp, or small light. If you’ve done your research, you’ll be outside somewhere where there is minimal light. You need a headlamp to see where you are going and to set your camera focus.
6. Final Thoughts

I hope this information has been helpful to you in learning how to photograph the Northern Lights. Remember that as in everything, the more you practice, the more naturally this will come, and the better you will get. Also, don’t forget that you can do everything correctly, but still don’t get a photo, as the Northern Lights fail to make an appearance.
Finally, if this guide has helped you and you want to get a first look at all the new articles and guides, as well as get access to the free Lightroom and Photoshop resources, then sign up to the mailing list below.
Get the Free eBook!
Download this article as a free PDF eBook to take with you when you’re shooting the Northern Lights.
Put your email address in below to sign up for my newsletter and get sent a download link right now.
7. Read More …
If you’ve found this guide useful, why not take a look at some of my other in-depth photo guides & tutorials:
The Digital Blending Workflow Tutorial
The Landscapes Masterclass: No HDR, No Plugins
This long form guide contains a complete workflow for one landscape photo, giving you detailed tips, tricks and guides on how to perfect your landscape photos through digital blending, using the tools in Lightroom and Photoshop
Lightroom Tutorial – Adding Color Depth with White Balance
Using targeted white balance adjustments, you can enhance sunrises, paint in new sunsets, make stormy skies pop, create stylised effects, and much more, all with very little time and effort. Learn how to do this entirely in Lightroom

Photoshop Tutorial – Blend Any Two Photos
This tutorial covers methods of blending in five common landscape situations: Multiple Exposure Blending; Time Blending; Object Blending; Double-Process Blending; Blending Skies.
These powerful methods will help you blend photos in any situation.
Color Control in Your Photography Tutorial
“I’ve blended my exposures, but my photo still doesn’t look like how I want it to look. Now what?”
Learn a two-and-a-half minute, Photoshop based workflow to fix both colour and tone in this long form tutorial and video series.

2 Responses
Richard Hampson
Thank you for providing such wonderful tutorials for free.
Tim Daniels
You’re welcome, Richard.