- Basic Effects
- Advanced Effects
- Secret Effects
Part 2: Advanced Effects
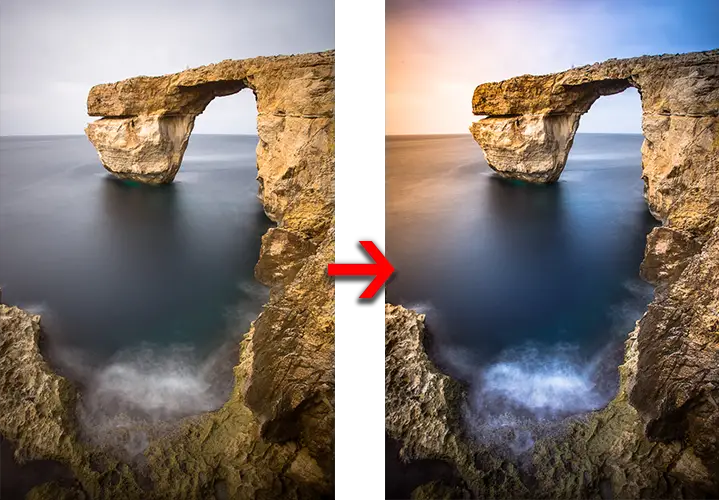
It’s possible to use these white balance effects to paint in a sunset from scratch. If you want to follow along with this tutorial, you can download the RAW source files from here. I took a long exposure of the Azure Window in Malta on a grey, overcast day. There was no interesting light at all, but a quick bit of Lightroom work lets you create an entirely new sunset. Here’s the before and after:
- Neutral White Balance. Unlike when you are enhancing a sunset, painting in an entirely new sunset requires you to set the main white balance to something fairly neutral. Either leave it as shot or set it to between 5000-6000. In the Azure Window photo, I set it for 5000. The idea is to minimise any colour cast. We’ll be adding the sunset entirely through filters.
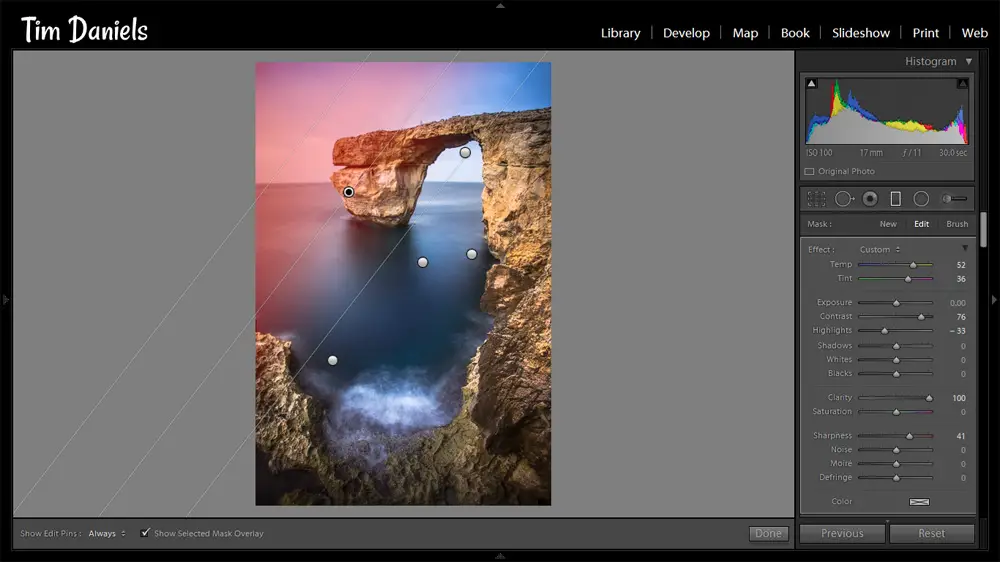
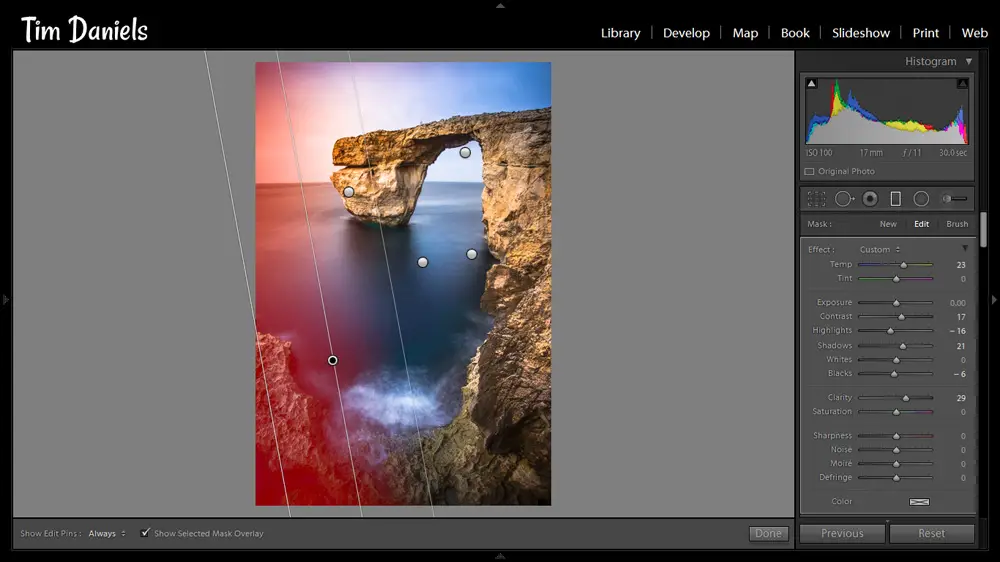
- Adding the Sunset. Start by adding in graduated filters with Temps set for about +25 to +50. To create a believable sunset will require multiple filters layered in slightly different positions, all overlapping where the sun should be. This will give a natural fall off in light. Increasing the Tint to make the effect more purple helps increase the strength of the effect, and I also usually increase Contrast, Clarity and Sharpness to give the sky some texture. Two graduated filter examples are below:
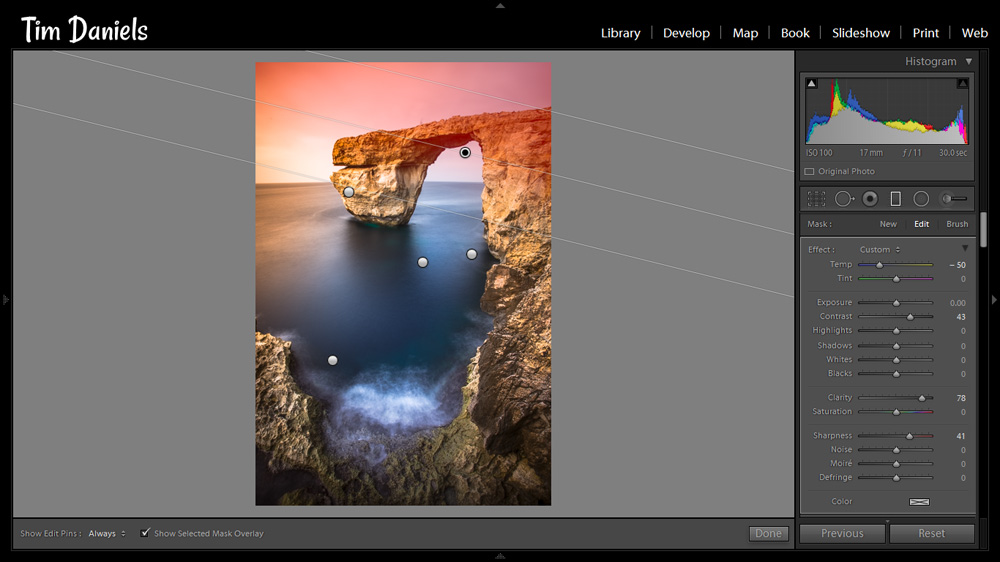
- Finishing the Sky. You’ve added the sunset, but to really make it stand out, you need to add some blue to the rest of the sky. Use graduated filters as before, but with Temp set to a negative value. You can usually get away with only using one filter for the blue sky, Temp set to about -50. Unlike with adding the sunset, you don’t have to layer these filters.
And that’s your sunset added. As always, there are plenty of presets to help you create sunsets like this in the free Lightroom Develop System.
Subscribe to the mailing list and get a free download link right now
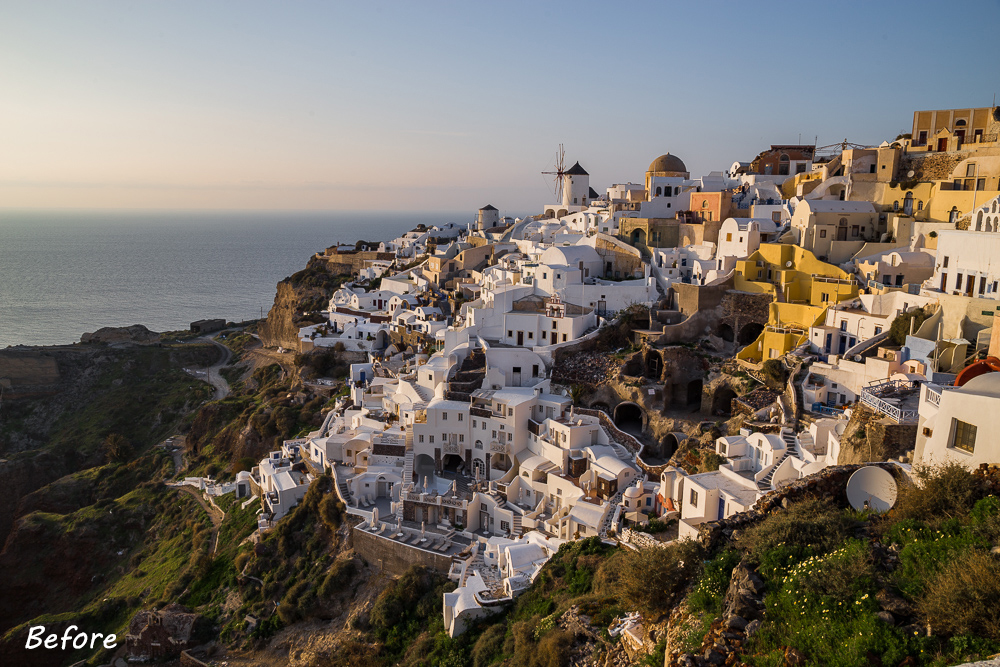
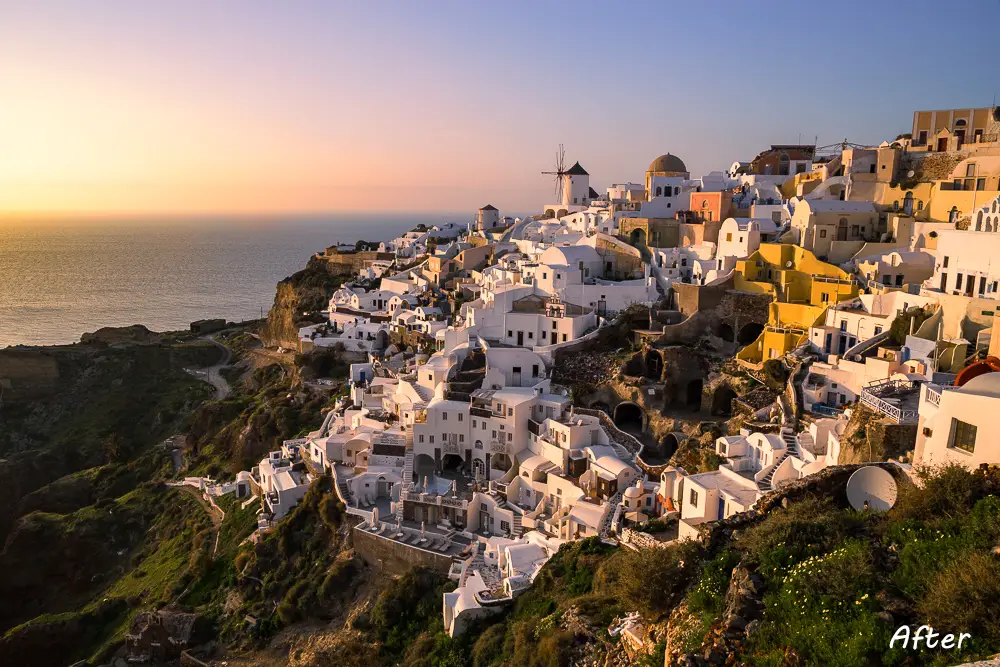
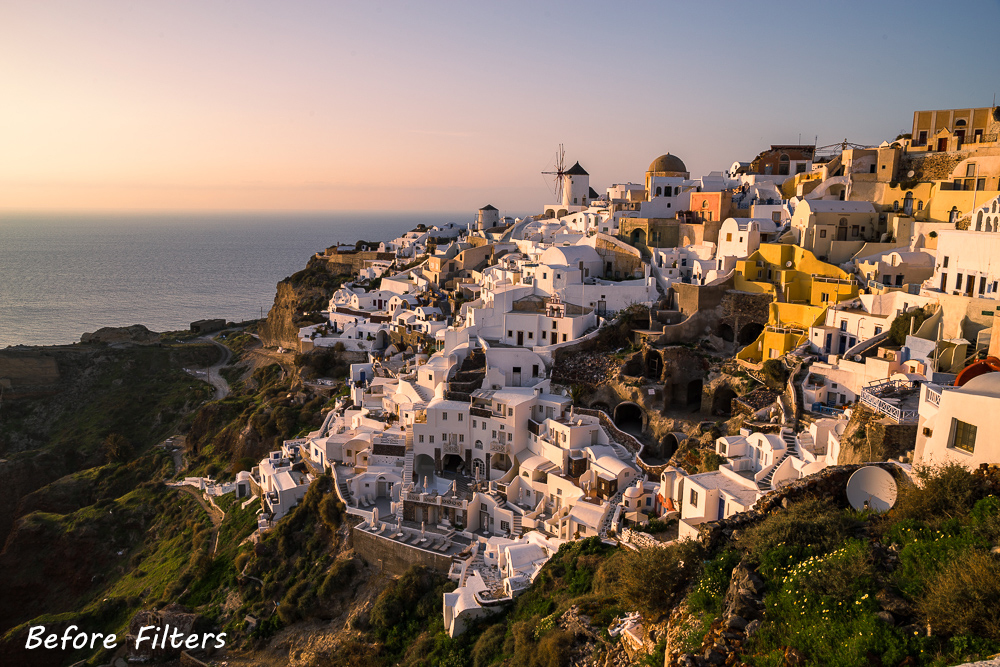
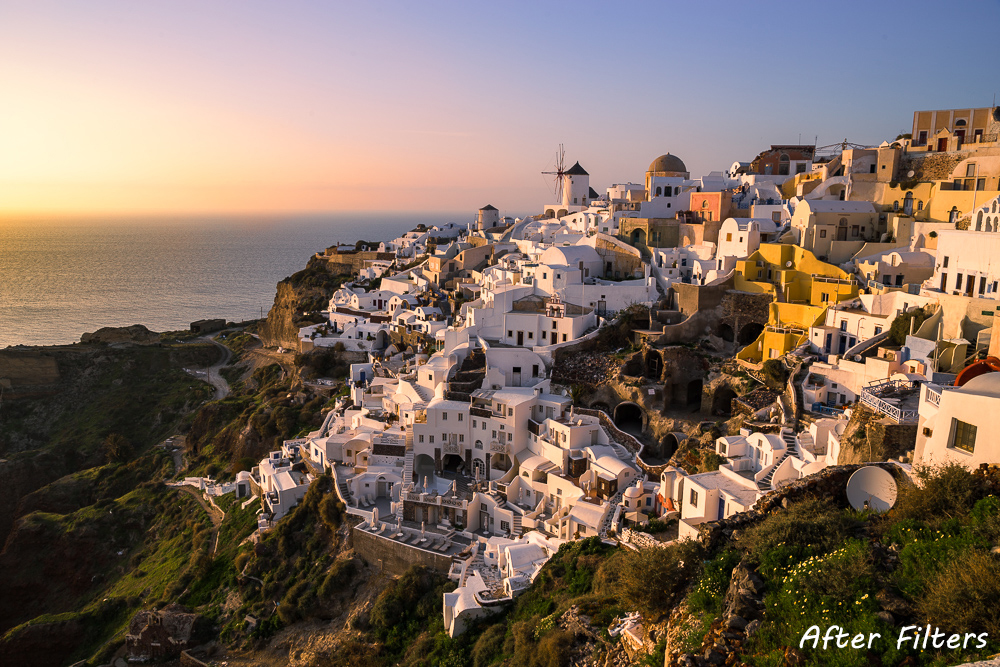
Next, let’s look at a slightly more complex example of adding a sunset, by combining filters with tone curve effects. Below is a before & after for a photo taken in Santorini. I’ve added the sunset to a bright area of sky where the sun was already setting, and this is key.
This technique works very well when you have a sunset photo, but the sunset was just too powerful for your camera, or too underwhelming. If you shot multiple exposures, you could blend them, but if you only have one exposure, try this …
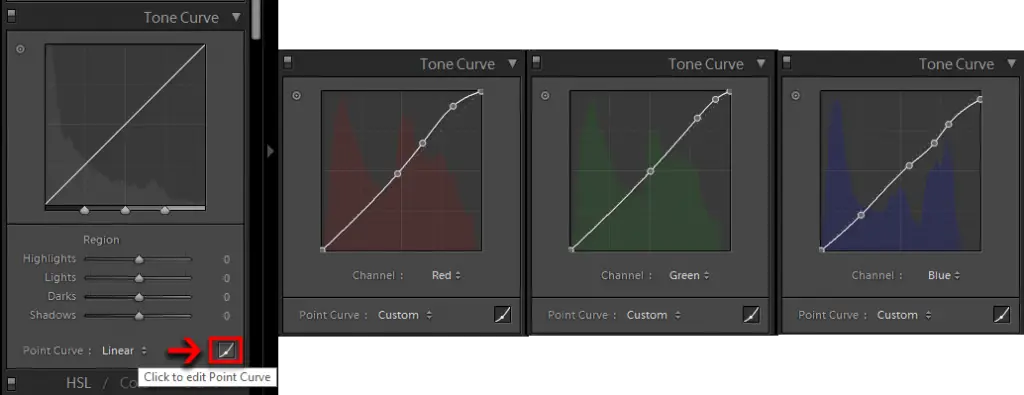
- Make Tone Curve Colour Adjustments. The Tone Curve in Lightroom isn’t simply for adding contrast or making lightness changes to your photos. By clicking on the symbol in the bottom right, you can access the red, green and blue curves individually. This is especially useful when you have a very bright part of your photo that you want to turn into a sunset.For this photo of Santorini, I have made some subtle adjustments to each of the colour curves to boost reds and yellow in the brightest parts of the photo. The exact changes are shown below, as is a before & after to show you exactly how powerful this technique is. It takes some practice to figure out how best to use these tone curve changes, but plenty of examples are provided for free in the Lightroom Develop System for you to learn from.

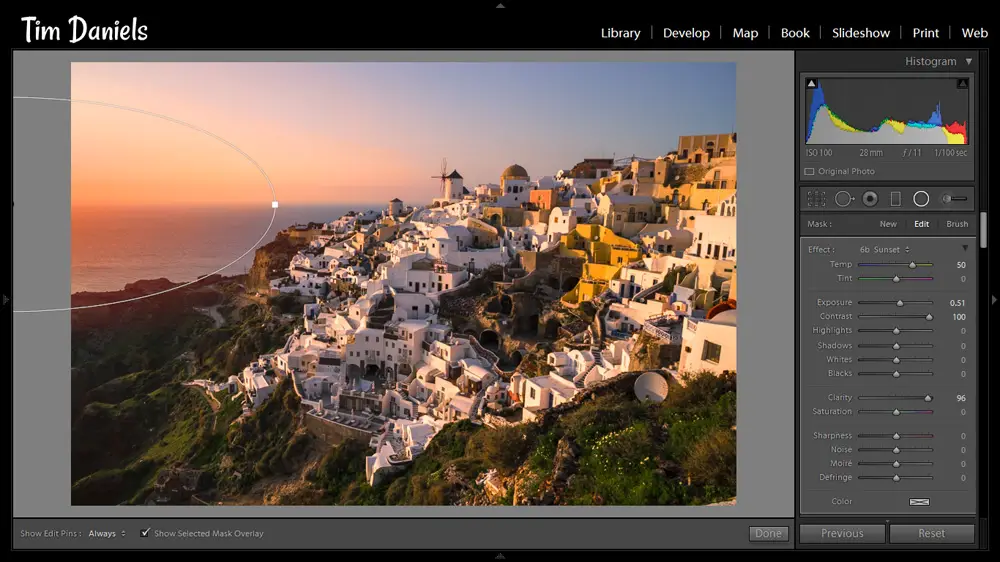
- Add Sunset. Using the circular gradient filter and techniques we have already covered, it’s straightforward to add a sunset. Select the circular gradient tool, increase the Temp to about +50, and also increase the exposure by at least +0.50. This filter will simulate the sun, and the sun should look bright. Then, simply draw a circle, centred approximately on where you want the sun to be. After you have placed the filter, you can move it off to the side of the photo to lessen the effect. It’s also a good idea to feather any circular gradient filters you use, to help simulate light fall off and to make the effect more natural.
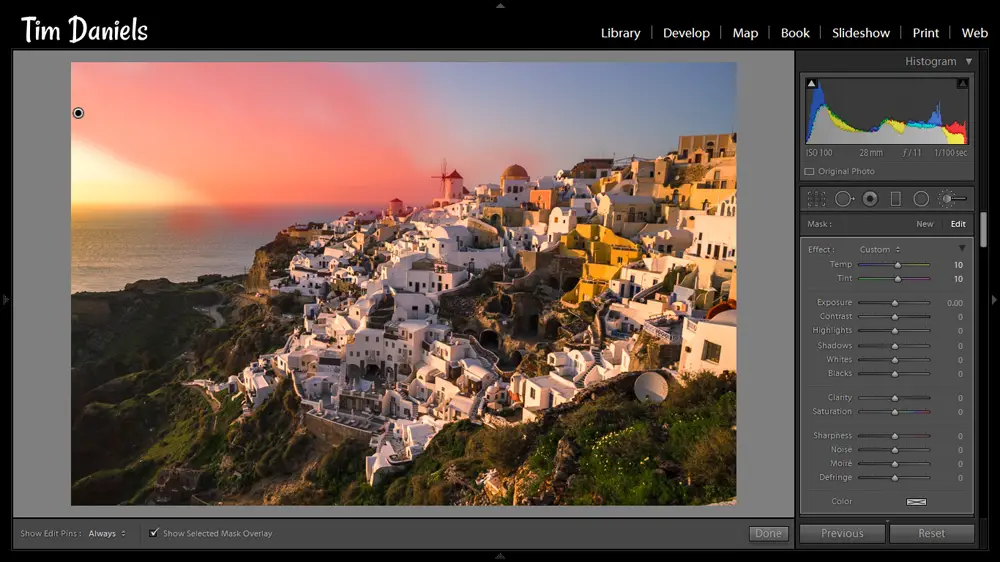
- Finalise the Sunset. Using the adjustment brush, you can add extra warmth and some purple tint to the edges of the sunset, to prevent its edges from looking too abrupt.
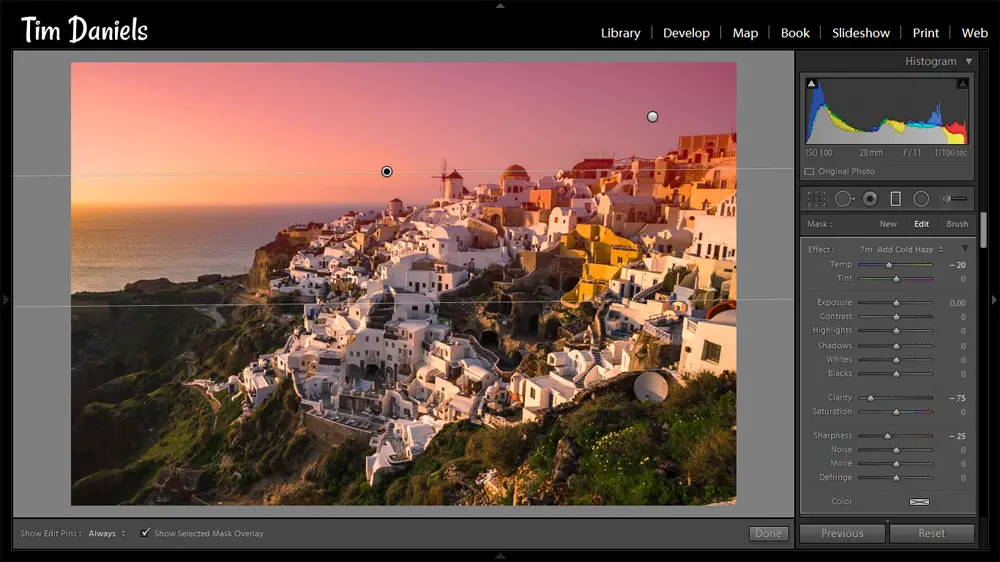
- Make the Sky Blue. As before, you need to make the rest of the sky blue to really make the sunset stand out. The tone curve effects we added earlier can reduce the blue too much in areas of sky where we still want it, so, use a graduated filter with the Temp set to a negative figure, and draw the filter across the sky where the sunset isn’t. You can also reduce clarity and sharpness to soften the sky, or increase it to make any clouds more prominent.
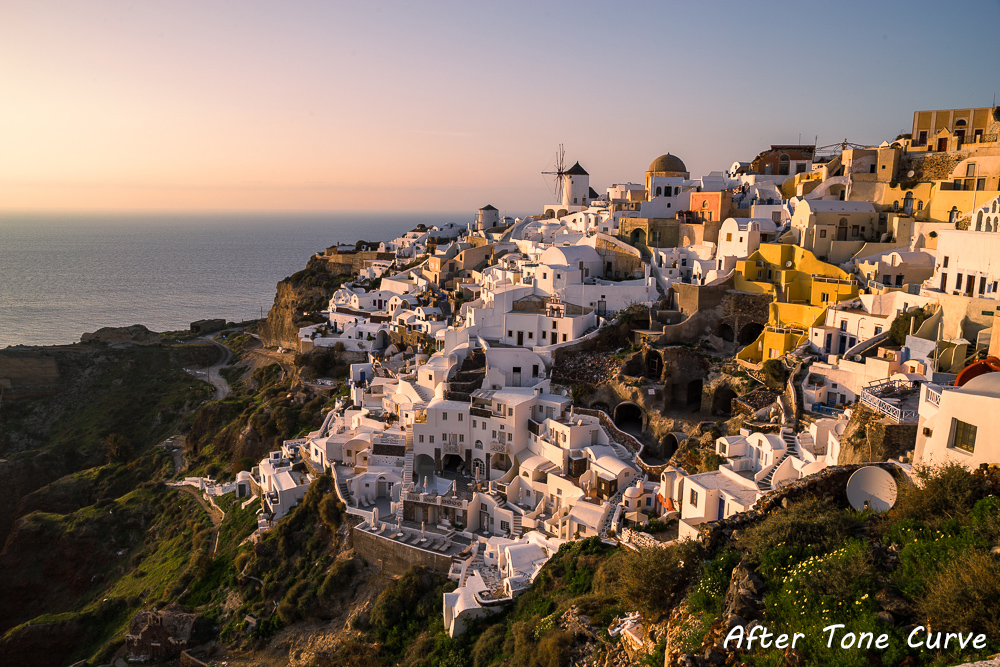
And that is this photo finished. Below is a before & after showing the difference from tone curve to adding filters. You can see that most of the work is done by the tone curve, but the filters play an important part in finalising the photo. If this feels too complex and you want some more guidance, try the Lightroom develop system, which has over a thousand presets, filters and brushes, all free and designed for landscape and cityscape photographers.
Subscribe to the mailing list and get a free download link right now
If this still seems a bit too complicated, then take a look at the video of the workflow below.
Want to learn even more? Turn to Part 3 to continue with some secret effects.
Leave a Reply