One of the keys to improving your photography is understanding different ways of composing images, and playing with perspective is one way to change up your composition. One Point Perspective in particular can make your photos seem more like a painting in some cases.
What Is Perspective in Photography?
If you’ve heard about perspective but don’t know what it is, a basic definition is that perspective is a representation of how an image would appear when viewed from a particular position.
To expand on that a bit more, imagine you’re standing in front of a windowpane and have the ability to draw exactly what you see through the glass onto that pane. The resulting image would be two dimensional, of course, but if you followed exactly what you saw, it would appear to have depth.
That illusion of depth is accomplished by making parallel lines appear to converge in the distance. The point at which those lines meet is called the vanishing point.

What Is One Point Perspective in Photography?
An image can have multiple vanishing points. The number is generally used in the name, so images with one vanishing point are said to use One Point Perspective.
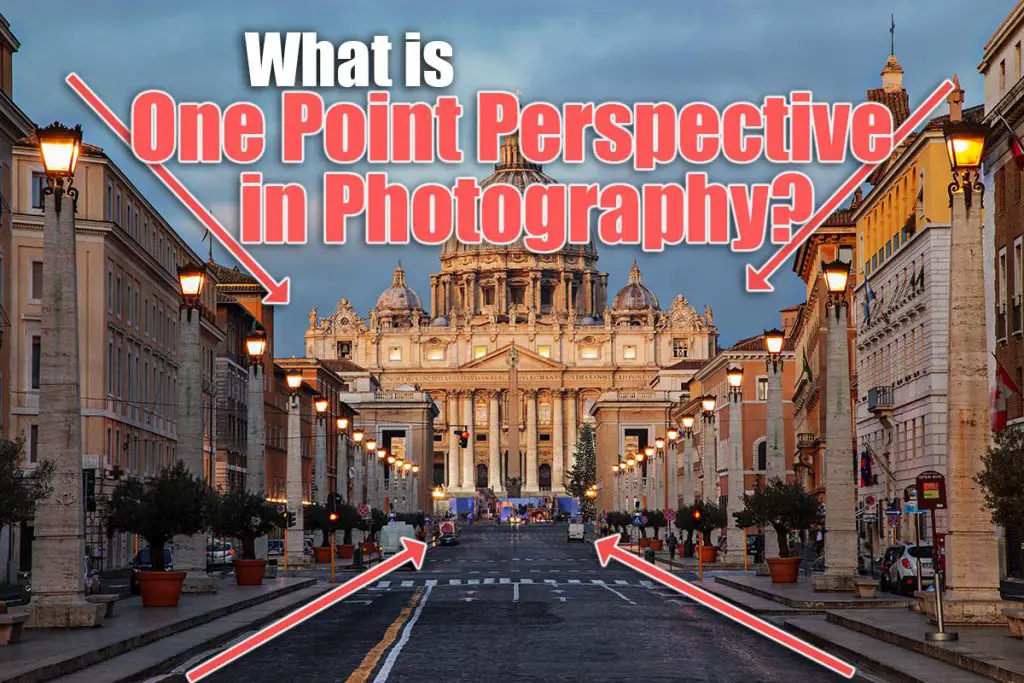
In images that use One Point Perspective, there is a single vanishing point in the image and all parallel lines in the image converge at that point. It’s particularly commonly used to represent long objects receding into the distance, such as railroad tracks or hallways.

How Do You Use One Point Perspective in Photography?
There are a number of rules to get the best photos using One Point Perspective, starting with your subject choice and camera placement. In general, your camera has to be directly in line with your subject, with it being particularly important that the sensor plane is pararrel to the vanishing point.
That alignment is key because the goal of One Point Perspective is that all the parallel lines in the image will converge at the same point on the horizon. Placing your subject at that point draws the eye to it.
Composing Using One Point Perspective
In the most basic use of One Point Perspective, you can place a distant subject in the center of the frame and use the naturally occurring lines in the image to direct your viewer’s eye.


In a photo like this, everything from the roof lines of the buildings to the painted line in the road to the bulbs of the street lamps direct the viewer to the center of the photo and the main subject.
Varying Your Compositions
Of course, while that technique is capable of producing some great results, it’s not going to work every time. There’s a reason a subject at the exact center of a photo isn’t the only thing we see, after all.
You can give just a little bit of life to the same basic kind of composition as above by simply moving your camera a little bit.
As long as you’re careful with subject choice and camera placement, you’ll still have a photo with a single vanishing point, but a different feel.

Instead of placing a building at the center of the photo, thereby drawing the eye to that subject, this composition emphasizes the road itself. So while the last photo makes the viewer feel like they’ve arrived where they’re going, this one feels like it emphasizes the journey instead.
Using Not So Straight Lines
Vanishing points can seem pretty easy in an urban landscape, which are generally full of straight lines, from road markings to curbs to lines of buildings. But what about in nature?
You don’t need perfectly straight lines to execute One Point Perspective. Instead of following the exact curve of whatever you’re looking at, you can draw an imaginary straight line between any two points and use that as a basis for your composition.

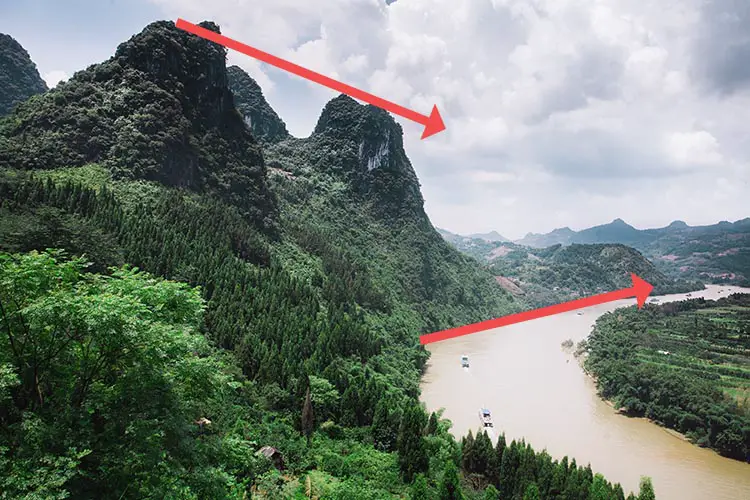
In this photo, there is a straight line implied by the far bank of the river, and it moves the vanishing point off center, combined with the angle and height of the hills.
Using Single Lines
While normally, the vanishing point is a place where a number of parallel lines appear to converge, the number isn’t necessarily important.
You can use essentially a single line to imply a vanishing point, though, again, composition and subject choice are everything.

In this photo, with the land positioned at an angle to the camera, it recedes into the distance and creates an implied vanishing point. This gives the photo a strong geometric feeling, even though it’s composed using the irregular shapes of buildings and rocks.
Lens Choice For One Point Perspective Photography
For the most part, you can use any lens for One Point Perspective, but there are some limitations. Because parallel and converging lines are so important, pick a lens with minimal distortion.
Where you can place the camera matters, also. If your image plane isn’t directly in line with your subject, you won’t get the correct perspective.
That could mean distorted lines or that shapes don’t come out how they are supposed to look.
A tilt-shift lens, also known as a perspective correction lens, might be just what you need.
What Is a Tilt-Shift Lens?
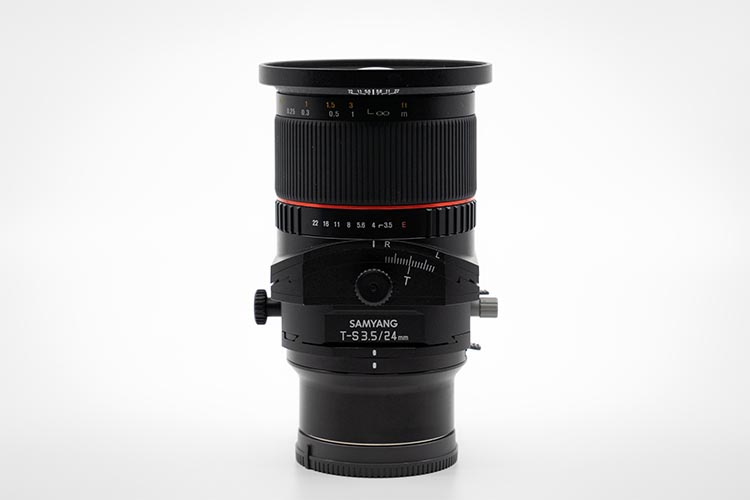
The reason tilt-shift lenses for digital and 35mm cameras are often called perspective correction lenses is they allow you to overcome perspective distortion caused by tilting the camera up or down.
A tilt-shift lens is geared in such a way that the angle of the lens can be changed in relation to the camera sensor. This allows the photographer to slightly change the position of the lens and adjust the perspective of the photo.
This is especially useful in architectural photos where you want shapes to appear true to life.
With live view on modern digital cameras, using a tilt-shift lens is easier than ever. First, start by placing the camera to get the composition you’re looking for.
Next, you can use the screen on your camera in conjunction with the knobs on the lens to correct the perspective distortion.
Tilt-shift lenses also offer the ability to change where the vanishing point appears in an image. Generally, the vanishing point is near the middle of the image, when looked at from top to bottom — composition can move it left or right.
Using a tilt-shift lens can move that vanishing point up or down based on the amount of shift applied.
Read More:


Leave a Reply