This site is part of various affiliate programs. Links may give us a small compensation for any purchases you make, at no additional cost to you. Please read the disclaimer policy for full details.
So your Sony TV has got a blue tint and you don’t know what to do.
Don’t panic, because this is acutally a very common problem, and is something that you can easily fix at home with a little time and know-how.
This guide takes you step-by-step through the process to fix a Sony TV blue tint, and I am confident will help you to get your TV working normally again.
Sony TV Blue Tint
To fix a Sony TV blue tint, reset your TV by power cycling it. Unplug your TV and wait for 2 minutes. Hold down the power button for 15 seconds to drain any residual charge, then plug it back in and the blue tint will be gone.
This works for nearly everyone to fix their TV’s blue tint, but if it hasn’t worked for you, then we can try a handful of hardware and software fixes to diagnose and treat the problem.
Let’s start with a few basic steps that you might have overlooked before we get into the more in-depth fixes.
You can also watch an overview of these fixes in the video below.
1. Power Cycle Your Sony TV to Reset It
Although this might seem a basic step, power cycling your TV is often the best way to fix a blue tint on your Sony TV.
Resetting your TV will clear out any issues with non-permanent memory and reset your main board without losing your personal settings.
This is quick and painless and won’t cause you to lose any of your saved settings.
- Make sure your TV is switched off and unplug it.
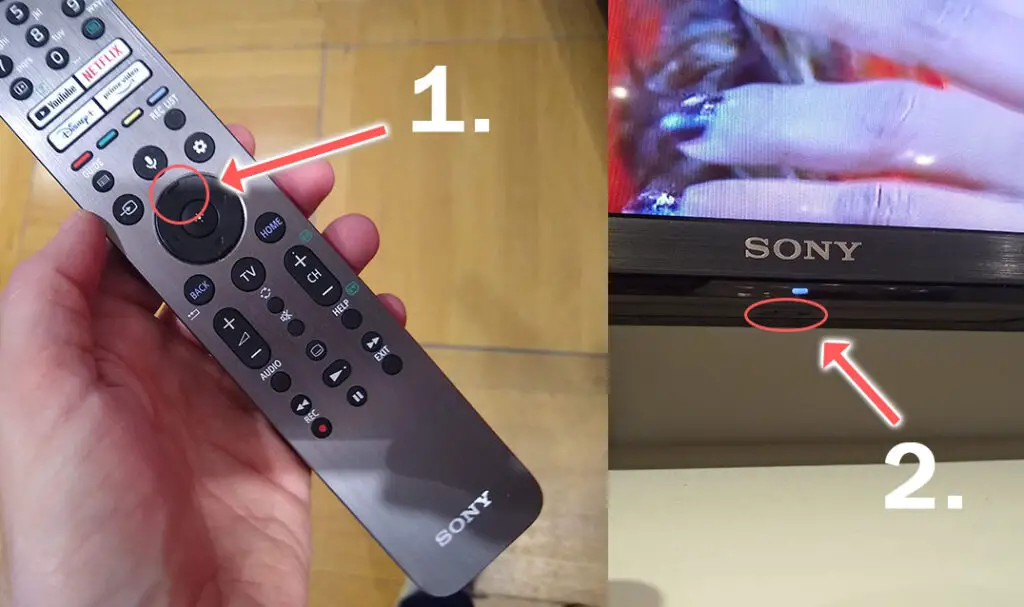
- Hold down the physical power button on the TV for at least 15 seconds.
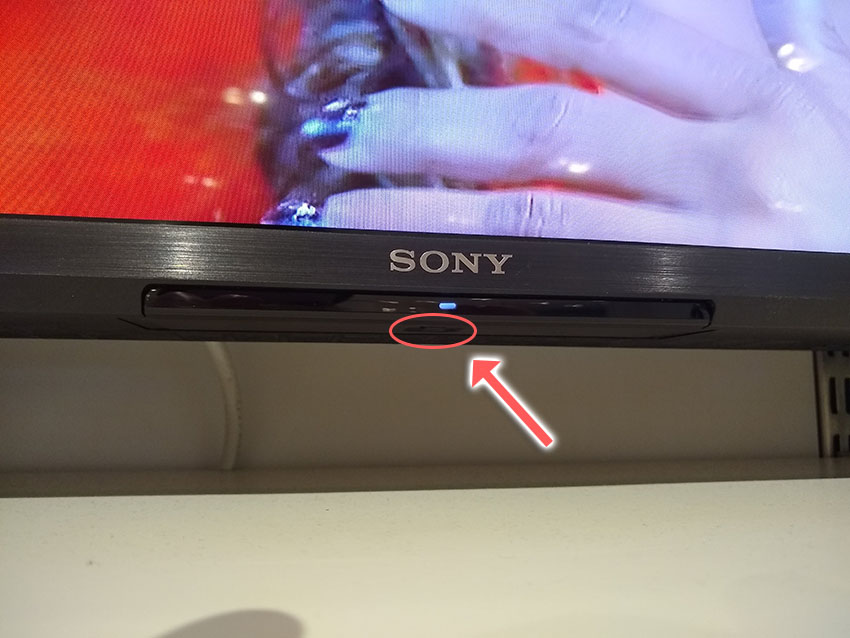
- Wait for at least 2 minutes for any residual power to drain from the TV’s capacitors (which are capable of storing charge for several minutes).
- Plug your TV back in and try switching it on. You should see a red light if you have been successful.
Make sure you do wait for the full 2 minutes before plugging your TV back in – you would be surpised how long the components within your TV can hold charge, and you want to make sure it has fully reset.
Although this seems a very basic step, don’t overlook it because in the vast majority of cases a simple soft reset fixes most issues.
Most people will now have their TV fixed and back up and running, but if your Sony TV still has a blue tint after resetting, then we’ve got a few more basic fixes to try before getting into the hardware fixes.
2. Check the TV’s HDMI Cables
There’s a strong possibility that a poorly seated cable is automatically switching inputs on your TV, but as it’s not fully connected, it’s creating signal noise which is displaying as a blue tint. This is also a common cause of a Sony TV that won’t turn on.
This comes down to either a:
- Faulty HDMI cable with a break in it
- Damaged HDMI port with broken pins
- Poor HDMI connection where the cable and connector are not fully making contact

To check your HDMI and other cables:
- Switch off your TV.
- Remove any HDMI or other physical cables connected to the back of your TV.
- If you have any compressed air, use that to clean the contacts both of the cable and in the connector on the TV. If you don’t have compressed air, then blow gently on them.
- Firmly push the cables back into their slots on the TV.
- Switch your TV back on again.
It that hasn’t fixed the problem, then try using a different HDMI input. Most TVs have 3 or 4 HDMI ports.
If you have one that is on a different part of the TV then that would be the best one to try, as it this should have a separate connection to the TV’s main board.

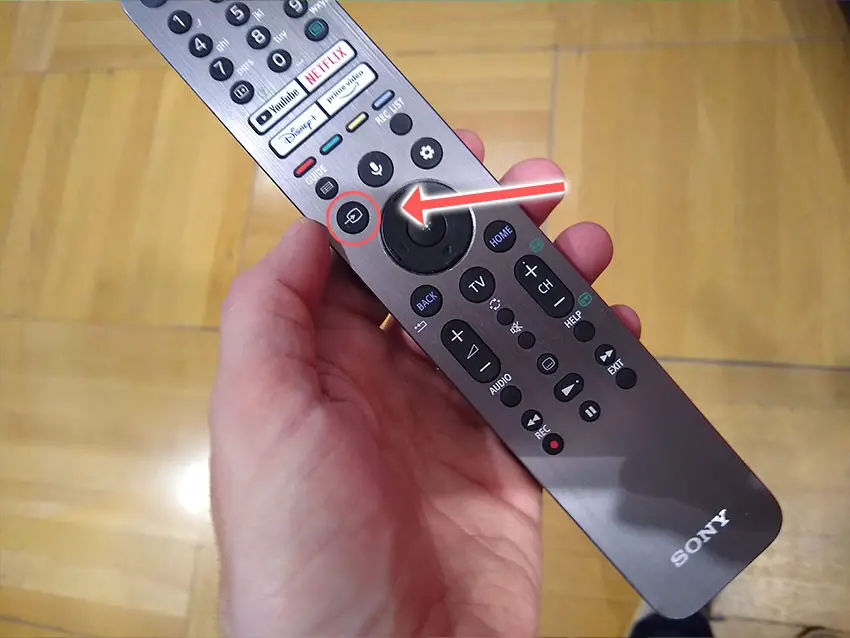
Plug you HDMI cable into the new port, note the number next to it, then choose this HDMI input on your TV, by using the Input or Source button on your TV remote or the Input or Menu button on your TV itself.
You can also try removing all external devices, including those connected by Bluetooth and any coaxial or signal cables, so that the TV only has a power cable going into it.
When you turn your TV on, this means the screen will be black as it is not receiving any picture, potentially making it tough to see if it is truly working or not.
Try to pull up the on-screen menu. If you can see this without a blue tint, then it means that your external connections are the problem, and you should try reseating your HDMI cables one by one, until you find the damaged cable that needs replacing.
3. Change Your Sony TV’s Color Settings
Most Sony TVs have an option to change the color temperature or other aspects of the picture.
If your blue tint is only slight, then this can be a good simple way to fix it, but you will have to play around with the settings with a bit of trial-and-error.
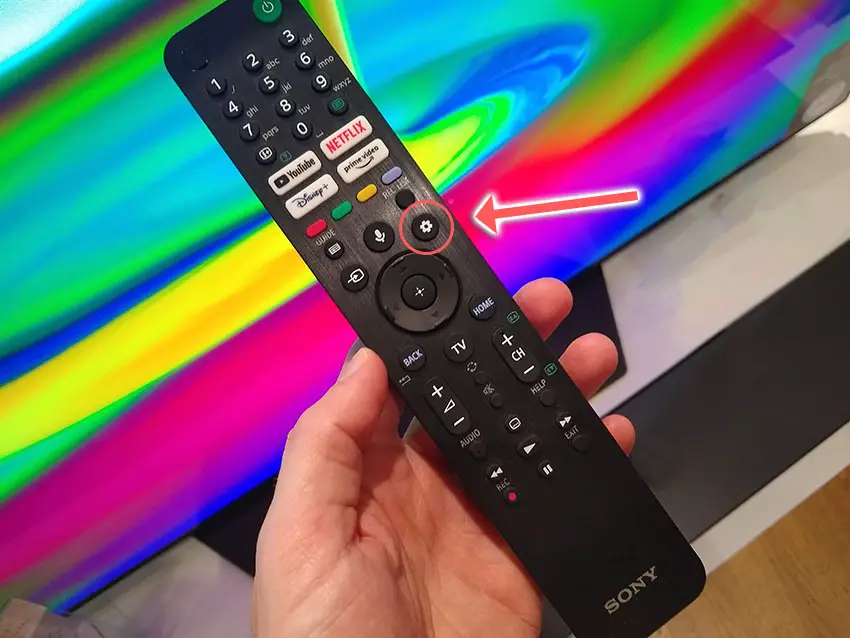
Press the Settings button on your remote and go to the Picture Settings screen.
You can try switching the Light Sensor off, then try reducing the Backlight Brightness and Contrast to see if that helps.
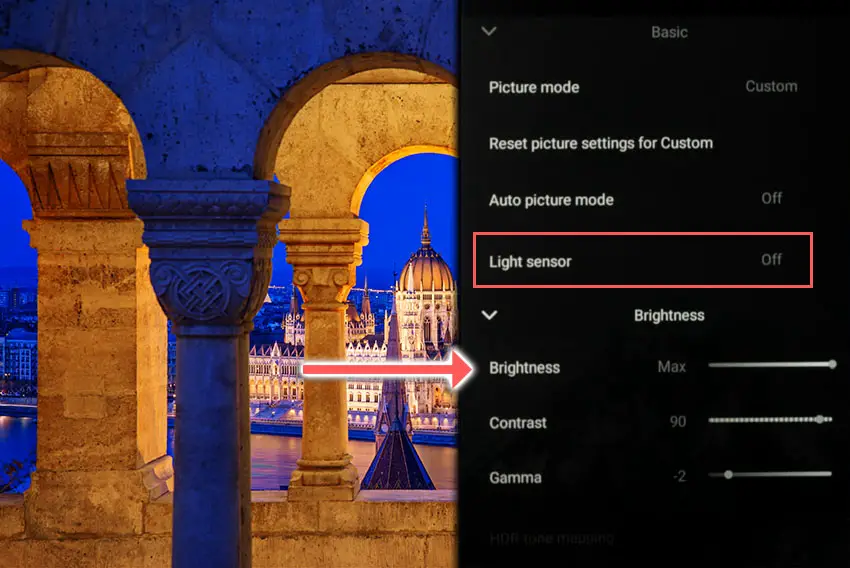
Then move into the Color sub-menu, and try setting the Color Temperature to Warm, and if the blue tint is still a problem, then try Custom and manually see if you can fix it.
You can also go into Hue and attempt to remove the tint that way.
4. Update Firmware
Software and firmware issues have been known to cause problems with the displays on Sony TVs.
As with any product, you should ensure that you have updated your Sony TV’s firmware to the latest version, even if it is new.
To update firmware on most Sony TVs:
- Press Settings on your remote control.
- Go to Customer Support, Product Support or Setup.
- If available, select Automatic Software Update or Automatic Software Download and check that this is switched on. (Note that you must agree to the Privacy Policy to receive automatic updates – go to Help -> Privacy Policy to find it).
- Otherwise, select Software Update.
- Choose your Network, then press Yes or OK to start the update process.
For Sony Android TVs:
- Press Home on your remote.
- Go to Help.
- Choose Status & Diagnostics.
- Then System software update.
- You can check that Automatically check for updates is switched on, and manually check for updates using the Software Update button.
For Sony Google TVs:
- Press Settings on your remote control.
- Go to System.
- Then About.
- And System Software Update.
- Confirm that Automatically check for update is On. You can also manually check for updates using the Software Update button.
Sony Android and Google TVs will automatically update firmware if connected to the Internet. If your WiFi has been broken for some time, then your Sony TV may not have the latest firmware, which you will have to install manually via USB.
- Go to the Sony support site on your computer.
- In the Search box, enter your TV’s model name. (Take a look at Sony’s help page if you can’t find it).
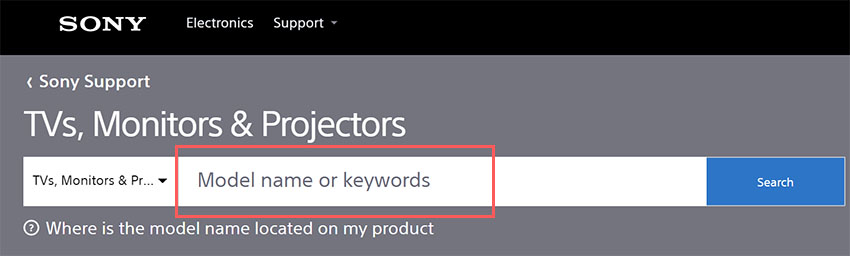
- Go to the Downloads tab and click the most recent Firmware update and download it to your computer.
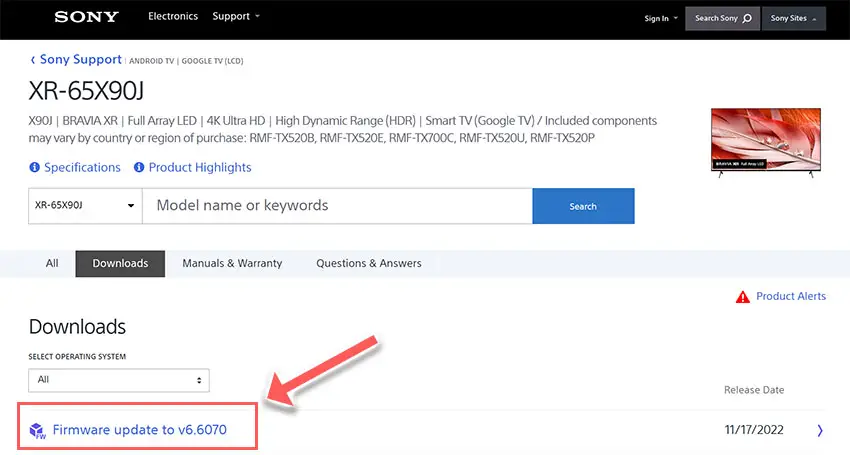
- The update process varies depending on your TV, but full instructions for each model are provided on the firmware update screen. Follow these to complete the update process.
5. Factory Reset Your Sony TV
Returning your TV back to its factory settings is a more extreme step, as it will delete any personalization features, downloaded apps or connected devices, but it’s always worth a shot when other methods haven’t worked.
To factory reset a non-Android Sony TV:
- Unplug the TV.
- Wait for 1 minute, then plug your TV back in.
- If it doesn’t switch on automatically, press the Power button on the remote or TV itself.
- Once switched on and fully loaded, hold the Up arrow on the remote and at the same time, hold the Power button on the TV until “Reset” appears on-screen.
- Once you see “Reset” on-screen, or after a count of ten, release the Up arrow and then the TV’s Power button.
- Your TV will now reset itself and return to the initial setup screen.
You can see these steps in the video from Sony below.
To factory reset an Android Sony TV and if your remote is working:
- Press Settings on your remote.
- Go to System.
- Then About.
- And Reset.
- Choose Factory data reset.
- And Erase everything, and confirm you want to do this. If asked for a PIN, use 9999.
You can see details for how to reset other models of Sony Android TV in the video below.
If you don’t have the remote, then you can factory reset your Sony TV using the guides for TVs that have either one or three buttons or four or more buttons.
6. Replace Your Sony TV’s Backlights
Blue tints are very common on TVs older than two or three years. This is because of the design of the LEDs used in the backlight and the fact that they can easily burn out.
Sony TV backlight panels use blue-light LEDs as their base, with a phosphor yellow coating over the LED.
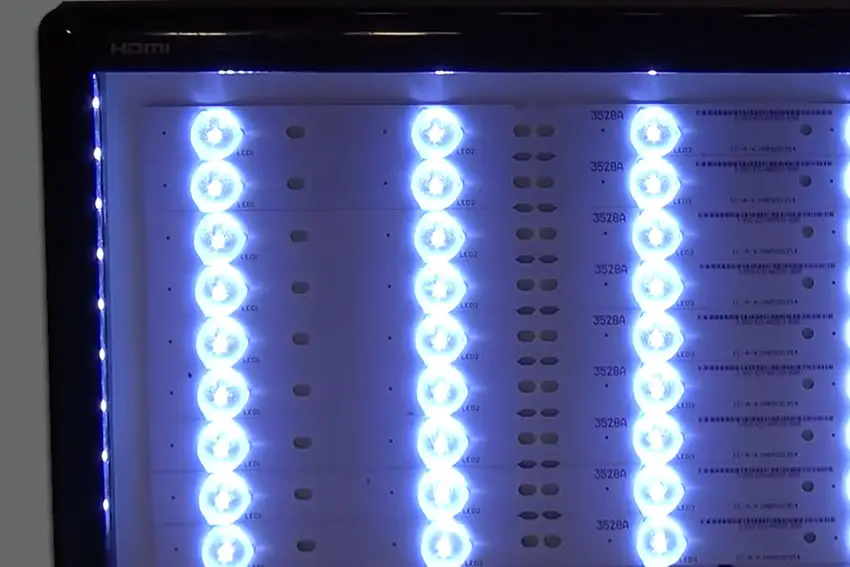
The blue light shining through the yellow phosphor creates white light, which is what you see on a correctly functioning TV.
But after a couple of years, the phosphor can burn off, meaning that blue light shines through unfiltered, giving your screen a blue tint.
These LEDs must be replaced, but luckily this is not a terribly expensive job, although it does require some work on your part.
If you’re not comfortable totally disassembling your TV, then now is the time to get a professional in, or to get a new TV.
Backlights on modern Sony TVs come in LED strips of varying lengths. Older models used lengths that spanned the entire frame of the TV, but due to cost savings, more recent TVs use a set 16″ or smaller LED strip which is connected in series for each row to span your TV.

You can get replacement LED strips quite easily from eBay – just put in your TV model number to be sure you are buying the correct type.
If you have a TV backlight tester to hand, then you could get away with testing every backlight strip in your TV individually and only replacing the broken strips, but it’s a lot less work to just replace every backlight and skip the testing, particularly given the relatively low price of LED backlights.
See the full process for replacing backlights below. This isn’t for the faint-hearted, but it will save you a considerable amount of money from either professionally repairing or replacing your TV.
To prevent LEDs burning off their phosphor layer in future, make sure you do not set your backlight to 100% brightness. The phosphor layer is destroyed by thermal degradation of the LEDs, caused by a too bright backlight setting. Reduce this to the lowest level you are comfortable with to prolong your backlight’s life.
Sony TV Support & Warranty
It goes without saying that if your TV is under one year old, then you should contact Sony customer support to get it replaced under warranty.
You can call Sony directly on:
- 239-245-6354 (Mon – Fri, 9am – 9pm ET, Sat – Sun, 10am – 8pm ET)
Or text them on 239-245-6354, or ask for a callback.
Even if Sony won’t fix your TV, they might still offer you a discount off a future model if you pester them hard enough! This is always worth a try in my experience.
So, How Do You Fix a Sony TV Blue Tint?
To wrap up, if you’re seeing a blue tint on your Sony TV, then to fix it:
- Reset your TV.
- Replace your HDMI cables.
- Update your TV’s firmware.
- Factory reset your TV.
- Change your picture settings.
- Replace your TV’s backlights.
Hopefully you’ve fixed your TV, but if not, give me a shout in the comments and I’ll see what I can do to help.
Read More:


Leave a Reply