Download The Lightroom Develop System For Free!
If you want the source file to follow along with the video, you can download it from: here.
Video Transcript:
”
Hi, I’m Tim Daniels from www.lapseoftheshutter.com, and in this video we will cover how to turn snapshots into fine art photos, just like in this photo of Venice. Most of the processing is done in the Develop module of Lightroom, with a finishing touch in Photoshop.
This is the unprocessed photo from straight out of the camera that we will be using. If you want to download it to follow along, there is a link in the video description.
The first tip for creating photos like this is to choose the photo you will work on wisely. You can see that I took a lot of photos from this bridge in Venice at dusk. Because it was still quite light, I had to shoot with a short shutter speed, which means that the boats and the waves in the water intrude on the composition and distract the eye. Although in a lot of cases this would be fine, if you want to create a travel photo in more of a fine art style, it helps to not have any distracting elements. The easiest way to remove any objects that move from your photos is to use a long exposure. You will need a tripod, or just rest your camera on any fixed objects, like railings or low walls, around you. Then, either reduce the aperture of your lens, which will increase shutter speed to compensate, or better yet, attach a solid neutral density filter in front of your lens. I used a 10 stop neutral density filter for two photos, which meant that I could shoot at a shutter speed of between one and half to two minutes, without over-exposing the scene. If you take a look at these photos, you can see that the water has smoothed out, and most of the distracting elements are gone.
Let’s take this photo into the Develop module of Lightroom. You don’t have to process photos like this in a fine art style of course. It’s possible to process them in a much more subtle, naturalistic way. If you want some presets that will help you with this, take a look at www.lapseoftheshutter.com to get over 1000 totally free Lightroom presets.
But if you want to create fine art style photos, the second tip is that it helps to restrict your colour palette. I’m sure you’ve seen a lot of fine art photos that are in black and white. Removing colour removes distractions and helps your photo stand out from reality. After all, fine art photos are not supposed to be documentary pieces – you are free to do whatever you want.
But rather than making photos black and white, try toning them through white balance. First, push the global white balance up to really warm up the photo. Then, begin selectively recovering this with graduated and radial filters. Open the graduated filter tool, with it set to a slight negative temperature, and draw it over part of your photo, in this case the water, to begin toning your photo. Heavy vignettes always work well in fine art photos, and in this case you can add one with another graduated filter. All of the filter presets in this menu are available as part of the totally free Lightroom Develop System, that you can get access to from www.lapseoftheshutter.com. Let’s choose one for overall darken and draw it over the sky.
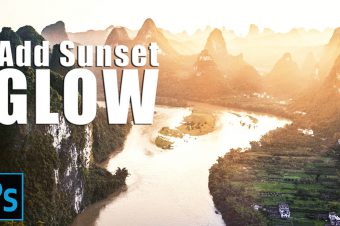
Now, we’ll use a radial filter to create a focal point in the sky, simply by targeting white balance changes to simulate the colours of a sunset. Make sure to invert this filter so that it stays within the bounds of the tool, and increase the feather to blend its edges. In this case though, I want it to not cover the buildings in the distance, but only the sky. We can fix that by setting the range mask of the filter to luminance, checking the box to show the mask, then modifying the range and smoothness until the mask is largely confined to the sky.
I’ll create another radial filter, with a negative temperature this time, to bring back some of the blue in the water. Then we can boost the brightness in the sky through another graduated filter. This is set to reduce highlights and blacks, and increase shadows and whites. Generally, these settings boost both brightness and contrast in a controllable way, that doesn’t go too far.
Finally, we can use an add coolness brush to paint in a bluer colour to the buildings, so that they stand out a little better from the sky, and help the blend between the blue water and orange sky feel better for the eye. To help make this easier, you can switch on the show selected mask overlay option to be able to see where you are painting.
It’s quite an extreme change from the straight out of camera photo, but how far you take this is entirely up to you. The third tip for creating fine art photos is to always use the crop. Personally, I prefer to do this towards the end of processing, when you can see much more clearly what you have done. Don’t be afraid to be extreme with your cropping. For this photo, a more cinematic, letterbox shape works well.
If you only wanted to use Lightroom, you could stop processing here. If you take this into Photoshop though, there is one little extra step that will give it a subtle boost. If you’ve chosen to download the Lightroom Develop System from www.lapseoftheshutter.com already, you will have noticed that you also received a free action pack for Photoshop. After loading your photo into Photoshop, you can use the Highlights Glow action to create a dreamy effect in the sky. If you want to learn how to create this effect yourself, without using the actions, take a look at the video ‘The Secret to Make Sunsets GLOW’. Here, the effect is a little strong, so you can reduce the opacity of the Highlights Glow group, and use a large, soft brush to remove its effects from the buildings.
Don’t forget, there’s much more at laspeoftheshutter.com, including free downloads for Lightroom and Photoshop, and the free Landscapes masterclass, containing a full digital blending workflow.
”
Subscribe to the mailing list and get a free download link right now
Leave a Reply