As you Photoshop image file gets bigger, you might want to merge layers to save space, or to make the image adjustments easier to navigate, but you can then run into a problem if you need to go back and edit the individual layers that you have merged.
In this article, I cover how to unmerge layers in Photoshop, or how to unflatten layers in photoshop, plus give you some tips on how to structure your working file in Photoshop so that you don’t run into the same problem again.

How to Undo Merge Layers in Photoshop
Although it is always possible to undo merge layers in Photoshop, you will likely also lose any adjustments that you made following the merge. This is because the default way of merging layers is essentially a permanent solution – the only way to unmerge layers is to undo it using your saved history.
You can use the following steps to unmerge layers, but I would suggest then looking at the next section to understand how to non-destructively merge layers in the future.
1. Use the Unmerge Layers Photoshop Shortcut Key
The unmerge layers Photoshop shortcut key is:
For Windows:
Ctrl + ZFor Mac:
Cmd + Z
Note that in some situations, you might have to use Ctrl / Cmd + Alt / Option + Z to undo un-merging.
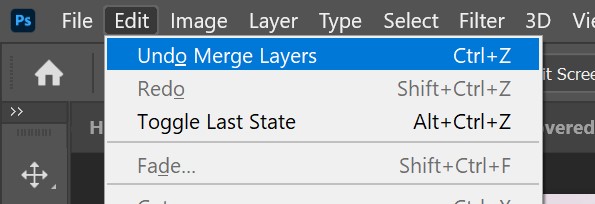
2. Use the Menu
You can also use the menu, by going to Edit -> Undo Merge Layers.
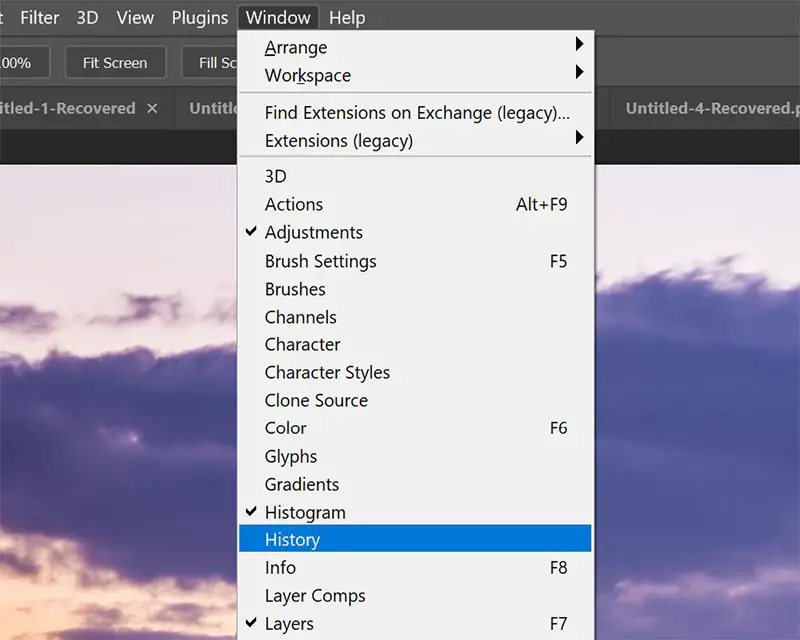
3. Use the History Tab
The first two methods work well only to undo merging of layers where you have only just merged them.
If you have merged your layers before performing other adjustments, then you will have to go into your history to restore the state prior to you merging your layers.
This means that you will lose all adjustments made after merging layers. But unfortunately, there is no other way to unmerge layers, unless you are using one of the non-destructive ways listed below.
So, open your History panel, by going using the menu Window -> History.
Find your step in the History where you merged layers.
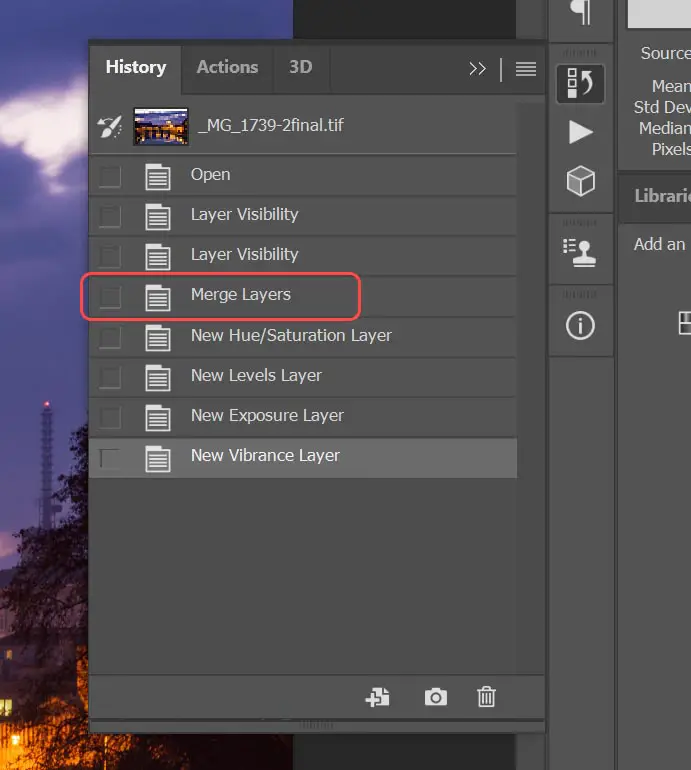
And click on the step that is one before the Merge Layers step. This will restore your layers, but all work after this step will be lost.
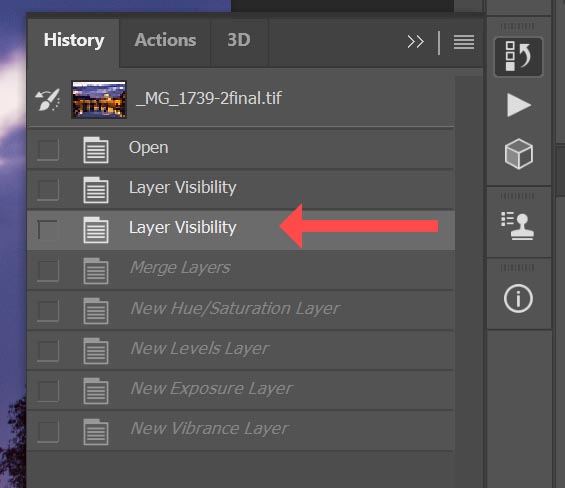
If you don’t see your Merge Layers step in your History, it’s likely because you have gone beyond the default 50 steps that are saved to history. If you want to increase your number of saved history states, follow the menu Edit -> Preferences -> Performance and modify the History States box.
Prevent Merge Layer Problems in Future
If you’ve asked how to unflatten an image in Photoshop, you’re almost certainly hoping for a way that does not lose all of your work since you flattened your image or merged your layers.
If you set your file up correctly from the start, then it is possible to merge layers in a non-destructive way, that can be reverted at any time, without losing any of your later edits.
Use Smart Objects to Easily Unmerge Layers
Don’t use the Merge Layers option to combine layers, but instead create a Smart Object. This is fully editable, with each layer saved independently into the Smart Object, and you can easily revert it at any time.
Select the layers you want to merge, right-click and choose Convert to Smart Object.
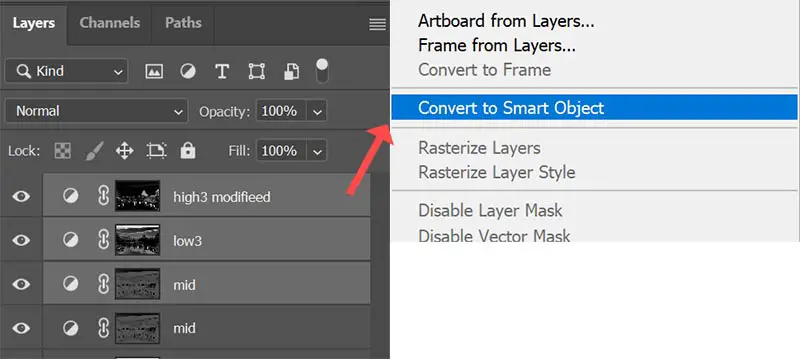
This merges the layers into a single Smart Object in your Layers palette. You can tell that this layer is a Smart Object by the document icon in the bottom-right of the thumbnail.
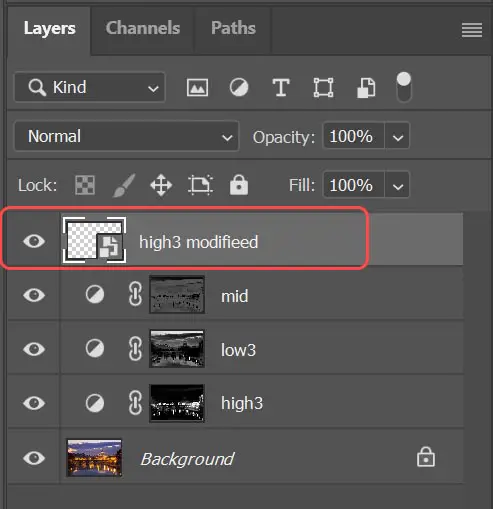
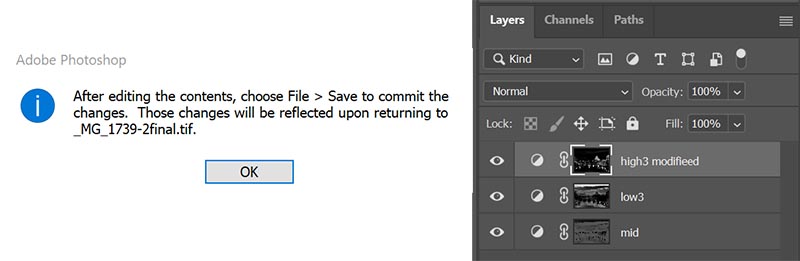
The great advantage of this method of merging layers is that each individual layer remains editable. If you double-click on the thumbnail for the Smart Object, it opens in another tab where you can then make any edits to each layer, before saving the edits back to your main file.
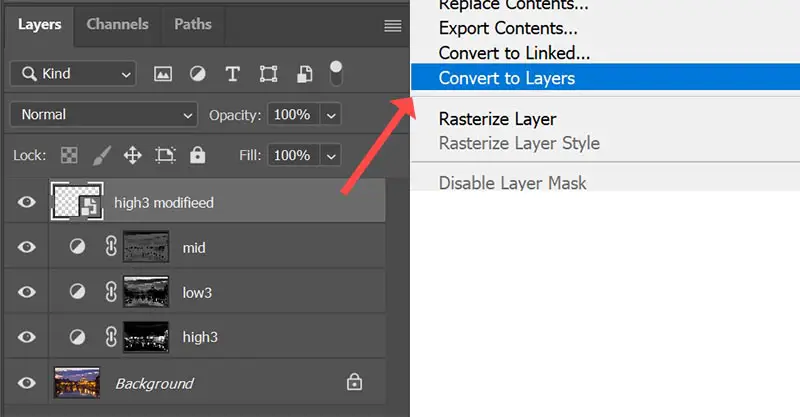
And if you want to re-instate the layers in your original document, then simply right-click on the Smart Object, and choose Convert to Layers.
The only negative to using Smart Objects is that they take up more disk space, and use more RAM when your file is open, but the advantage of being able to easily go back to a prior state without undoing other edits is a massive bonus.
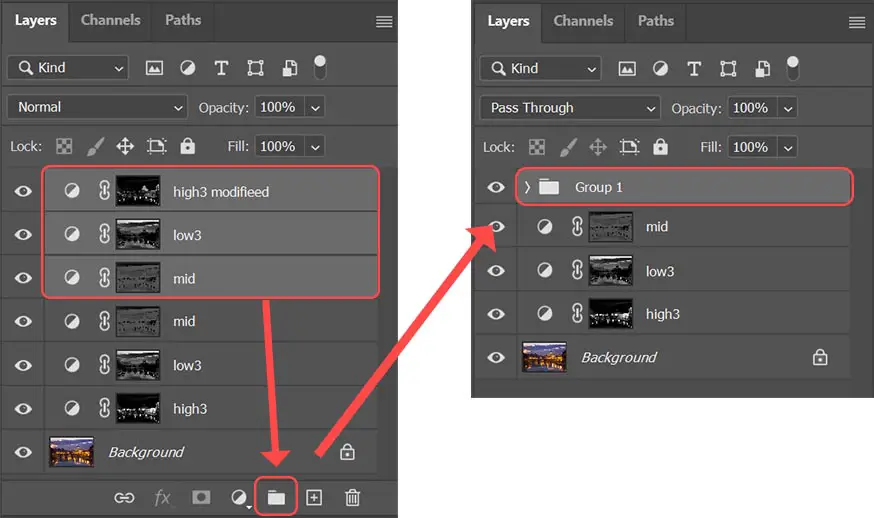
Group Layers into a Folder
If you want an easier way to manage layers than using Smart Objects, it’s very straightforward to simply group them into a folder. This has the advantage of making you layers palette neater, and makes it much easier to see which layers are having what effects on your image.
Select the layers that you want to merge, and use the keyboard shortcut Ctrl + G for Windows, or Cmd + G for Mac.
Or alternatively drag the selected layers to the Folder icon in the Layers palette, which will create folder called Group 1. You can expand this folder to see your individual layers.
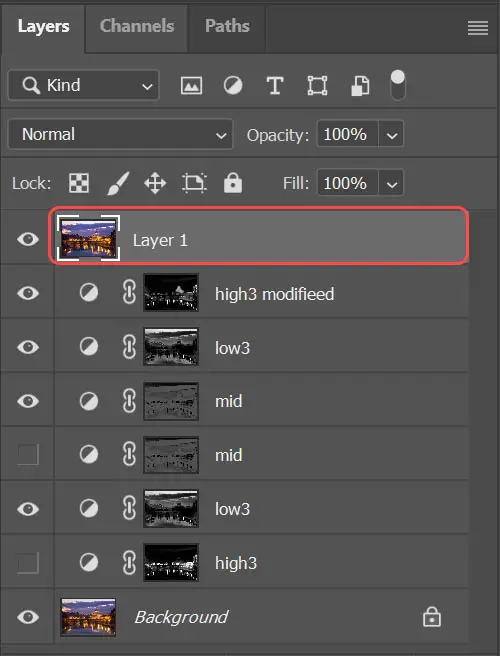
Merge Visible
The most common merging method I use is to merge visible. This creates a new layer that contains everything your currently have visible in your layers palette, and means that you essentially can keep your original layers as a backup, while working on the new merged layer.
To merge visible, first make sure the eye icon is next to any layers you want to merge. If you don’t want a layer to be included, then remove the eye icon.
Then, press Ctrl + Alt + Shift + E for Windows, or Cmd + Option + Shift + E for Mac.

Read More Photoshop Tutorials:
See all of the free photography fundamentals tutorials
How to photograph the Northern Lights


Leave a Reply