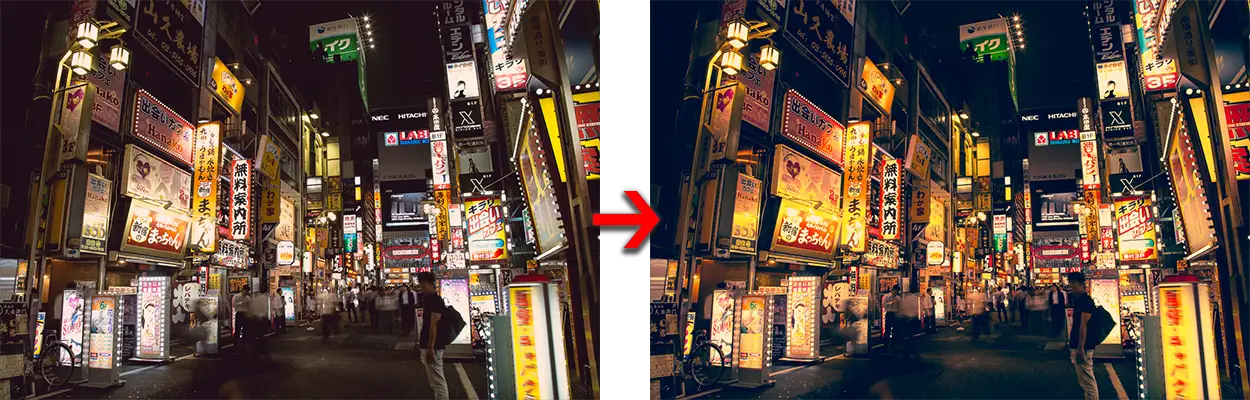
Applying a cinematic effect to your nighttime city photos is a popular way to turn them from snapshots into something special, like in the examples of Masashi Wakui. I’ve been following his work for years, and finally wanted to try and figure out how this effect is done, without using any plugins in Lightroom and Photoshop. The key parts of this technique are the crushed blacks, the glow in the highlights, and the colour toning.
In this tutorial, you will learn how to recreate this effect by hand in Lightroom and Photoshop, adding a cinematic look to the photo below. The basis of this technique is to use an extreme white balance that is then recovered by split-toning.
Step 1 – Set the White Balance
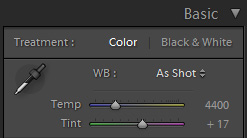
This may initially look bad, and you might think it has gone too far, but it provides the base tone for your photo which the effect is built on.
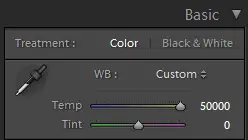
Step 2 – Recover the Colours
Next, add colour depth to your photo through split-toning. In the split-toning tab, set the highlights to yellow (a hue of around 60), with a saturation of 50, and set the shadows to blue (hue around 225), with a saturation of 100.
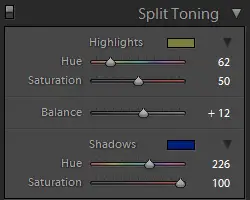
Play around with the balance, and you should see a large colour change in your photo, lessening the effects of the white balance.
Step 3 – Fix the Shadows
Most of the colour toning should now be complete, but you can perfect the shadows by pushing the shadows tint in the camera calibration tab to one extreme.
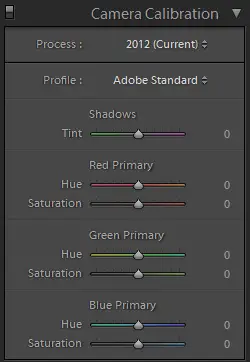
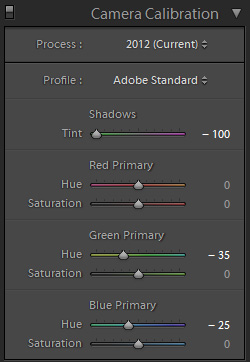
Making changes to the green and blue primary hues will also subtly tone the shadows, even if you are making what appear to be large adjustments.
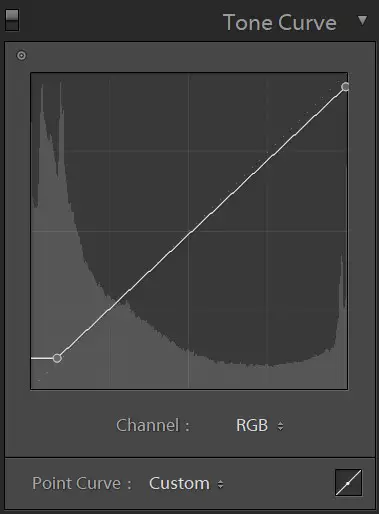
Step 4 – Create Crushed Blacks
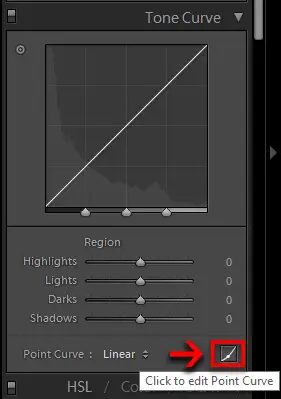
Bringing a foggy feeling to the blacks is a key part of this workflow, and can be done through advanced options in the tone curve. Move to the tone curve and click on the little symbol in the bottom right to activate the point curve. This gives you access to the individual colour channels and lets you directly change the shapes of these curves.
Make sure RGB is selected as the channel, then click on the curve towards its bottom end and drag it up until it looks good to you. This only affects the grayscale luminosity of the photo. This means it changes how bright and dark various parts of the photo are, without affecting any of the colours.
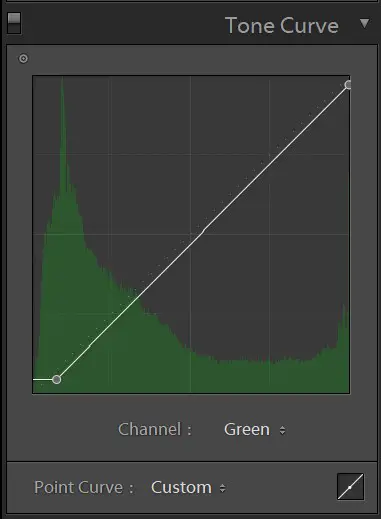
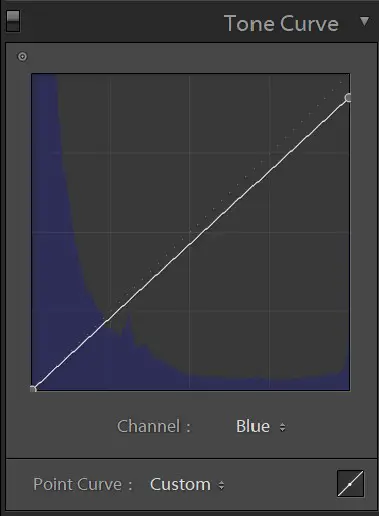
You can repeat this with the individual colour channels if you feel it is necessary. This will affect how light and dark the colours are. For this photo, copying the effect on the Green channel of the tone curve adds green toning to the shadows, and you can remove blue toning from the highlights by pulling down the top-end, bright part of the Blue channel.
If you don’t want to have to do any of this by hand every time you recreate this effect, you can use the free Lightroom presets that are available as part of the Lightroom Develop System.
There are a few more minor adjustments to make to finish this photo in Lightroom, such as reducing contrast and increasing clarity, compressing the brights by raising the highlights but lowering the whites, and giving a slight vibrance boost. Finally, we can boost sharpening to a quite extreme level.
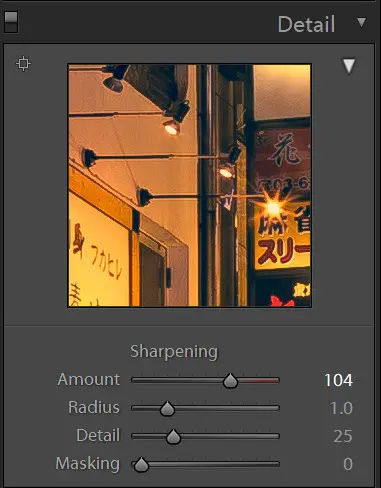
This is too much for most photos, but works well with this effect, particularly as we will be adding in some softness in Photoshop.
Now, all that is left to do is to export to Photoshop to finish the photo.
In Photoshop
Step 5 – Add Highlights Glow
A key step in this workflow is to create a glow in only the brightest parts of your photo, that doesn’t appear in the shadows. Unfortunately, this is the only important step that can’t be done in Lightroom. The quick way to do this in Photoshop is to use the action in the free Photoshop Colour Control Action Pack, but you can create this effect by hand without too much trouble, if you’d prefer. It’s a little too complex to go into here, but take a look at the video below for a more in-depth look at this, or read the video transcript on the how to make sunsets glow page.
Conclusion
Once you have added glow to the highlights, it’s possible to finish here if you like. I’ve skipped a number of more minor steps in this workflow that can improve your final photo, but aren’t as necessary as the key steps above. If you would like to view every step in detail, take a look at the full workflow video below.
Why not try this out and let me know how you got on?
There are also plenty of other free tutorials and resources at www.lapseoftheshutter.com.
Subscribe to the mailing list and get a free download link right now

![Photoshop Eraser Not Working? [FIXED]](https://www.lapseoftheshutter.com/wp-content/uploads/2022/04/photoshop-eraser-not-working-340x226.jpg)
Leave a Reply