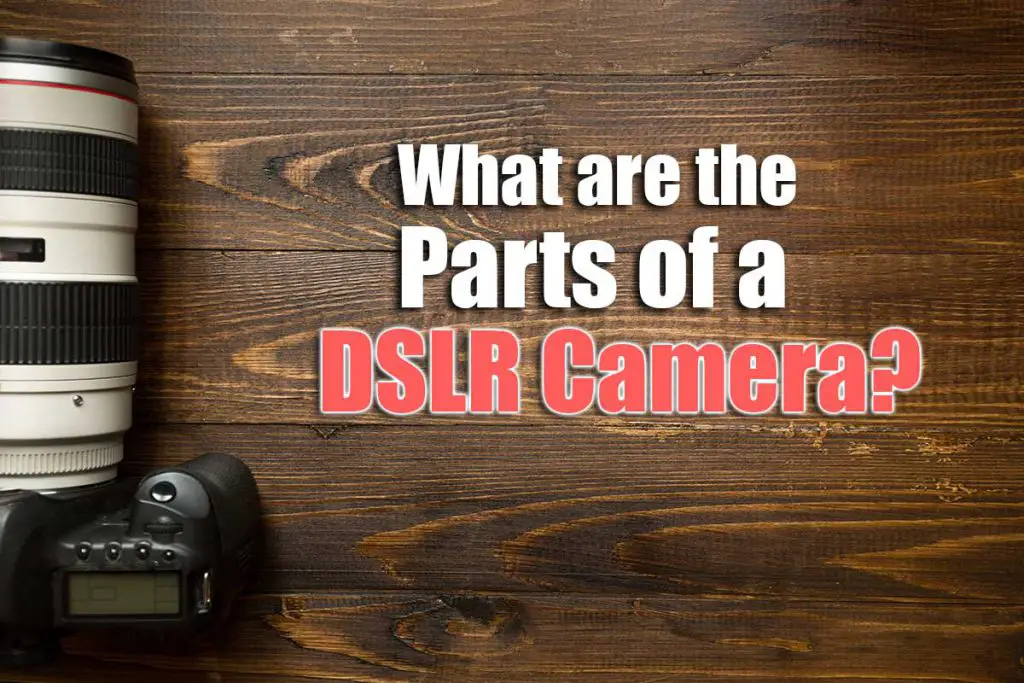
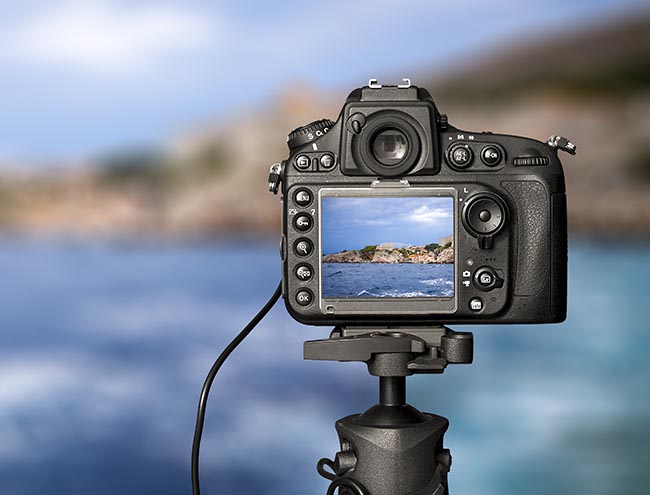
Although there are multiple camera types, the components of a camera are common across most of them. Before you start using your new camera, it helps for you to be familiar with the parts of a DSLR camera so you can understand how to use it correctly.
Understanding all of the DSLR camera parts and functions is one of the basic steps any aspiring photographer should take to improve their skills.
This article covers the most important DSLR components, and shows you what the associated DSLR parts and functions are.
Components of a Camera
The main parts of the DSLR camera can be broken down into camera parts and functions and lens parts and functions. We’ll start by describing the different lens parts in parts 1 – 8, then move on to the camera parts names in parts 9 – 24, with all of the camera parts labeled in the associated images so that you can be sure what you are looking for on your own camera.
1. Parts of a Camera Lens
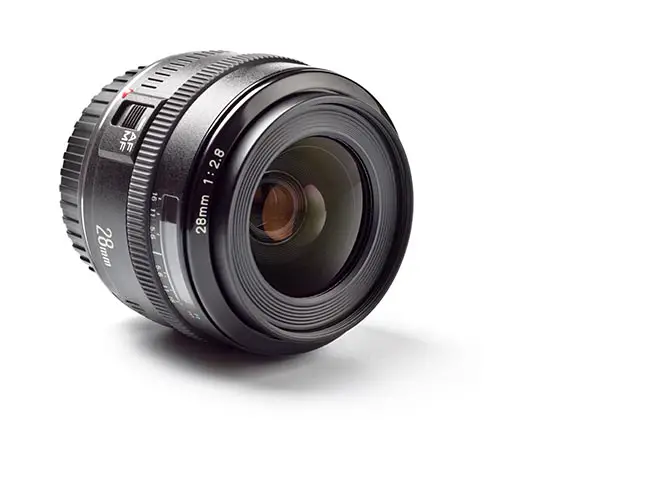
The lens allows light into the camera and to the sensor, allowing the camera to process the captured image. More basic cameras have a permanently fixed lens, but DLSRs include a removable lens.
Lenses come in different types and focal lengths, from macro lenses which are capable of closeup focusing, to long focal length lenses which can capture a distant scene. As you continue using and exploring the different functions of your camera, you’ll realize that you’ll need other lenses to achieve the results you want, be it a wider angle or a different zoom range, for instance.
2. Zoom Ring
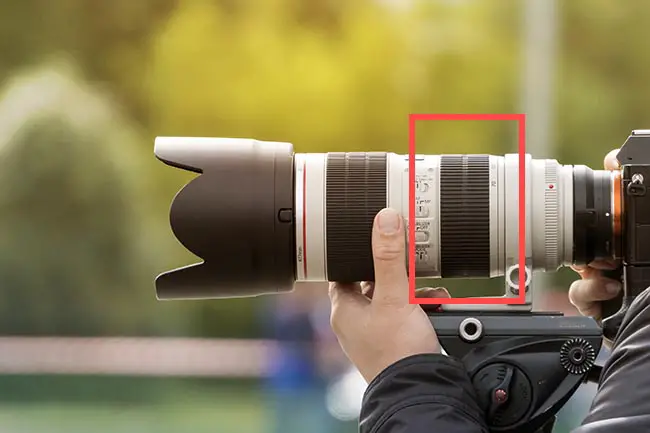
As the name suggests, the zoom ring allows you to modify the image’s zoom levels. Different lenses have different zoom capabilities, but they all focus on changing the focal length, with a longer focal length corresponding to a larger zoom.
Zoom rings are integrated into the lens, unless it is a prime lens. Prime lenses have a static focal length, but usually offer better image quality at this fixed focal length.
3. Focus Ring
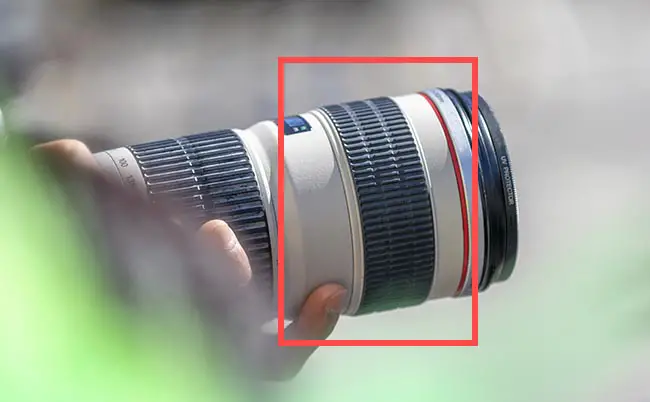
The focus ring is another part of a DSLR camera that’s located on the lens, usually towards the front. It allows you to modify the focal point for your photo. When you have selected manual focus mode, the focus ring allows you to move focus between the foreground and background of the scene you are photographing.
The depth of the focal plane depends on aperture, which we will look at shortly.
On most lenses, you will find a distance marker in a window in the lens that indicates where the lens is currently focused – this will be the sharpest point in your resulting image.
4. Autofocus / Manual Focus Button
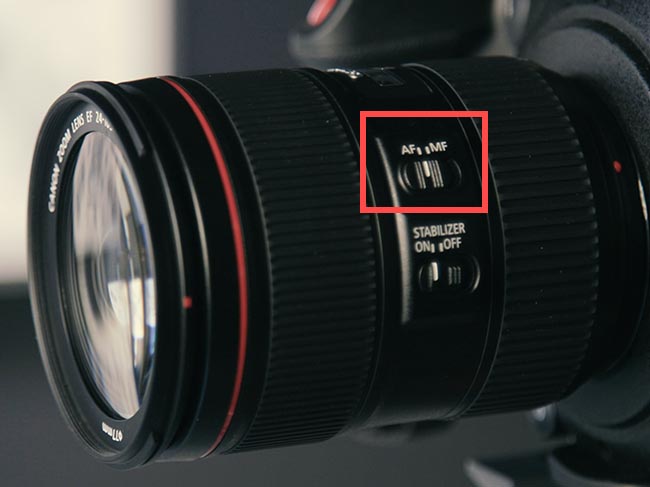
Besides the focus ring, some DSLR cameras include an autofocus or manual focus switch or button, usually located on the lens. This function allows you to choose how your camera will focus on the image.
With autofocus, or AF, selected the camera’s autofocus system will automatically use its hardware and software to determine the correct focus.
With manual focus, or MF, selected, you are able to modify the focus by using the focus ring. It can come in handy when the autofocus function doesn’t deliver the results you desire, such as in night photography.
5. Lens Release Button
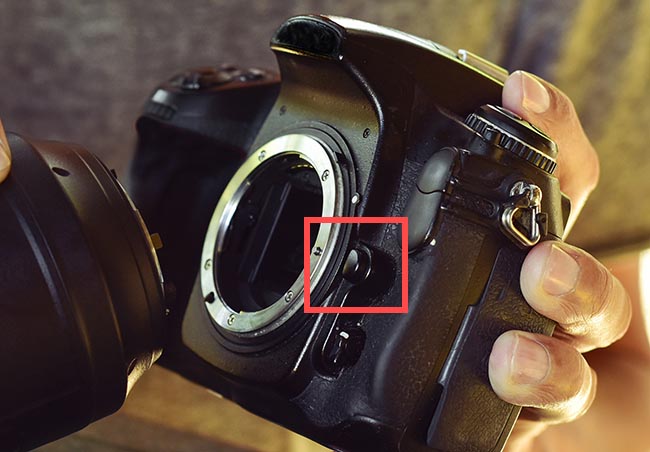
If you want to change lenses, then all you need to do is press the lens release button, and then you’ll have to rotate the lens so you can remove it from the camera. You only need to press it when you want to unmount the current lens.
To mount a new lens, line up the red dot on the end of the lens connector with the red dot on the camera body, then twist clockwise.
6. Lens Hood
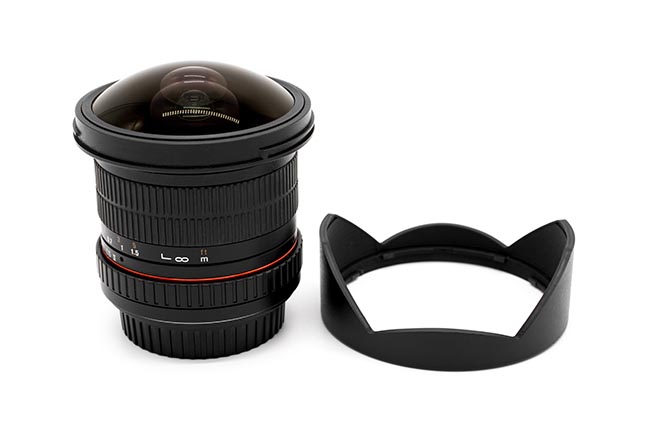
A lens hood is an optional DSLR camera part, as its main function is to prevent lens flare when shooting in the direction of the sun, although it also helps to keep the lens protected from any accident.
As a removable part, you should know that a lens hood is not available in all lenses, and can be especially difficult to use with wider angle lenses due to their wide field of view.
7. Lens Flange / Connector

Each camera brand lens type (such as Canon FD or Nikon FX) has its own set distance that separates the mounting flange and the sensor plane. It is known as the “flange distance,” “connector,” or “register distance.” The mounting flange is an external part of the lens which connects to the the lens connector on the camera body. This forms a seal to prevent stray light from getting to the sensor.
Lenses from different manufacturers (and often within the same manufacturers but across camera types) have different lens flange specifications, meaning that you cannot mix and match lenses between camera brands.
8. Aperture
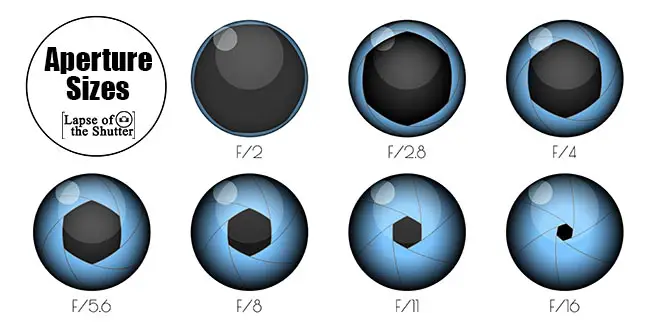
The aperture allows you can change the image’s exposure and the size of the focal plane. It does so by modifying the diameter of the lens, allowing either more or less light to reach the image sensor. You can read the aperture as f/stops (i.e., f/2.8).
In the days of early film cameras, many cameras had a fixed aperture lens. However, cameras have evolved, and now most camera models include a range of apertures that you can select, although this does tend to get more limited with larger zoom lenses.
You can make images sharper, with a larger focal plane by stopping down the aperture (eg. f/11), or you can increase bokeh and decrease the amount of your image in focus by opening the aperture (eg. f/1.8).
9. Camera Body
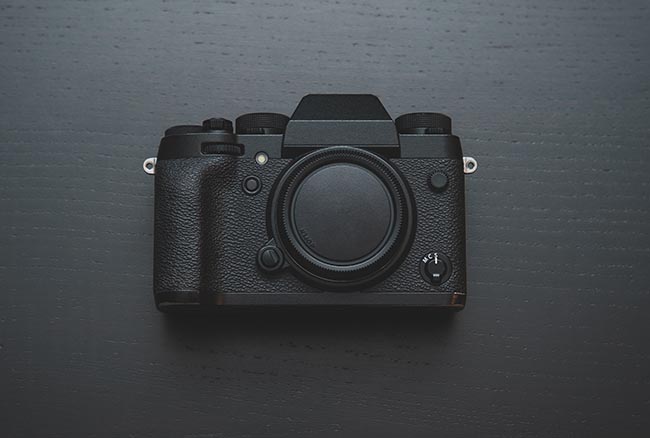
The camera body contains the camera sensor and all of the software that handles image creation, plus most of the buttons that you will use day-to-day in your photography.
Camera bodies can vary in size, shape and weight based on the type and brand. For example, it’s typical for pro-level DSLR cameras with long lenses to weigh about 5lbs or more; therefore, you’ll need a bag to store them as they’re too big to fit in your pocket, unlike compact cameras.
10. Sensor
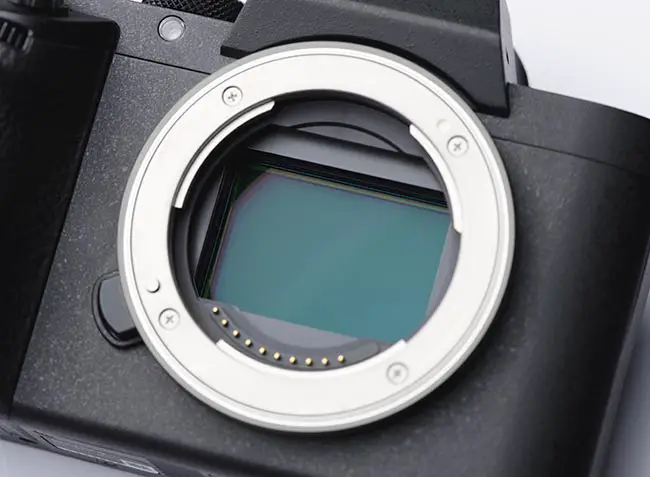
The image sensor is one of the most important parts of a DSLR camera as it allows the device to record light. It is located behind the lens and it has a rectangular shape.
Thanks to the sensor, the camera can record the light and transform it into the image you’ll later find on your memory card. Also, like with other camera parts, the size depends on the brand and the camera type, with sensor sizes ranging from APS-C to full frame in typical DSLRs, which are much larger than the sensors usually found in budget cameras.
It’s also worth noting that the smaller the sensor, the less capable it will be of processing light. As a result, compact cameras, with their smaller sensors, tend to give you a low-quality photo, unlike the higher image quality of DSLRs.
11. Viewfinder
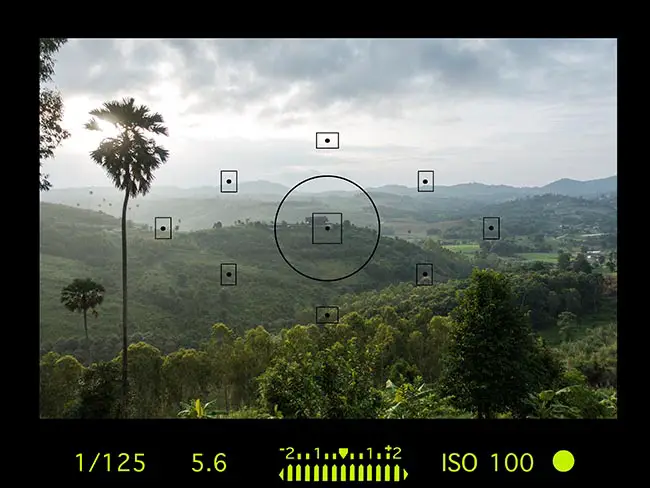
You can easily identify the viewfinder, as it is the part of the camera you look through when you are composing your shot. It varies based on the camera, with some models using an LCD screen as a viewfinder, and others having an optical system.
As various factors that affect the final result of your photo exists, the image recorded to your memory card may not be exactly what you perceive through the viewfinder. Therefore, you shouldn’t think of it as a “preview” of the final result of your photo, but more of a guide.
12. Shutter Release Button
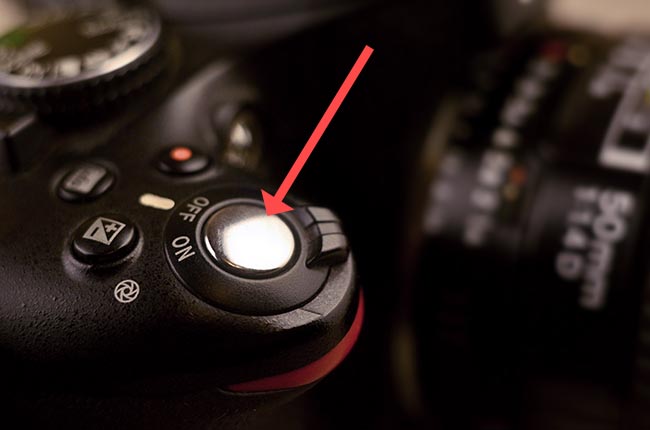
This button allows you to take pictures. Once you press the shutter release button, it will send a signal to the shutter, which will open and close depending on the shutter speed you’ve set. Light goes through to your sensor, and the image will be lightly processed and recorded directly onto the device’s memory card.
Unless you are shooting in fully auto mode (more on this later), you will have to select either the shutter speed and / or the aperture prior to pressing the shutter, according to the effect that you are trying to create.
13. Screen
In the modern-age, most digital cameras include an LCD screen – if not all. You can use it to see all the images or videos that are stored on the camera’s memory card, and use it for live-view photos.
On most models, the LCD screen can be fixed to a specific place within the camera body, or it can be a flip-out screen.
The usage of an LCD screen as a viewfinder has been trending due to its convenience. Unlike the traditional viewfinder, the screen will show you a preview of how the picture will look based on your settings.
14. Mode Dial
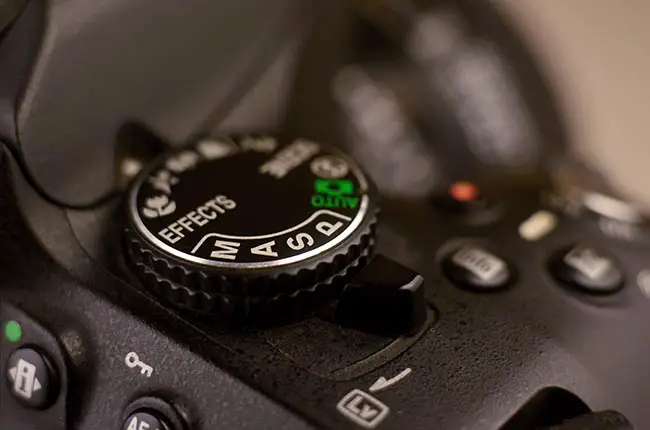
The mode dial allows you to set the camera based on the shooting mode of your preference, such as shutter priority or aperture priority. There are also program and manual models.
You can easily identify each of the modes mentioned above by the letters P, S, A and M.
Program mode is essentially fully automatic, where you don’t have to select aperture or shutter speed yourself.
Shutter priority requires you to select the shutter speed, but everything else is handled by the camera.
Aperture priority has the camera dealing with everything except aperture, which you must manually select.
Manual mode is where you select both the aperture and shutter speed.
15. Exposure Compensation Button
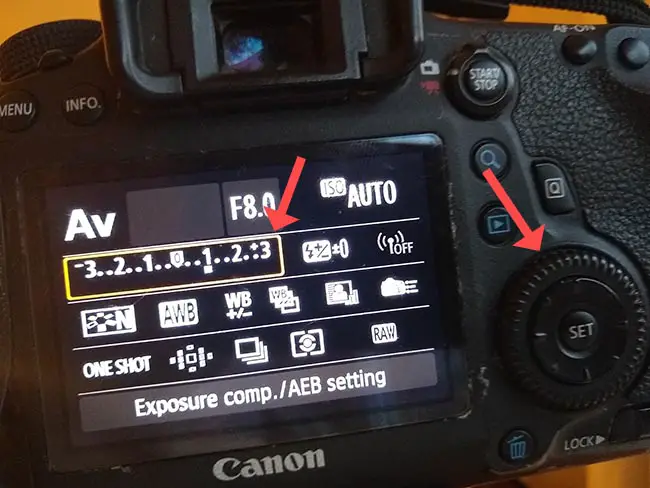
By default, the camera will be looking to create an image with a balanced exposure, but sometimes you might want to change this. The main function of the exposure compensation button is to modify the image’s lighting settings, making it darker or brighter. It still allows the device to choose the optimal configuration based on your preset options.
16. Autofocus / Autoexposure Lock Button
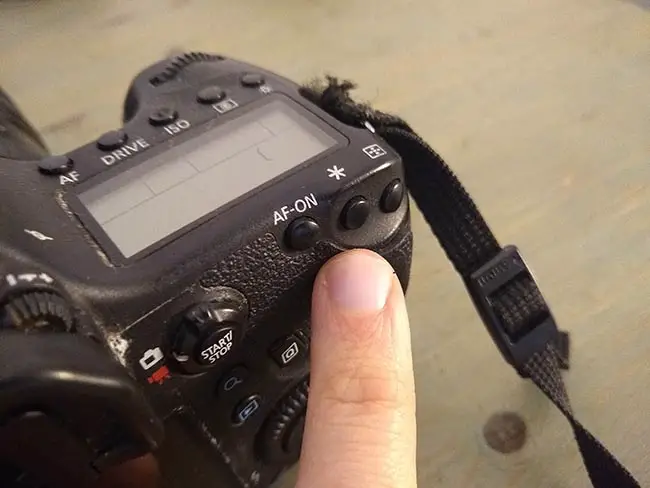
Some cameras have an autofocus-autoexposure lock button (AE/AF Lock), which, as the name suggests, will lock the settings for focus and exposure that the camera has chosen when you press the button.
It is mostly utilized by photographers as a quick way to keep the camera focused on a specific point, so they can take multiple shots with the same exposure while emphasizing a certain object.
17. Playback Button
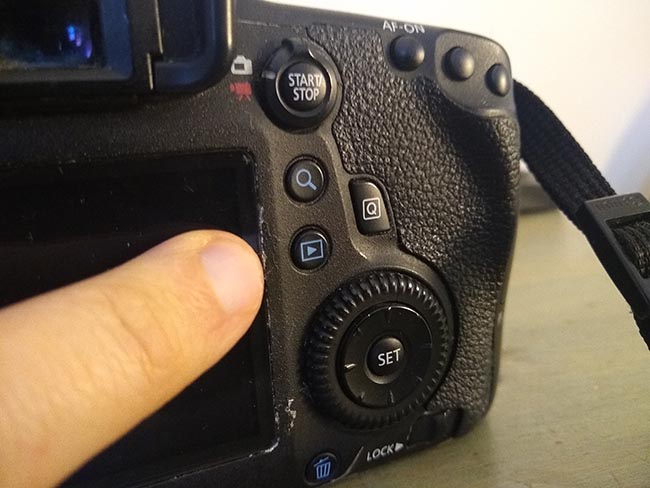
This button allows you to access the different pieces of media you have captured with your camera, be it videos or pictures. You can also see images that weren’t taken by your camera if they exist within your memory card.
18. Video Button
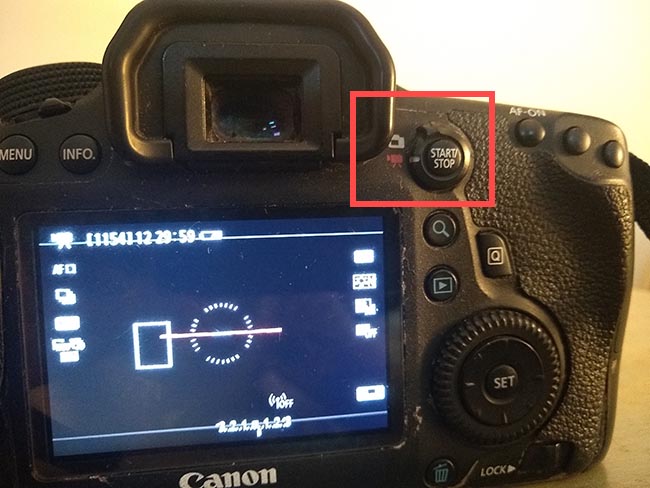
The video start-stop button is easy to identify as it has usually has a small red dot on it. If you don’t want to shoot a video, don’t press it.
Although the red dot is a universal symbol of the video button, it may have a different location based on the model and the brand. Some cameras don’t even have a video button; they utilize the shutter release button along with the movie mode instead.
19. Flash
Although some professional camera models lack flash, it is present in most modern DLSR cameras aimed at hobbyists. It is a useful resource that you can use if you’d like the picture to have some extra illumination.
It’s also worth noting that some cameras have a flash button integrated, which you can press while any of the exposure modes are functioning to activate the flash. Like the red dot from the video button, this one can also be identified by a “lightning bolt” symbol. Its location may vary from a model to another.
20. Memory Card Slot
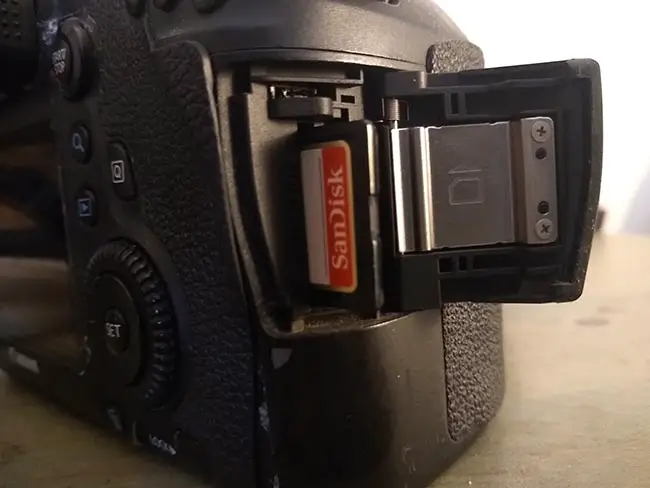
Although some cameras have a built-in memory card, the memory card slot allows you to add your own memory card to store the captured pieces of media, to then transfer to an external drive or your computer. As an essential part of a camera, it is present in most modern models.
You may also come across some professional cameras that have more than one memory card slot integrated. These extra slots provide the user with more security since the camera can store the image in any memory card with enough storage space if one fails to do so.
Memory cards accepted by modern DSLRs are usually full-size SD cards, although some use Compact Flash or other memory card types.
21. Hotshoe
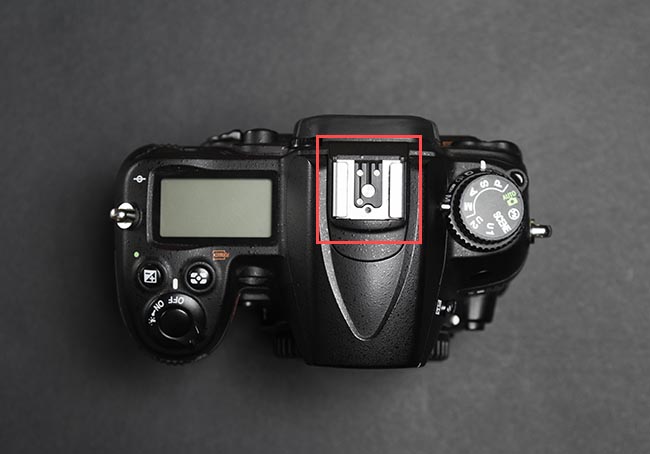
Most contemporary DSLR cameras have a hotshoe. You can easily identify it as a metal bracket in the upper area of your camera.
The hotshoe is equipped with sensors, which allow the camera to send signals to any external accessory, such as a flash. The camera will activate these accessories after pressing the shutter.
22. Diopter
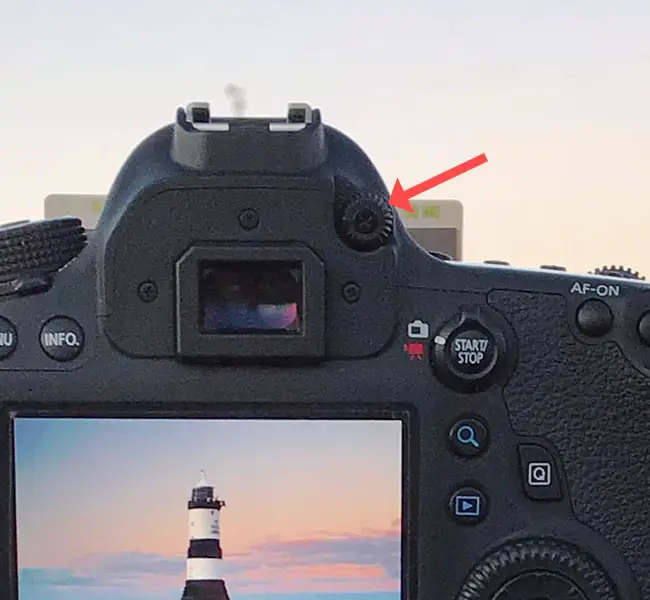
The diopter, or diopter adjustment, is a tiny dial that you can use to enhance the visibility of the image in the viewfinder. It is more common on Canon and Nikon cameras.
If you have any condition that affects your vision such that you wear glasses, the diopter can be an essential resource for capturing the images you desire, as it allows you to focus the image within the viewfinder.
23. Auxiliary Inputs
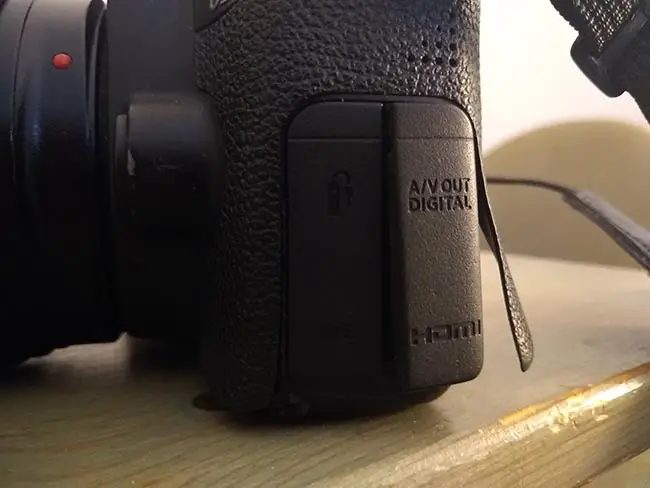
Most DSLR cameras include auxiliary inputs that will help you perform multiple actions, such as connecting your camera to your computer via an HDMI cable or connecting a shutter remote.
If you explore different DSLR camera models, you will see that most of them have different auxiliary inputs available with many useful functions. However, you shouldn’t pay too much attention to this aspect, as they act as accessories to the main camera features.
You can still take professional pictures without the auxiliary inputs, but they can aid you during the composition process.
24. Baseplate Receiver
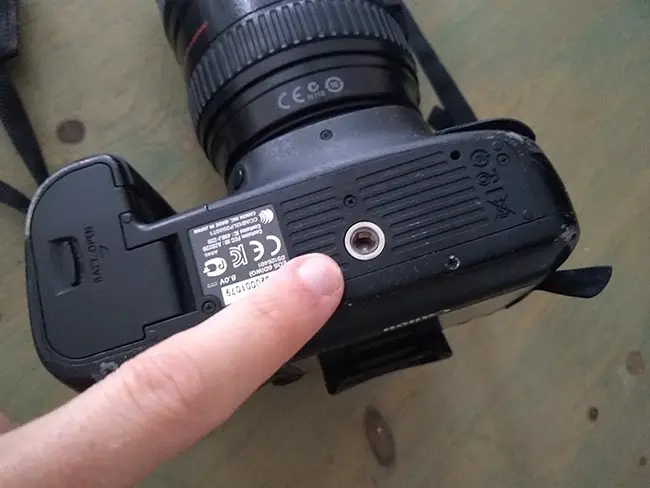
You can find the baseplate receiver in the bottom area of your camera, and you can use it to mount your camera onto a tripod head. It may have measurements of 1/4″ or 3/8″. It’s a female receiver where you can screw a quick release plate to attach your camera to a tripod without too much effort.
Read More:
What are the parts of a camera lens?


2 Responses
Sayem Ahmed
Thanks a lot! It helped me a lot to understand the parts of a DSLR Camera.
Venus Bartena
Thanks alot it helps me understand the parts of a DSLR camera