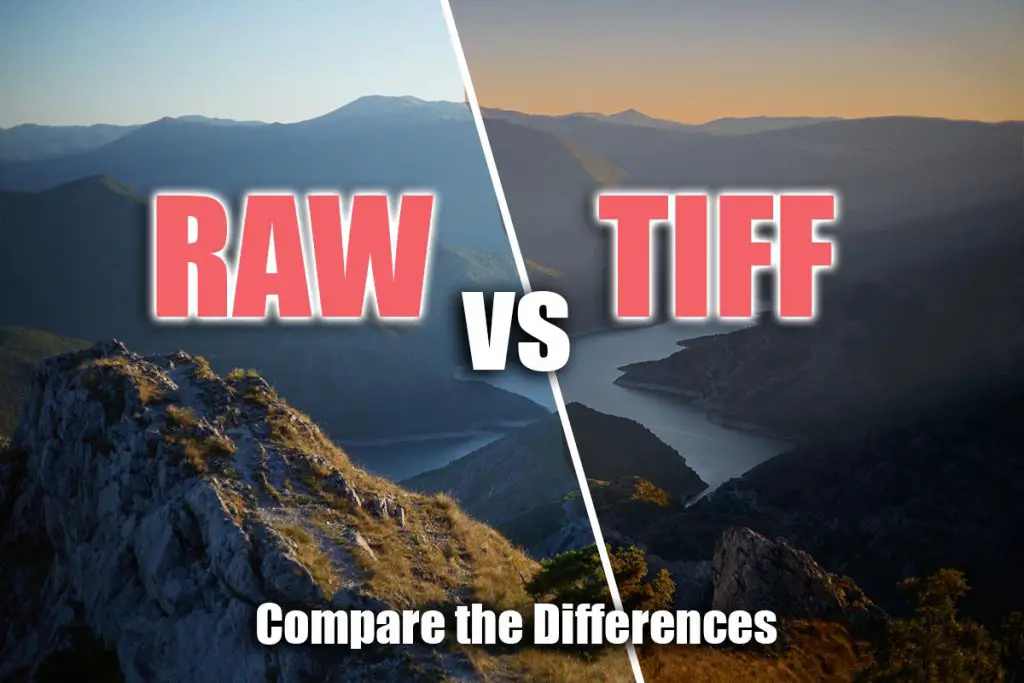
If you are getting into photography or you have been doing photography for a while, you’ll probably get acquainted with both RAW and TIFF file formats.
There are common misconceptions about both of them, as people often think that they work pretty much the same. Sadly, that is far from the truth. Both files have their pros and cons and have some overlap. However, they aren’t a replacement for one another.
This article will go through all the ins and outs of both image formats, and it will cover everything you need to know and understand about RAW and TIFF files.
TIFF vs RAW: A Quick Comparison
| RAW vs TIFF Comparison | RAW | TIFF |
|---|---|---|
| Image Quality | Perfect image quality with complete sensor data contained. | Perfect image quality with limited highlight and shadow recovery. |
| Color Fidelity | Up to 14 bits per channel. | Up to 32 bits per channel. |
| File Size | Smaller files. | Larger files. Often significantly larger if it contains layers. |
| Compression | No Compression. | Can be saved with or without compression. In any case, it loses highlight and shadow recovery data. |
| Support | Not supported for general use. Supported by editing software. | Widely supported. |
| Suitability for Editing | Used for initial edit and developing, but the edit has to be exported to a different file format. | Good for preserving editing changes using layers with maximum capabilities. |
| Layers | Does not support layers. | Supports layers. |
RAW vs TIFF – What is the difference?
Many people confuse RAW with TIFF thinking that they have the same features, just one being universal and the other one being brand specific.
The reality is that RAW and TIFF are very different file formats. The RAW file is, in essence, a data dump from the sensor, without any processing whatsoever, simply all the data that the sensor gathered for that exposure packed in a file. The rest of the processing is done afterward.
TIFF, on the other hand, is a lossless image format with a wide color gamut capabilities. However, it can’t contain the data that a RAW file has. You can save an edited RAW file as a TIFF if you want the best quality deliverable. TIFF can also save the layers that you might create in Photoshop.
If you were to save a RAW file with slightly overexposed highlights to a TIFF file without any edits and then try to recover those highlights from the TIFF file, you are not going to get far. Recovering those highlights from a RAW file however, can be done to the extent of the camera capability.
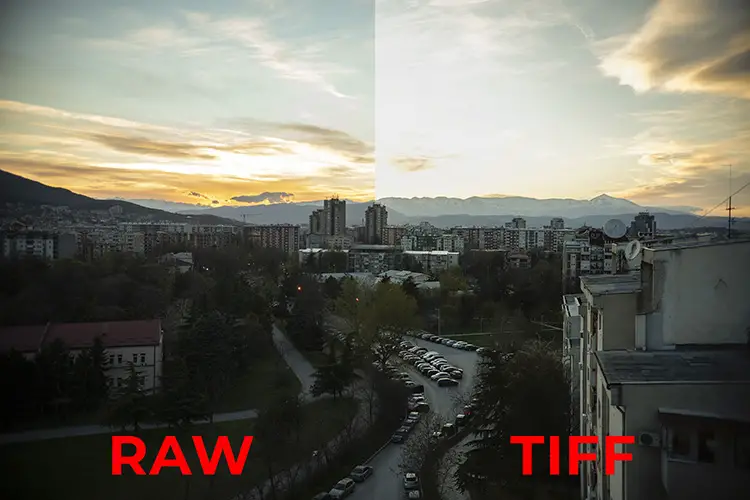
(Image by Dzvonko Petrovski)
As you can see, recovery in a TIFF file is pretty much not going to happen.
(Image by Dzvonko Petrovski)
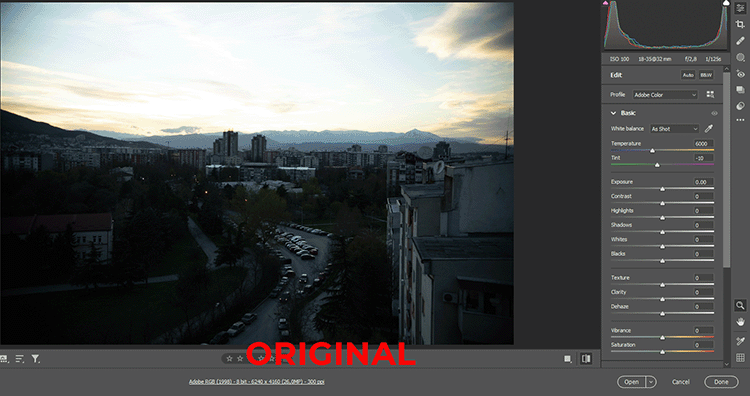
However, unlike JPEG, you can save a 14 bit edited RAW file into TIFF file format, keeping all 14 trillion possible color hues that the RAW file can generate.
RAW – the Good and the Bad
Since the RAW file isn’t actually an image, and it needs to be parsed by a RAW image editor of your choice, be it Photoshop, Lightroom, Capture One, Luminar, or whichever editor is your go-to, it has its pros and cons.
Each camera manufacturer marks their RAW files differently, more precisely, with different file extensions. Canon uses .CR2 and .CR3, Nikon uses .NEF, Sony uses .ARW, Fuji has .RAF, and so forth. Even though the extensions are different, the functionality is the same.

(Image by Dzvonko Petrovski)
RAW files, in essence, contain everything the sensor has seen without it being processed and saved as a common image format, avoiding the limitations of the common image formats.
Moreover, you can not save a photo in a RAW file, at least not in the original file. You can save it as a .DNG, which is close enough. But you won’t be able to save an edited Canon .CR3 file, back to .CR3. In that sense, you always have the originals intact. Which is neat.
Having all that data from the sensor allows you to do more aggressive edits and recover lost details in the shadows and highlights. Details you wouldn’t have if you were to use a JPEG or a TIFF generated by the camera.
RAW file Pros:
- Keeps all the sensor data without any compression
- Clipped highlights and shadows can be recovered to an extent.
- You can do aggressive white balance changes without any issues.
- The RAW file stays intact no matter the edit. It is great if you want to do another edit down the line.
RAW File Cons:
- Can’t be used straight out of the camera.
- RAW editing software solutions usually need a couple of weeks before they support RAW files from newly released cameras.
- Can’t be easily previewed with photo viewing apps.
TIFF – the Good and the Bad
TIFF is the best file format you can use for high quality lossless image delivery. It supports uncompressed 32 bit per channel images. That means if you need a high quality print, you can deliver the images to the print shop in TIFF format and get the highest quality print.
Moreover, since TIFF can store layers, it can be a more compatible version of the PSD file. TIFF has a file size limit of 4GB, which means there is a hard limit on how many layers you can store in it.

(Image by Dzvonko Petrovski)
If you don’t want to store the RAW edits inside a catalog, and export them again every time you need them, then using TIFF for the highest quality export of the edits is a good idea.
Yes, it will take up a significant amount of storage space, but it will be the highest quality export you can have. You can then create JPEGs from the TIFF files for web use and low and medium quality prints.
When you take film or printed images to be professionally scanned, you’ll often be given TIFF files that are at least 16 bit. The wide color gamut capabilities of the TIFF file and the lossless image quality make it a perfect file type for high quality film and photo scans.
Note that pro cameras like the Canon 1DX III or the Nikon D5 can save .TIFF files in camera.
TIFF file Pros:
- Very high lossless image quality with high bit depth capabilities.
- Can save layers for better compatibility with different editing applications and non-destructive edits.
- Widely compatible with photo editors and graphic design software solutions.
- They can be easily previewed in any photo viewing app.
TIFF file Cons:
- Large file sizes.
- Limited to 4GB per file, which can cause issues with edits with a lot of layers.
- Can’t recover highlights and shadows from a TIFF file.
Summary and workflow example
By now, you probably understand that the RAW file needs to go through a RAW editor, such as Lightroom or Capture One, and then be saved into a file format that is easy to use.
But TIFF has the highest image quality because it is lossless with high color depth capabilities, and it can hold layers. Therefore it is common to see RAW to TIFF workflows.
For example, a common workflow is to have the RAW file edited in a RAW editor, then put through Photoshop for final touches, and then saved to TIFF for the highest quality output.
After that the TIFF file can be used to create more compressed copies of the image in other image formats, such as JPEG.
Read More:

![[SOLVED] Sony TV Turns On By Itself?](https://www.lapseoftheshutter.com/wp-content/uploads/2021/10/sony-tv-turns-on-by-itself-340x226.jpg)


Leave a Reply