If you want to edit your photos for web use or printing, then you need to use a lossless format.
Two of the most popular lossless imaging formats that you convert your RAWs files to are TIFF and DNG, even more so when you use Adobe products like Lightroom and Photoshop. But which is the best format for your images?
This article covers everything you need to know about DNG vs TIFF, and means that you won’t be stuck with images in a format that you can’t use long term.
DNG vs TIFF Quick Comparison
The major pros and cons helping you to decide between DNG or TIFF are in the table below. Then we’ll look at each format in a bit more detail.
| TIFF vs DNG Comparison | ||
|---|---|---|
| Image Quality |
|
|
| File Size |
|
|
| Compression |
|
|
| Support |
|
|
| Suitability for Editing |
|
|
| Layers |
|
|
| Conversion Time |
|
|
What’s the Difference Between DNG and TIFF?
The main difference between DNG and TIFF is that TIFF supports layers, while DNG does not.
Both DNG and TIFF are file formats that you might convert a RAW file to, although DNG preserves the editing capabilities of the RAW image, allowing you to essentially go back in time and modify your camera settings to see how that affects the image.
Once you convert a RAW file to TIFF, you do lose some of the information as recorded by the camera, although it is lossless thereafter. TIFFs do allow a much wider range of editing possbilities than DNGs, and you will likely want to eventually save you DNG in this format eventually.
A common workflow is: shoot in RAW -> convert to DNG on import to Lightroom or Photoshop -> Edit your photo, potentially adding layers in Photoshop -> save as TIFF for long term storage.
You can then create a JPEG from this TIFF from web display and printing.
What’s Good About TIFFs?
TIFFs use lossless compression and can handle layers.
This means that once they are first saved, you will not lose any more data after that point.
If you always keep your layers and do not flatten the image, you can even go back and recreate your original photo years later, from the TIFF file.
TIFFs are therefore ideal to save more complex Photoshop edits, as they are widely compatible with most image programs (though not as compatible as JPEGs).
TIFFs are commonly used in place of PSD files (Photoshop’s default image format), as they are very similar with the exception that TIFFs also contain a flattened version of the image in addition to the layered version, allowing them to be used in Lightroom, and a much wider range of programs than PSD files.
In short, the main advantages of TIFF files are:
- Very high quality, lossless files that maintain all your image data
- Layer support, so non-destructive editing is possible
- Widely compatible with photo editors
What’s Bad About TIFFs?
Because of their layer support, TIFFs are known for their very large image files – I have some exceeding 4GB in size. Even a single layered photo is likely to be around 50MB with modern, high megapixel cameras, meaning that storage can become a problem.
As cameras do not natively shoot in TIFF, you must convert your RAW files to TIFF, which is generally done on an image-by-image basis, rather than automatically as you do with DNGs in Lightroom.
The disadvantages of TIFF are:
- Large file size
- No automatic conversion of RAWs to TIFF
What’s Good About DNG?
DNG is a digital negative file format first created by Adobe as a more compatible container for RAW files.
Because every camera manufacturer uses their own file types for RAWs, with this changing even between camera models from the same manufacturer, a new format was needed to eliminate compatibility issues among all of these RAW formats.
DNG maintains all of the image data of your RAW file, meaning that you can modify exposure, white balance and any other feature of a RAW image, using the camera’s original pixel-level data, but it is generally about 20% smaller, and is much more widely compatible than RAW files.
When compared to TIFFs, DNGs are about 20MB, when the same photo in TIFF format would be about 50MB.
Programs like Adobe Lightroom can automatically convert your RAW files into DNG format on import, meaning that you get smaller, more compatible files, with almost no effort.
Because of their wider compatibility, they can be viewed directly in Windows Photos and Google Photos, among other photo display programs – you don’t necessarily need a dedicated photo editor to view them, unlike RAW files.
The advantages of DNG files are:
- About 20% smaller than RAW files and 60% smaller than TIFF files
- Faster to open than RAW files (at least in Adobe programs)
- No compression – all the original camera data is maintained
What’s Bad About DNG?
Despite being better containers for your photos than RAW files, DNGs do suffer from the same problem as RAW files – they lack the ability to store layers.
DNGs are good for storing the straight-out-of-camera images, but cannot be used to store edited files.
You are also unable to shoot images directly in DNG unless you are using a high-end camera like a Leica, and must otherwise convert them, even though this is a relatively painless process.
The disadvantages of DNG are:
- Do not store layers
- Can’t be used to store edited files
Should You Convert Your Photos to DNG or TIFF?
Both DNG and TIFF are lossless formats and share a lot of similarities, as you can see above. But DNG or TIFF are not really direct competitors, with each most suitable in specific situations, which are discussed below.
Convert to DNG
DNGs are typically used in the start of a photo editing workflow as a storage medium for RAW files.
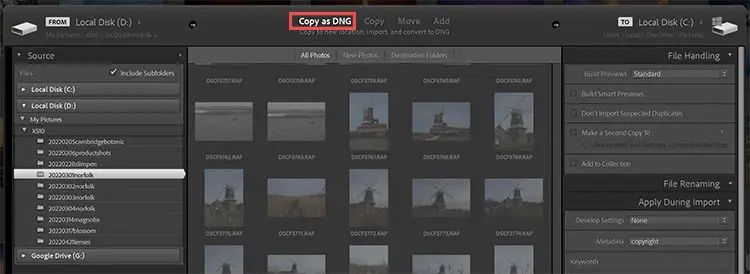
Because they are smaller, more widely compatible and faster to open than RAWs, a large number of photographers convert their RAW images directly to DNG on import into Lightroom, or by using Adobe Bridge.
You simply need to use the ‘Copy as DNG’ option on import, as below.
Or you can convert existing images in your catalog to DNG by using the ‘Library’ menu, then ‘Convert Photo to DNG’ option.
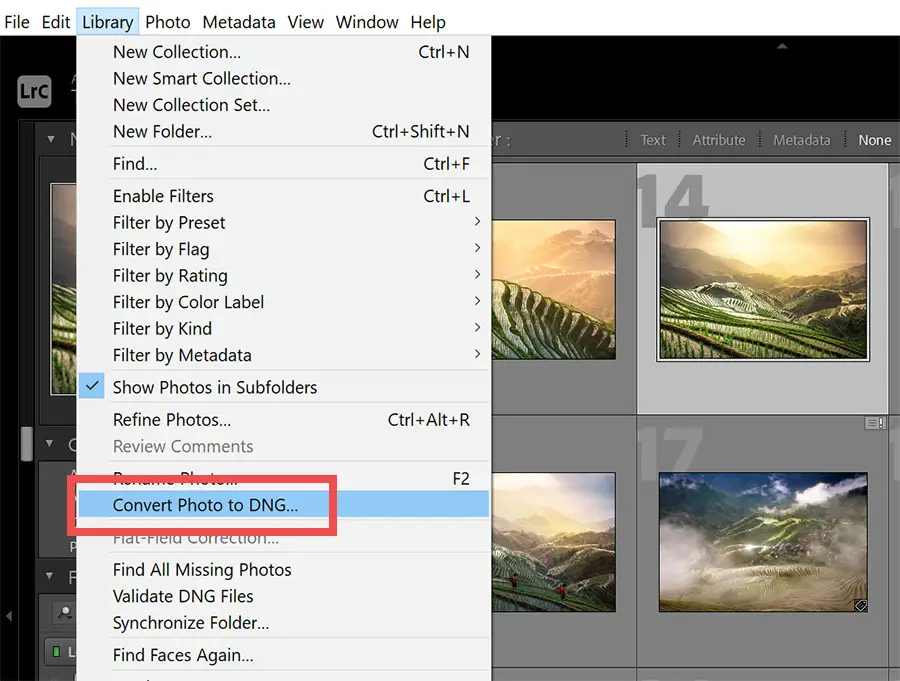
These DNGs can then be directly edited in Lightroom or Photoshop.
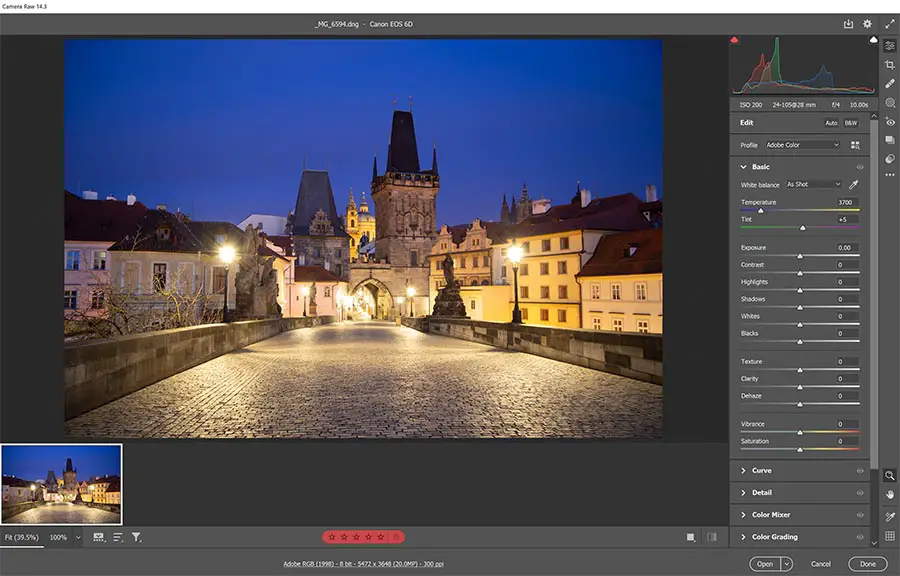
If you open a DNG in Photoshop, you will see the Adobe Camera RAW interface, exactly as you would if opening a normal RAW file.
Once you have made your adjustments in Camera RAW in Photoshop, you should then click the ‘Open’ button in the Camera RAW interface, which will remove all of the unused RAW data in your photo, leaving you able to then move onto making more complex edits.
Convert to TIFF
Whether you open your RAW files directly into Photoshop, or first convert them to DNG and then open them in Photoshop, you will almost certainly then want to work with layers. This is where TIFF files are used.
Because DNGs cannot store layers, and are essentially just another RAW container, you must use another format if you intend to perform complex edits and then save your file.
Within Lightroom and Photoshop, two of the most common choices are PSD (the Photoshop default) and TIFF, with TIFF generally being the better option thanks to its wider compatibility outside of the Adobe ecosystem.
You can of course directly convert your RAW files to TIFFs, without the DNG step, which is perfectly valid and ideal if you are editing your photos soon after taking them.
If you are wanting to store your RAW photos long term though, then that is where using the DNG step in-between RAW and TIFF is ideal.
TIFF vs DNG: Proposed Workflow
Hopefully the difference between TIFF and DNG is much clearer now. To make the differences obvious, you can refer to the below workflow showing the ideal file type for each step of your photography.
Take a Photo: RAW (or DNG if your camera supports it)
Storage: Convert RAW to DNG (or keep in DNG)
Editing: Open your photo as DNG, then save as TIFF to preserve layers
Final Version: Convert to JPEG for display or printing
Read More:


4 Responses
Judith Bluysen
Hi Tim,
Leica cameras do shoot in DNG, which I have been editing in Photoshop/Camera Raw and saving the final copy in a flattened TIFF. If it was a complex initial “pure photograph” DNG edit I can save a DNG file with snapshots detailing those results (and a description of what I did in each step) but rarely bother. However, recently I’ve found that by storing DNGs in files on my computer (Mac) which eventually goes into the Cloud, they lose detail over time, while the TIFF files don’t. Is this correct?
Tim Daniels
Hi Judith,
Thanks for the tip on Leica cameras shooting in DNG – I’ve added this to the article.
DNGs should not lose detail over time. It’s possible that they are being compressed somehow when they get saved into the cloud, and this causes the loss of detail that you are seeing.
You should be fine using DNG for long-term storage, as they are a lossless format, exactly the same as TIFF.
Really, both TIFFs and DNGs should look the same as when you initially saved them, even if you are opening them a year or two later, so I’m afraid I don’t know what is happening to your DNGs.
MarthaCT
Hi Tim … great DNG vs TIFF tutorial! I recently purchased an Epson Perfection V850 Pro and SilverFast Ai Studio 9 software to scan hundreds of late-19th and early-20th century family photos for storage/conservation. I have calibrated the scanner (using the ISO Dec 2019 compliant target). My goal is to scan the analog photo albums and loose slides as RAW files for long term storage, then enhance them in SilverFast Ai Studio 9 at a later date for sharing with relatives. I don’t want to embark on this scanning exercise again (measure twice, cut once!) … so which file format should I use? Per your article I am inclined to choose DNG due to its smaller file size, but am concerned DNG may not be a readily available losses format in the future. Suggestions?
Tim Daniels
It looks like you’re going to store the slides long-term as RAWs and also store the enhanced versions as DNG/TIFF, right?
If so, I think DNG is going to be fine for you – I don’t think this format is going away anytime soon and it is lossless and will save you storage space as you mention.
I actually think that DNG is more likely to survive long-term than some RAW files. Remember that RAW files are not one format but lots of different formats with each manufacturer having a proprietary version. It’s possible that some particular RAW formats may become unsupported within a few decades (but you are probably OK with Epson RAWs).