This site is part of various affiliate programs. Links may give us a small compensation for any purchases you make, at no additional cost to you. Please read the disclaimer policy for full details.
Dark shadows on TVs become increasingly common after two or three years of ownership, and can be caused by a number of defects.
It’s possible to prevent many of them becoming problems, and the others are possible to fix with varying levels of effort.
You can use this guide to help diagnose what’s causing your TV’s dark shadow, and see some simple fixes for it.
Possible Causes of a Dark Shadow on TV Screen
The most common causes of dark shadows on your TV screen are:
Backlight Failure
Either failed individual LEDs in the backlight, or failed connections between LED strips, are the most common cause of dark shadows on TVs.
It’s possible to replace these yourself for only a few dollars, although it does take a little time.
Pixel Damage
Damage to pixels within your TV’s display can cause them to go black, making it look as if there is a dark shadow on screen.
Displays are not user-replaceable as they are too expensive to source. In this case, you would be looking at a new TV.
Screen Burn-In
If you have your TV switched on for many hours a day, and it spends a large part of that time on one screen, then you may get pixel burn-in, which looks like a ghostly shadow layer on top of part of your screen.
There is no easy way to remove this, although leaving your TV on a non-tuned channel that displays static can help.
Most new LG TVs have a pixel refresh option which will also clear this.
Mechanical Damage
If your TV has been hit with something or dropped while you are moving it, this can damage the display.
Overtightening screen mounts can have the same effect.
How to Fix Dark Shadows on Your TV Screen
| Dark Shadow Fixes | Explanation |
|---|---|
| Power Cycle Your TV | Unplug your TV, hold down the power button for 15 seconds, then plug it back in and switch on again after waiting a further 2 minutes. This will reset your TV. |
| Update Firmware | Switch on Auto Update Firmware in your TV’s menu and run a manual firmware update to make sure the dark area isn’t caused by a software glitch. |
| Remove Any HDMI Cables | Confirm the problem isn’t caused by other devices connected through HDMI by removing all cables other than the power cord. |
| Check for Consistent Wall Socket Power | TVs need consistent power to work properly, with fluctating voltages potentially causing dark shadows on screen. |
| Adjust Backlight Brightness | Reduce your backlight’s brightness to even out any differences across the panel, and try turning off any Eco Sensors or similar. |
| Factory Reset Your TV | Reset your TV back to factory defaults using the reset button on the back or through the on-screen menu to make sure that the dark areas aren’t caused by incorrect settings. |
| Replace the Backlights | Individual LED backlights or the connectors between LED strips can fail, causing dark shadows. Test LEDs with a multimeter and replace any that have failed. |
Whether you have a dark shadow on your TV or a dark strip on one side, it’s almost always caused by backlight problems.
But because there can be a few other causes, I’ll start with the simpler fixes so that you don’t have to do the more complex steps if they’re not needed.
1. Power Cycle Your TV
With modern electronics, it’s possible that the shadow on screen on your TV is caused by something stuck in your TV’s flash memory, which can also be a problem if you are seeing white spots on your TV.
Power cycling or cold booting your TV will clear out any issues with non-permanent memory and reset your main board without losing your personal settings.
This is quick and painless and won’t cause you to lose any of your saved settings.
- Switch off and unplug your TV.
- Hold down the physical power button on the TV for at least 15 seconds.
- Wait for at least 30 minutes for any residual power to drain from the TV’s capacitors (which are capable of storing charge for several minutes).
- Plug your TV back in and try switching it on. You should see a red light if you have been successful.

Make sure you do wait for the full 30 minutes before plugging your TV back in – you would be surpised how long the components within your TV can hold charge, and you want to make sure it has fully reset.
Although this seems a very basic step, don’t overlook it because in the vast majority of cases a simple soft reset fixes most issues.
Most people will now have their TV fixed and back up and running. If this isn’t you, then we’ve got a few more basic fixes to try before getting into the hardware fixes.
2. Update Your TV’s Firmware
Software and firmware issues have been known to cause problems with the display on TVs.
As with any product, you should ensure that you have updated your TV’s firmware to the latest version, even if it is new.
Smart TVs support auto-updating of firmware, but you can’t assume that this is turned on for you.
To check that auto-updating is on for firmware / software on your smart TV:
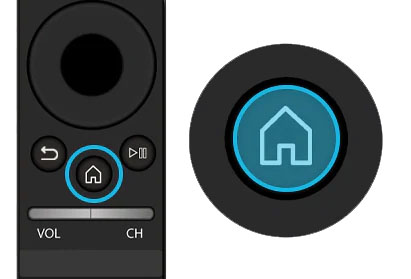
- Press the Menu or Home button on your remote and go to Settings.
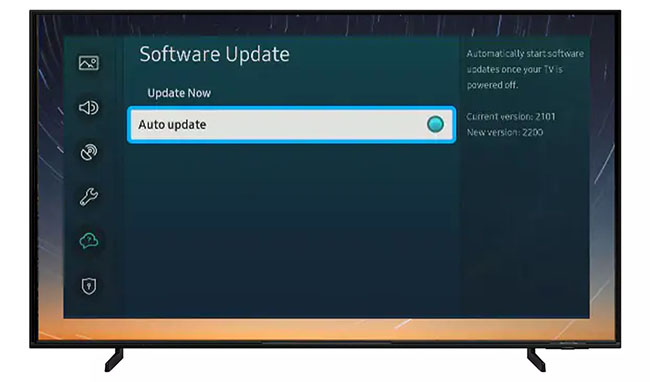
- Click Support.
- Then Software Update.
- Agree to any terms and conditions that may popup, then switch on Auto Update.
For older TVs, you’ll need to update the firmware by USB. You can do this by going to your TV manufacturer’s website and following their instructions.
3. Remove HDMI Cables
There’s a strong possibility that a poorly seated cable is creating signal noise which is displaying as a dark vertical shadow or dark strip on screen.
This comes down to either a:
- Faulty HDMI cable with a break in it
- Damaged HDMI port with broken pins
- Poor HDMI connection where the cable and connector are not fully making contact

To check your HDMI and other cables:
- Switch off your TV.
- Remove any HDMI or other physical cables connected to the back of your TV.
- If you have any compressed air, use that to clean the contacts both of the cable and in the connector on the TV. If you don’t have compressed air, then blow gently on them.
- Firmly push the cables back into their slots on the TV.
- Switch your TV back on again.
It that hasn’t fixed the problem, then try using a different HDMI input. Most TVs have 3 or 4 HDMI ports.
If you have one that is on a different part of the TV then that would be the best one to try, as it this should have a separate connection to the TV’s main board.

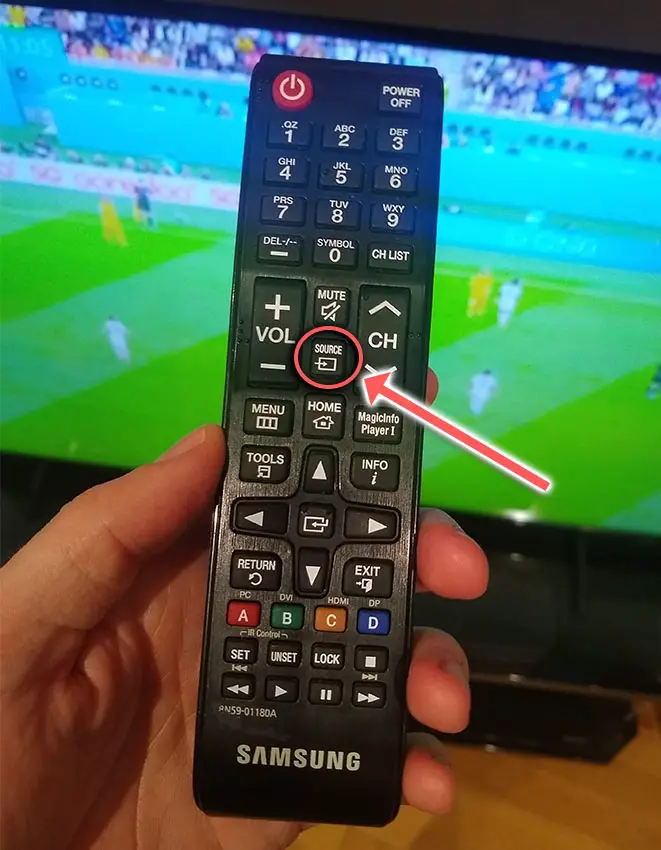
Plug you HDMI cable into the new port, note the number next to it, then choose this HDMI input on your TV, by using the Input or Source button on your TV remote or the Input or Menu button on your TV itself.
Many TVs come with the option to run an HDMI self test, which can check that HDMI cables are working properly. Note that this only works on cables less than 2m long.
HDMI self test is usually found in Settings -> Support or Device Care.
You can also try removing all external devices, including those connected by Bluetooth and any coaxial or signal cables, so that the TV only has a power cable going into it.
When you turn your TV on, this means the screen will be totally black as it is not receiving any picture, potentially making it tough to see any shadows on screen.
Pull up the on-screen menu to see if the dark shadow is still on one side. If it is, this means that your external connections are fine and the problem is located within the hardware of your TV.
If the dark shadow has gone, then try re-seating your HDMI and other cables one by one, until you find the damaged cable that needs replacing.
4. Check Your Power Supply
When your TV isn’t working properly, you naturally jump to thinking that there must be a fault within your TV itself.
Actually, the fault is often within your household power supply, or more specifically within the surge protector or smart plug that your TV is plugged into.
So, you need to confirm that your wall socket is supplying enough power, and there is no interruption of supply during use.
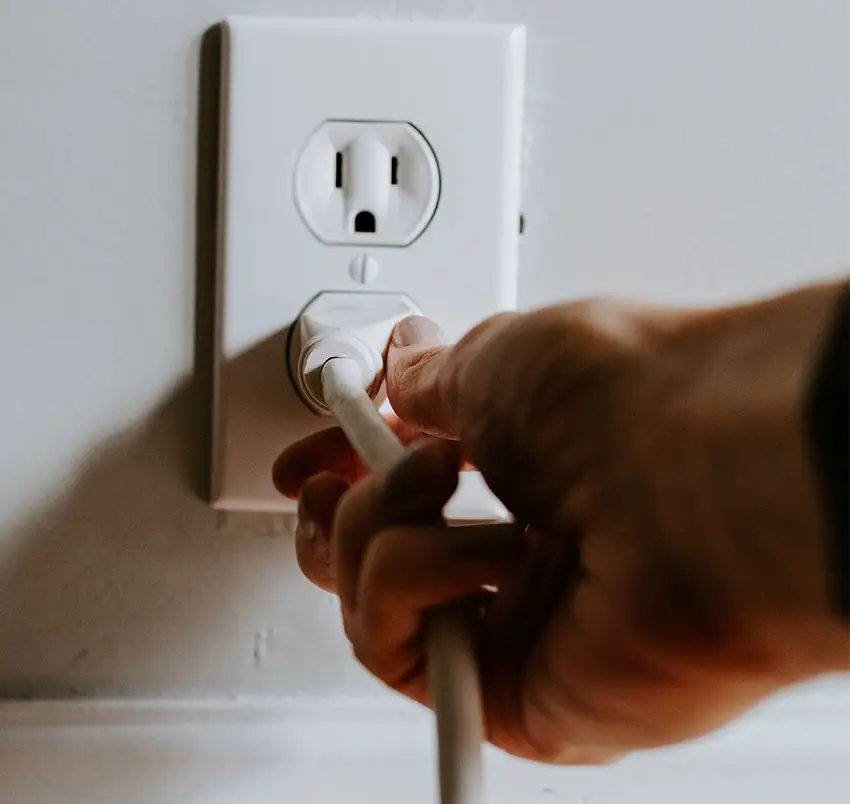
There’s a few methods that you can use:
- Unplug your TV from your wall socket.
- Remove any surge interruptors or smart plugs so that you have a direct line to your wall socket.
- Plug another large device that you know works into the same socket and check that the new device works as normal. (It’s important that this device draws approximately as much power as your TV, to confirm the socket is fully working).
- Remove the other device and plug your TV back into this socket.
- Switch on the power and switch on your TV using the physical power button located somewhere on its case (usually beneath the logo).
- See if the power light is solid. If so, this means your TV is getting sufficient voltage.
- If your TV’s red light is flashing 5, 6, 10 times or more, then repeat these steps with another wall socket to confirm your household electricity supply isn’t a problem.
Also make sure to look at your power cord, checking there are no knots or kinks that could have damaged the internal copper wires and that could be affecting electricity transmission.
5. Adjust Backlight Brightness
Most TVs have an option to change the brightness or other aspects of the picture.
If this hasn’t helped, then using your remote control, navigate to the Home screen, then Settings and go to the Picture menu, for most TV models.
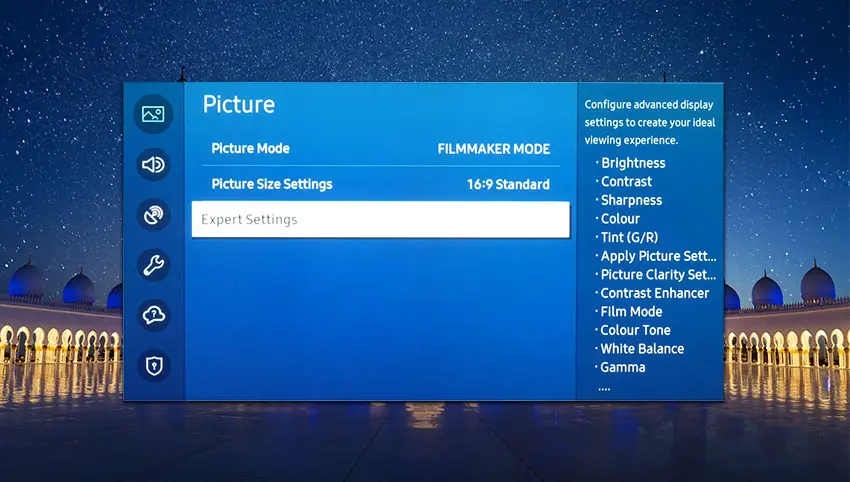
You can try the various picture modes to see if they fix the shadow, and if not, then go to Expert Settings or Advanced Settings.
You can adjust backlight brightness, reducing it to try to make the difference between the dark and light areas less noticeable.
6. Factory Reset Your TV
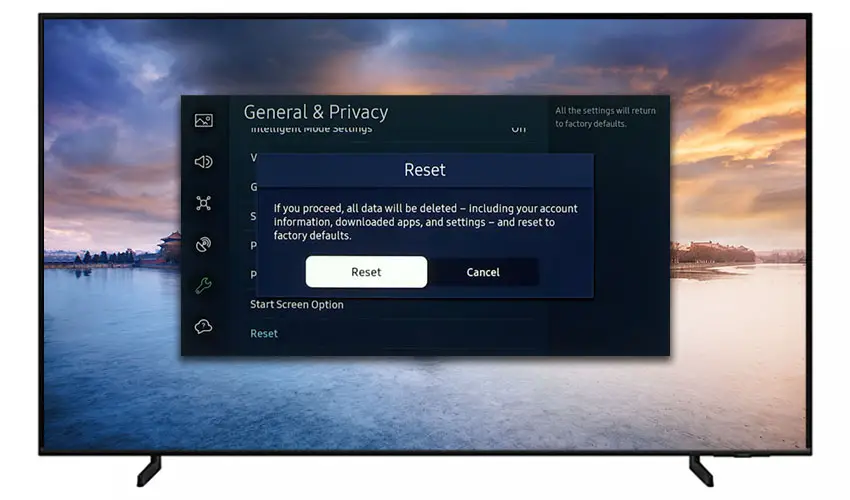
Returning your TV back to its factory settings is a more extreme step, as it will delete any personalization features, downloaded apps or connected devices, but it’s always worth a shot when other methods haven’t worked.
To factory reset most Smart TVs:
- Press the Menu or Home button on your remote and go to Settings.
- Then General & Privacy.
- And Reset.
That should remove most dark shadows on one side of the screen without you having to delve into hardware problems, but just in case you still have a problem then this will be caused by the backlights, which we will look at next.
7. Backlight Issues
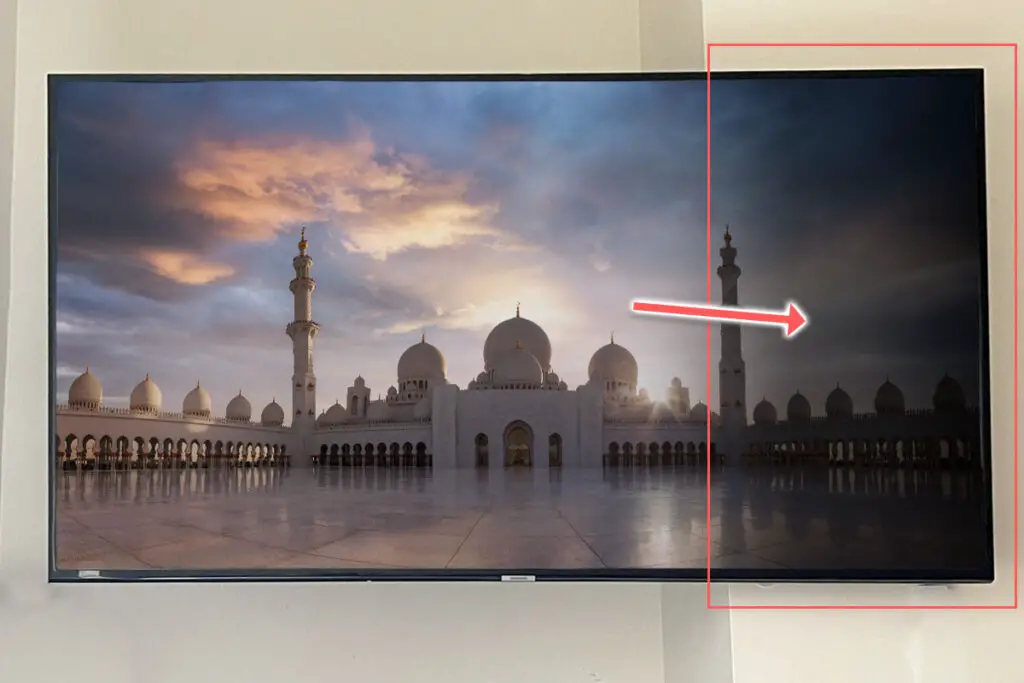
If you are seeing dark shadows on screen, or either the top half, bottom half, left side or right side is darker than its counterpart, or your TV screen is darker than normal, then you have a backlight issue.
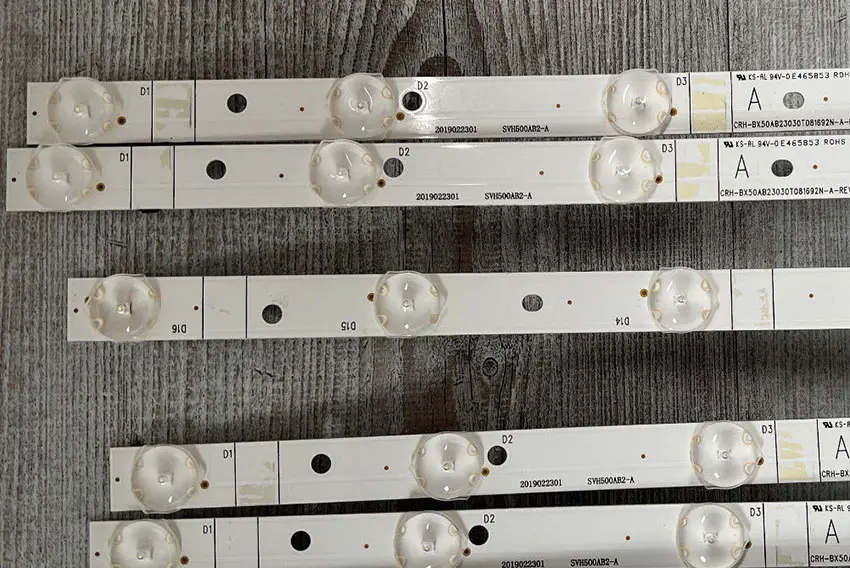
Backlights on modern TVs come in LED strips of varying lengths. Older models used lengths that spanned the entire frame of the TV, but due to cost savings, more recent TVs use a set 16″ LED strip which is connected in series for each row to span your TV.
These cold soldered connectors are a notorious failure point on TVs, but can be easily fixed if you are willing to re-solder a joint yourself.
Equally commonly, the LED backlights themselves can fail. This is due to repeated current over powering, which over time causes thermal degradation of the LEDs leading to burnout. You can replace any failed LEDs by just removing the entire strip and replacing it.
The problem with fixing the LEDs is that they are located in the most difficult to access part of your TV. So if you are not comfortable with a larger repair job, then now is a good time to seek help from a professional.
You need to remove the back panel, remove all of the circuit boards and connectors, then another layer of screws for the front panel, and only when you have fully removed the LCD panel can you get to the backlights.
You will also need a multimeter to test the backlight strips to find out where the problem lies.
To fix a failed backlight:
- Unplug your TV, hold down the power button and wait for at least 30 minutes. There are large capacitors in the power board for the backlight and these can hold charge for an extended period of time.
- Place your TV face down on a large table or workbench. Make sure there is nothing that can scratch the screen on your work surface.
- Ground yourself.
- Open your TV by unscrewing the screws in the backpanel. It should come apart in two pieces: front and back.
- Put the back panel somewhere out of the way and take a look at the circuit boards that have been revealed.
- You will see a T-Con panel for translating the signal into a TV picture, a power board and a main board. Any wires or ribbons that are near the edge of the TV should be disconnected, and the three boards will also need to be removed.

- Then remove the screws around the edge that hold the bezel of the TV.
- With some care, you should be able to remove the bezel, panel and reveal the TV backlight underneath, which will be in strips of LED lights.
- Use a voltmeter or TV backlight tester to check whether they are working, and replace any failures.
The video below covers checking and replacing the LED backlights, with some additional tips on when you should seek to replace your backlight driver board instead.
It’s also possible that one of the connectors linking the LED strips as they span the width of your TV has failed. This can be fixed by checking the connectors with a multimeter and re-soldering and broken connections. This article has a good study on this.
How to Prevent Dark Shadows on TV Screens
- Turn backlight brightness down. Factory settings put backlight brightness up so high that your LEDs burn out through thermal degradation after a few years. Lower brightness increases their lifespan.
- Avoid having your TV go through power surges or lightning strikes.
- Keep firmware up to date.
- Don’t overtighten wall mounts and avoid any sharp knocks or bumps to your TV.
Backlight failure is by far the most common cause of dark shadows on TV screens, so make sure that you turn down your backlight brightness to extend your backlight’s lifespan.
You can easily replace any failed backlights yourself at home – just use a multimeter to check for failure and order new backlights off eBay for a few dollars.
If you still are having problems with your TV, then try your manufacturers support, but otherwise you will be looking at a new TV.
Read More:
How to fix LG TV backlight issues

Leave a Reply