This site is part of various affiliate programs. Links may give us a small compensation for any purchases you make, at no additional cost to you. Please read the disclaimer policy for full details.
As a more budget brand, vertical lines on your Element Roku TV screen often appear after a few years of continuous use, or on those TVs where you might be regularly cleaning the screen with abrasive screen cleaners that can seep into the tab connections and cause corrosion.
Because there are actually a few different causes of these vertical lines, it can be tough to know how to fix your TV without calling out a technician.
Sometimes it’s a simple software problem that can be fixed by a reset, and other times it’s an issue with the T-Con board or most likely, a failing tab connector or capacitor on the tab connector.
This guide will take you step-by-step through every possible fix for Element Roku TV lines on screen, and if you follow it, I am confident you will be able to get your TV working again without needing an expensive replacement.
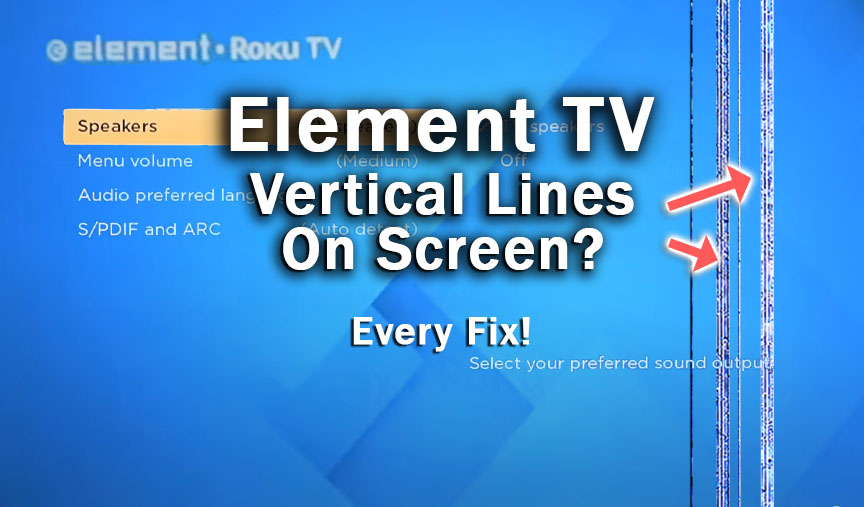
Element Roku TV Vertical Lines on Screen
To fix vertical lines on your Element Roku TV screen, check all HDMI and signal cables are securely seated with no oxidation on their contacts, then power cycle your TV to reset it, unplugging it from the wall for 2 minutes and holding down the TV’s power button for 15 seconds, before plugging it back in.
In the vast majority of cases, this will fix your TV, but in case you still see vertical lines on screen, or if you need more info on how to apply the fixes above, then you can follow the detailed steps below to get your TV working again.
1. Clear Your Element Roku TV’s Cache
Resetting your TV and remote can help resolve any issues, and with the Roku Voice remote this doesn’t require you to go through any on-screen menus.
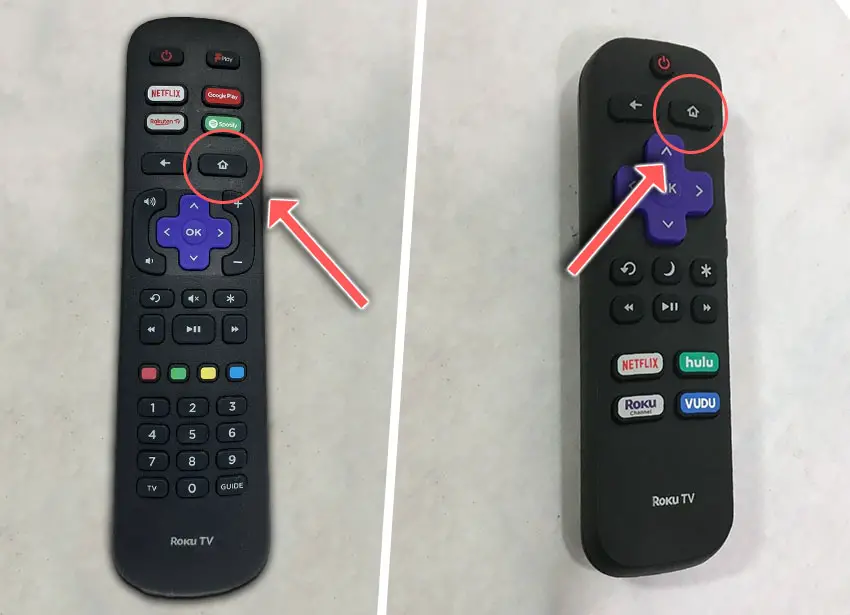
On your remote, restart your TV using the button combination: Home – press 5 times; Up Arrow – press once; Rewind – press 2 times; Fast Forward – press 2 times.
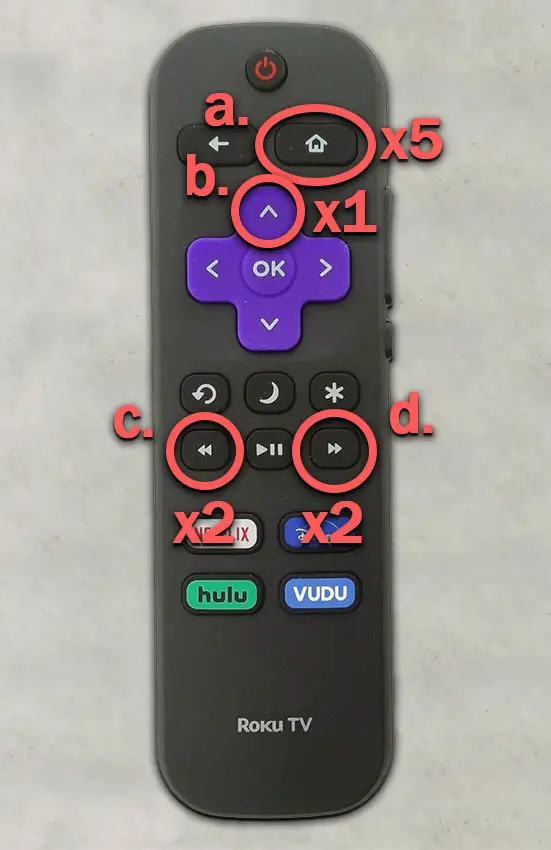
Your Element Roku TV should then restart.
You can also run a system restart from the menu.
To restart a Element Roku TV:
- Go to the Home screen.
- Then Settings.
- And System.
- Then Power.
- System restart.
- And click Restart.
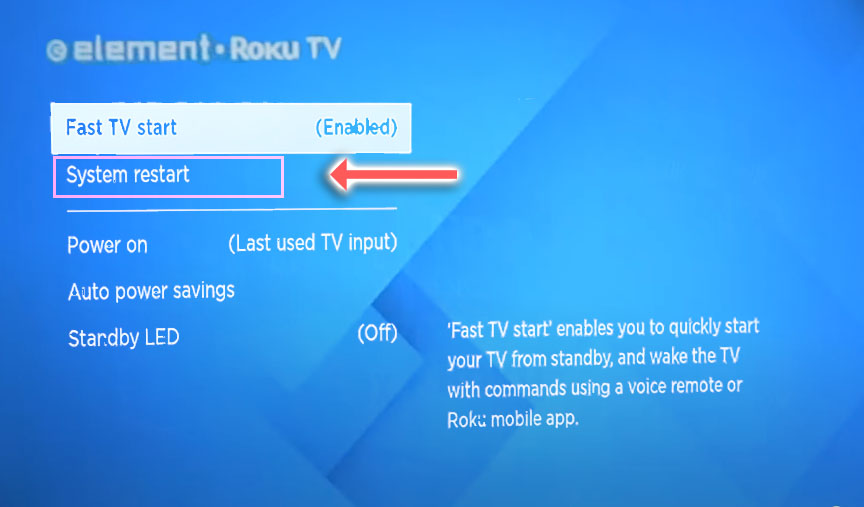
2. Power Cycle Your Element Roku TV
Although this might seem a basic step, power cycling your TV is often the best way to fix your Element TV.
Resetting your TV will clear out any issues with non-permanent memory and reset your main board without losing your personal settings.
This is quick and painless and won’t cause you to lose any of your saved settings.
To reset your Element Roku TV:
- Make sure your TV is switched off and unplug it.
- Hold down the physical power button on the TV for at least 15 seconds.
- Wait for at least 2 minutes for any residual power to drain from the TV’s capacitors (which are capable of storing charge for several minutes).
- Plug your TV back in and try switching it on. You should see a red light blinking if you have been successful.
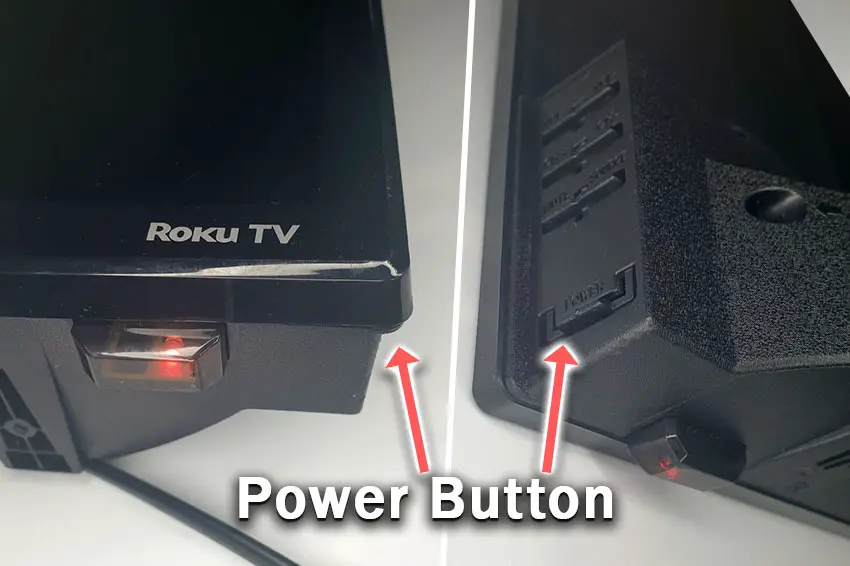
Make sure you do wait for the full 2 minutes before plugging your TV back in – you would be surpised how long the components within your TV can hold charge, and you want to make sure it has fully reset.
Although this seems a very basic step, don’t overlook it because in the vast majority of cases a simple soft reset fixes most issues.
You can also hard reset most Element Roku TVs by putting a pen into the recessed Reset button, usually found on the side or back of the TV.
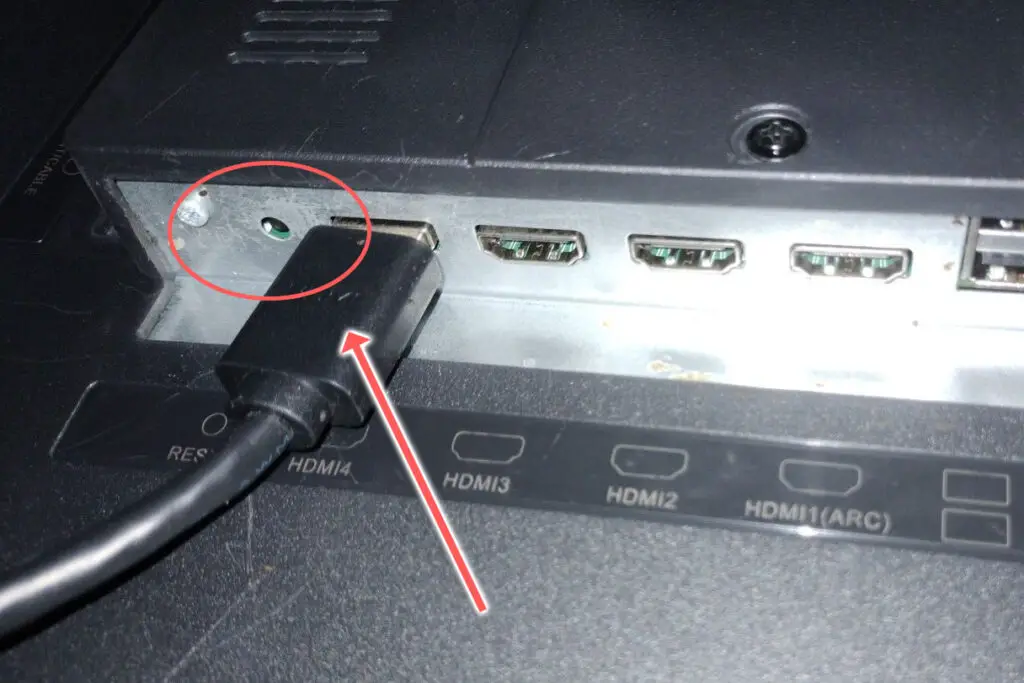
Most people will now have their TV fixed and back up and running, but if your Element Roku TV is still not working properly, then we’ll move onto the next step.
3. Update Your Element Roku TV
It’s important to keep any electronic devices up to date with the latest firmware, none more so than smart TVs.
You should follow the system update procedure on your TV as this has been known to fix picture issues.
If your Roku TV remote is not working and you can’t access your TV’s menus to perform the update, then use the Roku App.
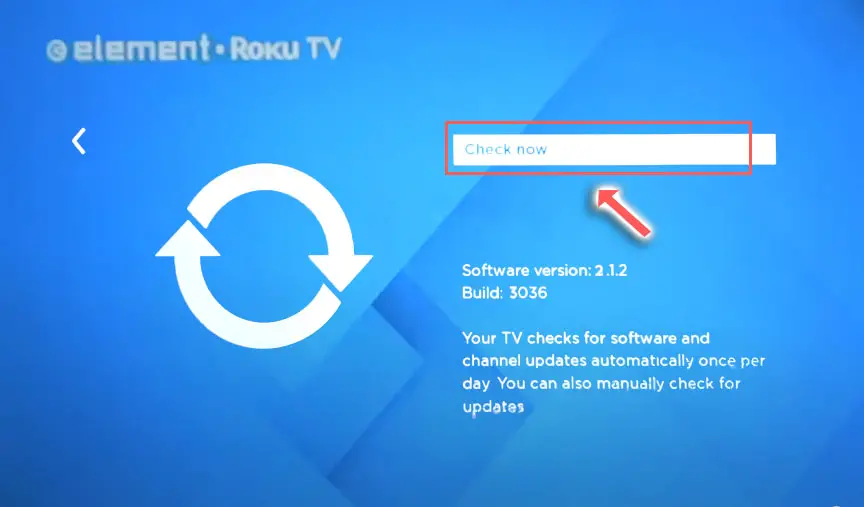
To update your Element Roku TV:
- Press Home on your remote.
- Then Settings in the on-screen menu.
- Use the Right Arrow and choose System.
- Right Arrow to System Update.
- Then Check Now to run the update process.
4. Clean HDMI Ports
There’s a strong possibility that a poorly seated cable is creating signal noise which is displaying as vertical lines, and is also a common cause of horizontal lines.
This comes down to either a:
- Faulty HDMI cable with a break in it
- Damaged HDMI port with broken pins
- Poor HDMI connection where the cable and connector are not fully making contact
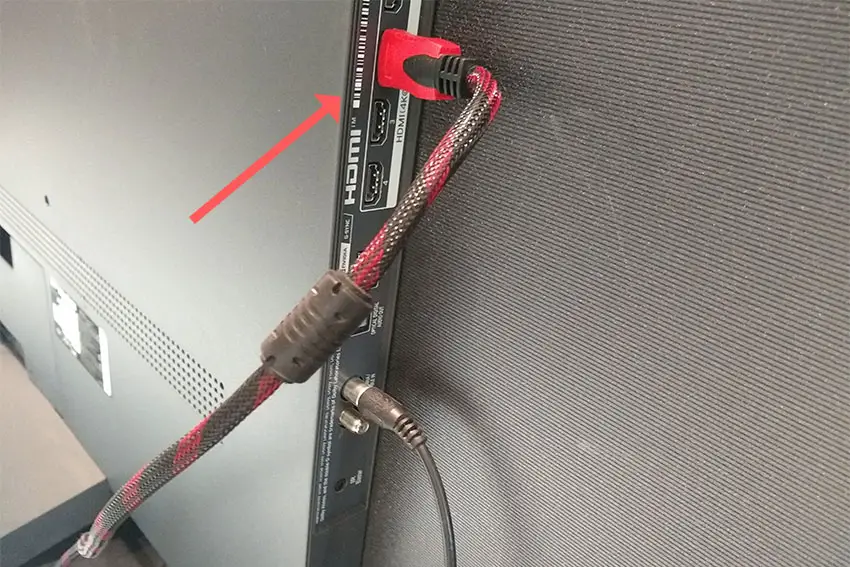
To check your HDMI and other cables:
- Switch off your TV.
- Remove any HDMI or other physical cables connected to the back of your TV.
- If you have any compressed air, use that to clean the contacts both of the cable and in the connector on the TV. If you don’t have compressed air, then blow gently on them.
- Firmly push the cables back into their slots on the TV.
- Switch your TV back on again.
It that hasn’t fixed the problem, then try using a different HDMI input. Most TVs have 3 or 4 HDMI ports.
If you have one that is on a different part of the TV then that would be the best one to try, as it this should have a separate connection to the TV’s main board.
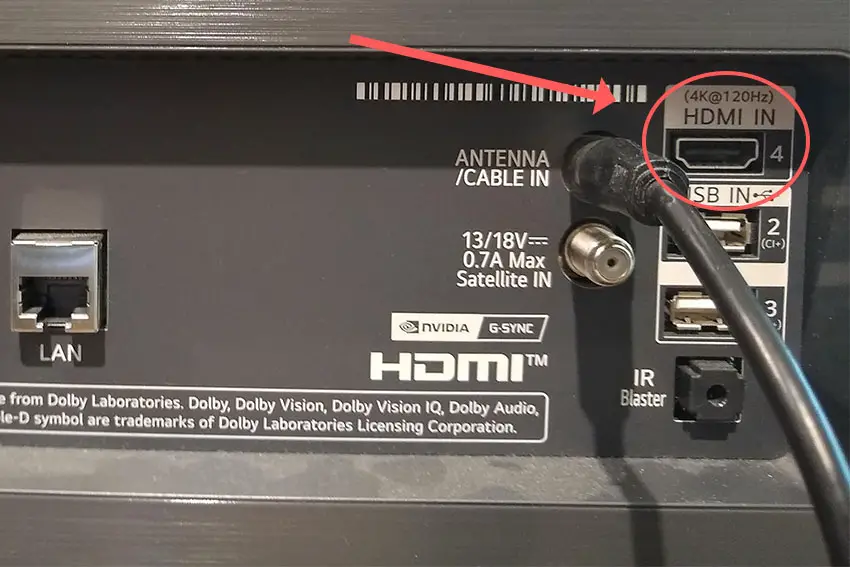
Plug you HDMI cable into the new port, note the number next to it, then choose this HDMI input on your TV, by using the Home button on your TV remote and selecting the new input tile on your home screen, or the Input or Menu button on your TV itself.
You can also try removing all external devices, including those connected by Bluetooth and any coaxial or signal cables, so that the TV only has a power cable going into it.
When you turn your TV on, this means the screen will be black as it is not receiving any picture, potentially making it tough to see any vertical lines.
Pull up the on-screen menu to see if the vertical lines are still there. If they are, this means that your external connections are fine and the problem is located within the hardware of your TV.
If the lines have gone, then try re-seating your HDMI and other cables one by one, until you find the damaged cable that needs replacing.
5. Check for Power Supply Faults
Because flat screen TV’s rely on a constant power supply, when there are fluctuations in voltage these can show up as inconsistencies with the backlight, causing dark areas on your screen.
If your TV is on, then you know that your wall socket is supplying power, but the question is whether this is constant without fluctuations and is of a sufficient voltage.
The most common cause of low voltage from wall sockets are faulty surge protectors.
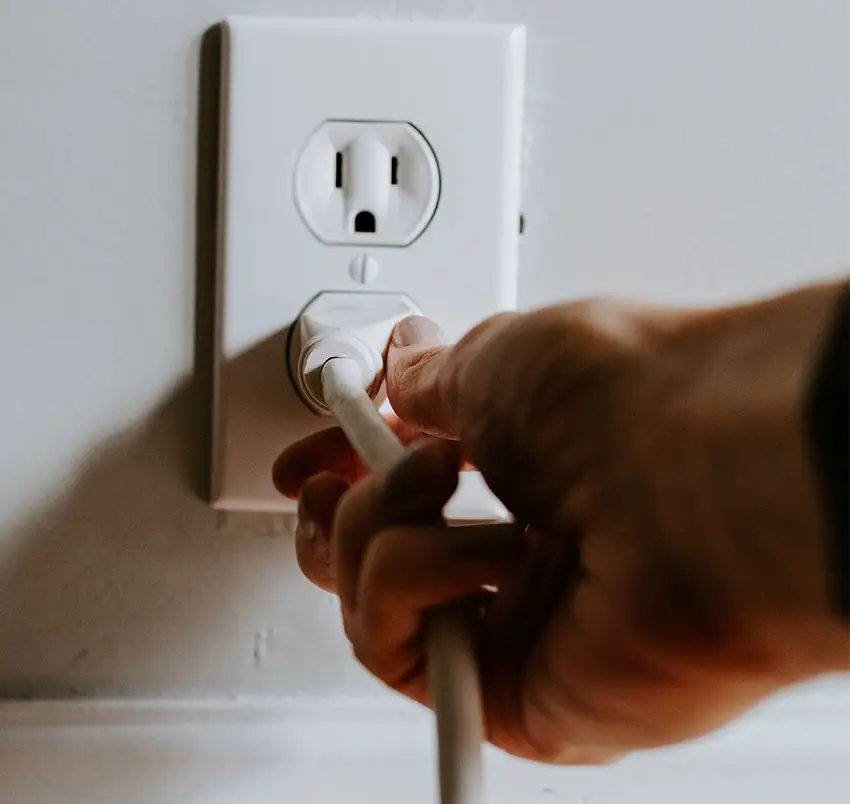
If you don’t have a wall socket testing rig, then just unplug your TV, remove any surge protectors and try another appliance that you know draws a similar current. Check if this works as expected.
You can also plug your TV into another wall socket, preferably one located on the other side of the room from the current socket, again without any surge protectors or consumer extension cords that you might be using.
6. Clean the LVDS Cables On Your T-Con Board
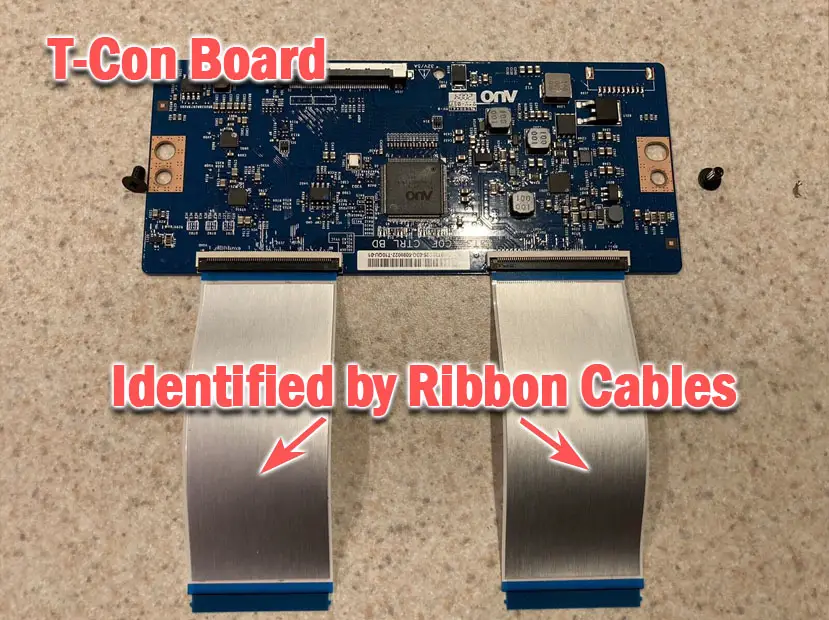
The Timing Control (T-Con) board is a small PCB board that drives your TV’s panel, translating the signal into a picture on your screen.
It’s hidden away under the back panel, behind the screen, and is a regular source of vertical lines in TV images because it connects to the LCD / OLED panel with ribbon connectors which can come loose.
To access the T-Con board, you need to remove the back panel. If you’re not confident doing this, then now is the time to get an expert in. Otherwise:
- Unplug your TV, hold down the power button and wait for at least 30 minutes. There are large capacitors in the power board for the backlight and these can hold charge for an extended period of time.
- Place your TV face down on a large table or workbench. Make sure there is nothing that can scratch the screen on your work surface.
- Ground yourself.
- Open your TV by unscrewing the screws in the backpanel. It should come apart in two pieces: front and back.
- Put the back panel somewhere out of the way and take a look at the circuit boards that have been revealed.
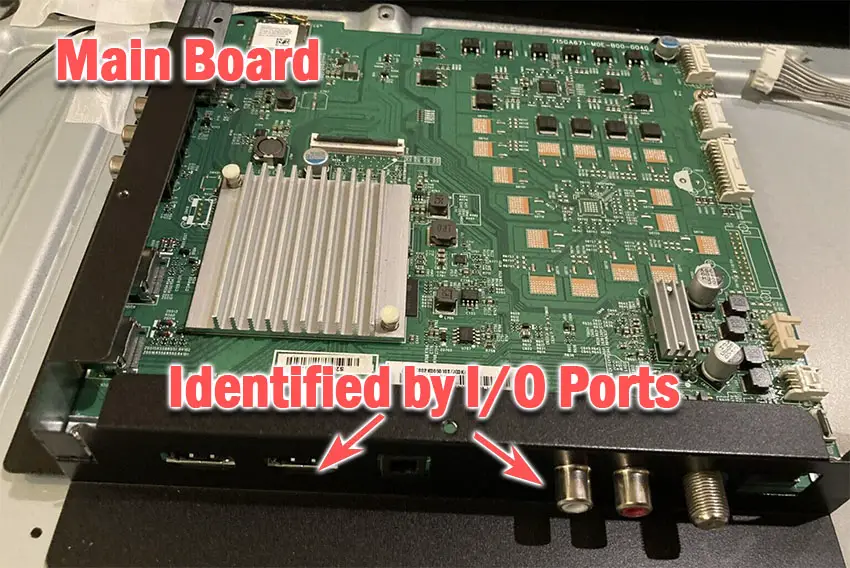
- You will see a T-Con panel for translating the signal into a TV picture, a power board and a motherboard board.
You can take a look at the video below to see how to open your Element Roku TV’s back panel and investigate the T-Con board.
The position of the boards and their precise shapes and sizes will vary by model, but the T-Con board can be identified by the ribbon cables connecting it to the TV’s panel. Identify the other boards you will see in the images below.
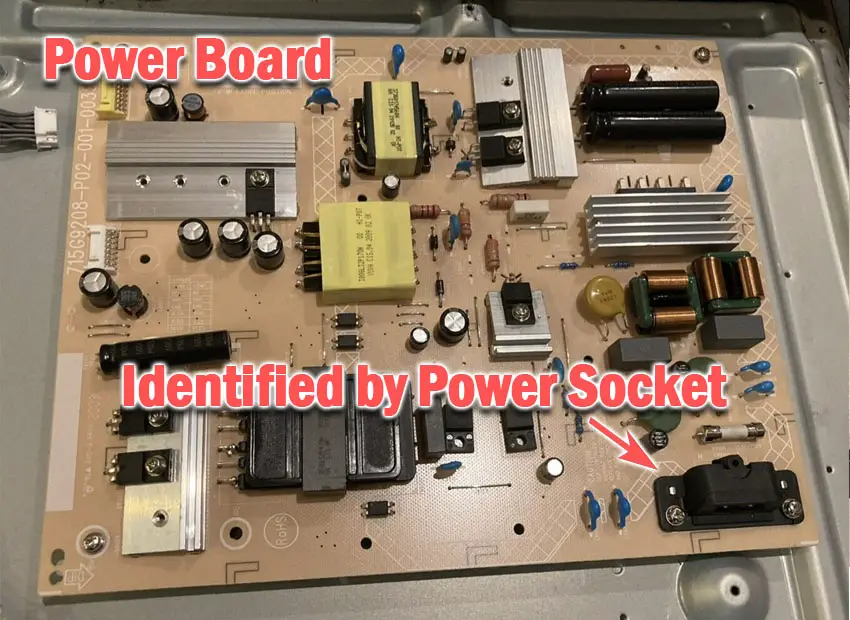
Start by giving everything a good clean, preferably with compressed air. It’s possible that dust in the connector can block the signal.
Then, you should be able to remove the cables by pushing the locking cover down and they will then easily come away from the board. Don’t try to force them out without unlocking them first.
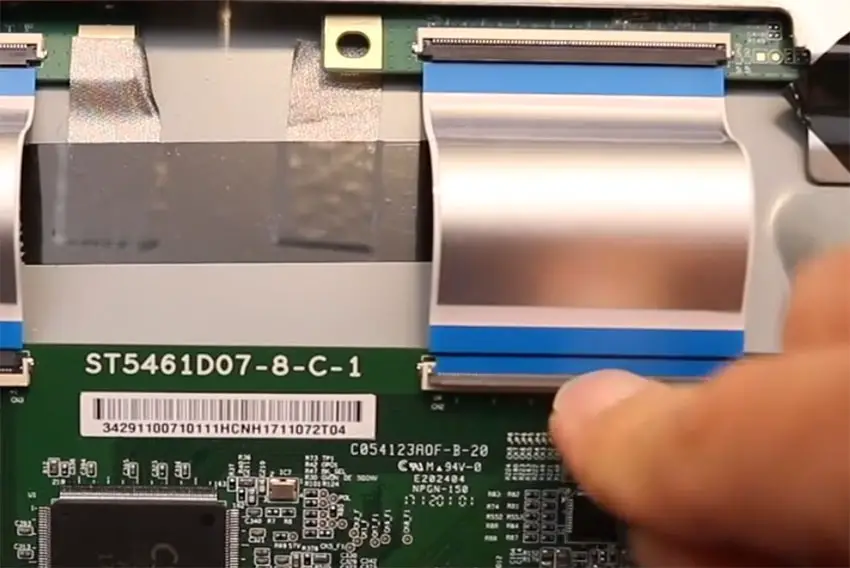
After removing the ribbon cable, take a look at the individual connectors on the ends of the cables, and the connectors in the socket. You are looking for any signs of corrosion, damage or dust.
The contacts should be a shiny gold or silver color. If they are dull and appear to have a rough, copper-like layer over them, this would indicate oxidation and therefore a new cable is recommended.
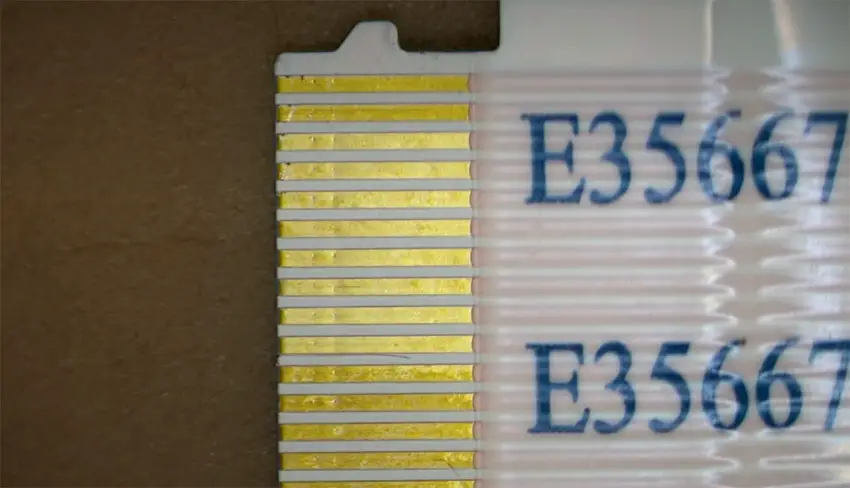
Give the cable and socket a good clean with compressed air, then put the cable back in, put the back panel back on your TV and fire it up.
If there are still vertical lines, there could be a fault somewhere on the T-Con board itself. These can be replaced for around $30 from eBay.
To get the correct board, note the T-Con model number written on the label on the board, and put this into eBay.
7. Use Tape on the T-Con’s Pins
This might seem like a bit of a hacky approach, but it is possible to use small pieces of non-conductive tape to block the individual contacts on the T-Con cable.
This blocks the “bad” signal getting sent through that contact, and can actually clear up the image.
This works because the T-Con cable sends a clock signal through a handful of the pins (usually 8 pins per cable) and any one of these clocks failing results in an improperly sent signal and vertical lines on screen.
And with two cables, one for each side of the TV, you can use the signal from the working side of the T-Con board to fill in for the faulty clock signals on the other side.
It can take some trial and error to get this right, so I recommend you check out the video below for a good demonstration of how to follow this approach.
8. Check Your TV Panel’s Tab Bonds
If you’re seeing single vertical lines on your Element Roku TV screen, or a bunch of individual pixel-wide lines, then you could be looking at a failure of the tab bonds connecting the row drivers to the panel.
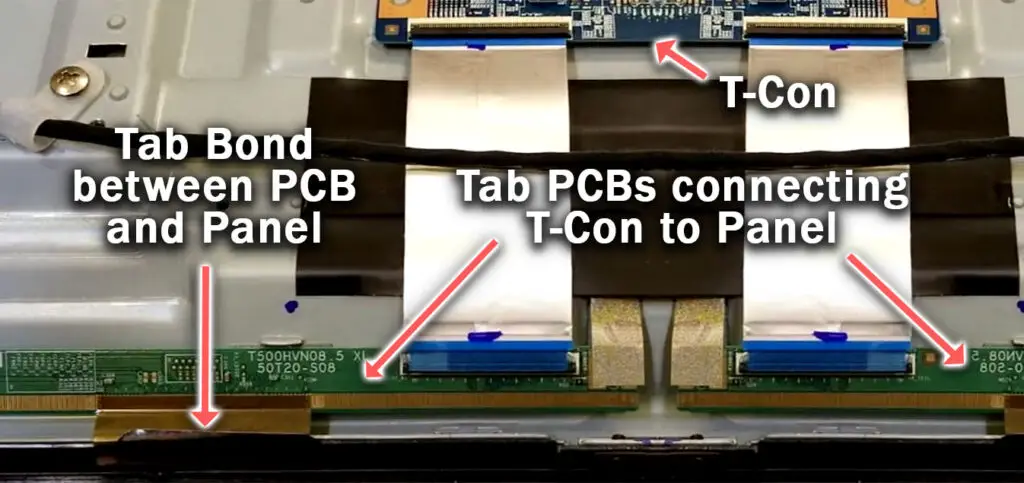
These small PCBs are attached to your TV’s panel in the factory and can’t be manually removed and replaced, but the factory applied glue linking the tab bond to the panel can come partially unstuck.
This causes the connection to drop for single rows of pixels where they are not receiving any data, and is commonly caused by corrosion from cleaning products that you’ve used on your screen.
You can tell if this is a problem by lightly banging the bezel of your TV next to the line, as seen in the video below. If it goes away or fades, then you have a tab bond failure.
For tips on how to fix these single vertical lines, take a look at the video below.
Element Roku TV Support & Warranty
It goes without saying that if your TV is under one year old, then you should contact Element customer support to get it replaced under warranty.
You can call Element on 888-842-3577, or use their contact form.
Even if Element won’t fix your TV, they might still offer you a discount off a future model if you pester them hard enough! This is always worth a try in my experience.
Vertical Lines on an Element Roku TV Screen: How to Fix
To fix vertical lines on a Element Roku TV:
- Clear your TV’s cache.
- Power cycle your TV.
- Update your Element TV’s firmware.
- Try to reseat the HDMI cables.
- Check your power supply for consistent voltage.
- Re-seat the T-Con cable and potentially replace the T-Con board.
- Use tape to block part of the T-Con clock signal.
- Check the tab bonds on the panel.
If you haven’t been able to fix your problem using the steps above, then your next port of call should be to customer support, who can advise you if they are able to fix it.
You can also leave me a comment below and I’ll see what I can do to help, but if your TV is especially old, then you might want to check out one of the latest, most highly rated new TVs as a replacement.
Read More:


Leave a Reply