If you want to make a complex selection covering large parts of your image, it is often easier to invert a selection in Photoshop.
This article covers a few quick methods for how to select inverse in Photoshop, along with some useful ways to actually make the selection that will save you time in the long run.
How to Invert Selection Photoshop
To invert selection in Photoshop, make sure you have a selection active, then you can use Ctrl + Shift + I (for Windows) or Cmd + Shift + I (for Mac), the Photoshop select inverse shortcut.
Photoshop Select Inverse Not Working?
If you try the shortcut keys above, and the selection does not invert, then you can troubleshoot as follows:
- Make sure that you first have an active selection – see below for how this is defined.
- If you have an active selection, then the selection may well have inverted. It is not always clear when this has happened, so see below for screenshots and advice on what an inverted selection looks like.
What is Inverting a Selection?
Before you start on inverting a selection, it’s a good idea to fully understand what a selection is and looks like within Photoshop.
A selection is defined by the line of marching ants surrounding part of your image, as in the screenshot below. This line of ‘marching ants’ is the term for a moving black and white line that you create with one of the selection tools.
Making a selection allows you to apply various adjustments to contrast, color, and even allows blending of multiple images.
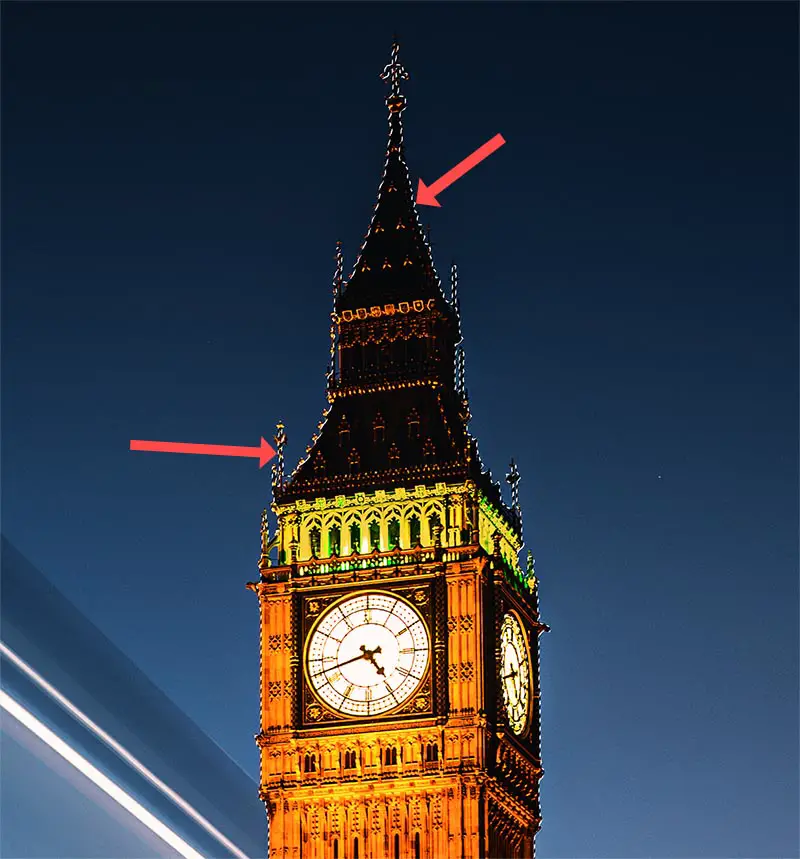
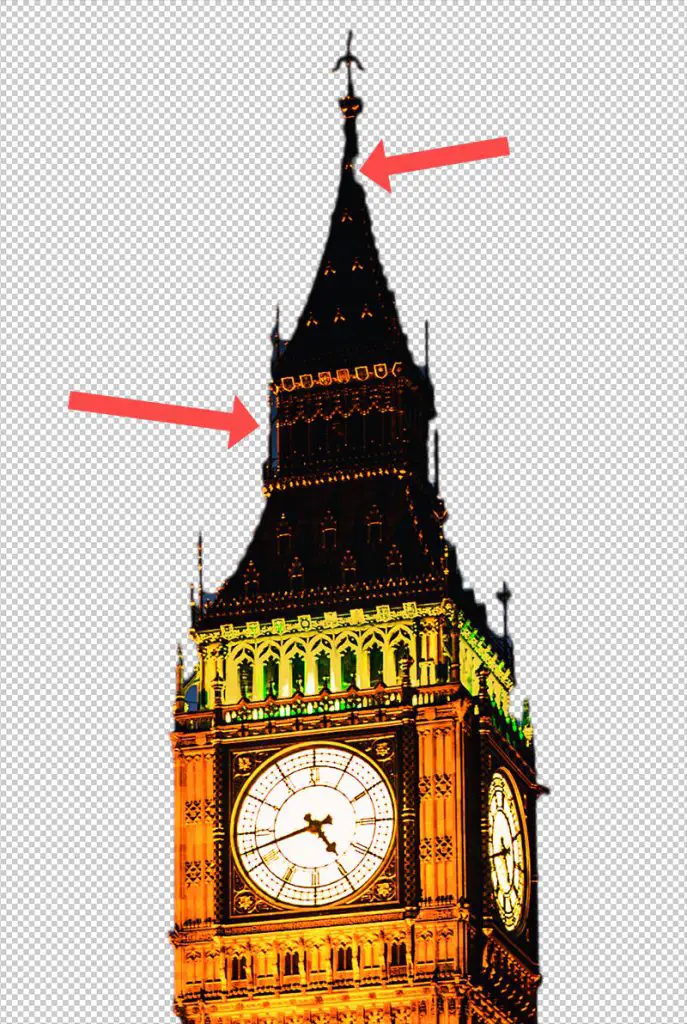
But in the image above, it is very difficult to make an accurate selection of the tower because of its complex outline.
If I cut out the selection I made, you can see that more ornate parts of the tower have been missed from the selection, and it overall looks fairly poor.
But this is where inverting a selection comes into its own.
If you look at the original image again, you can see that the sky is a fairly uniform blue color. Therefore, the sky is easy to select with the Magic Wand tool.
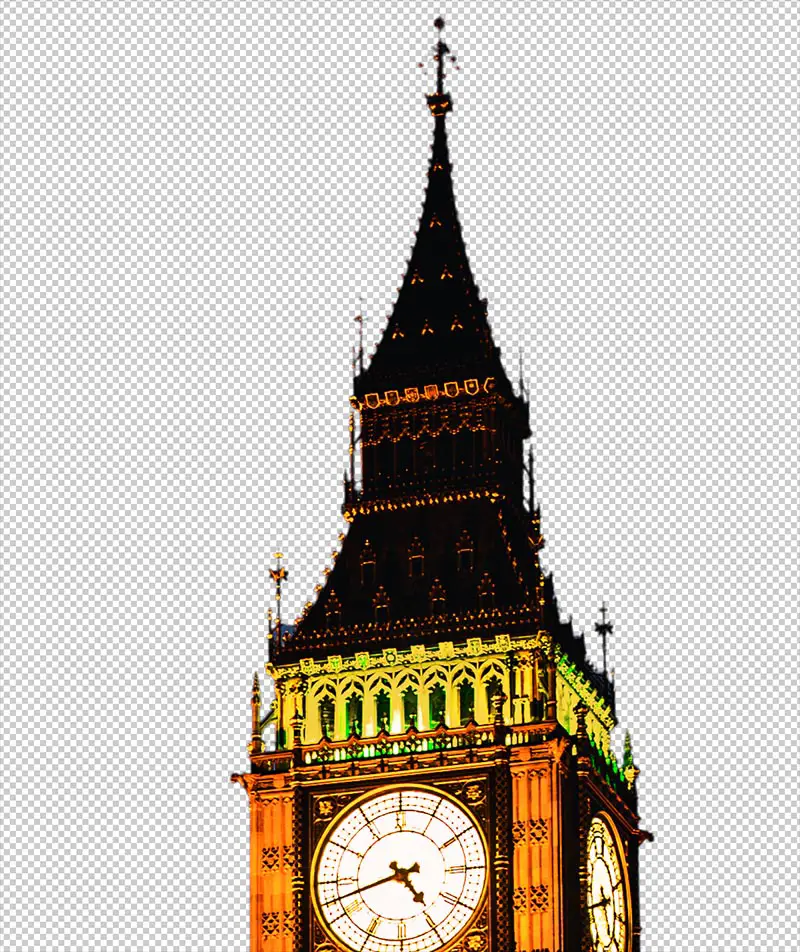
If you select the sky, then invert the selection, you will be left with a perfect selection of the tower.
You can now use that selection to create a layer mask, cut out the tower, or perform any number of adjustments.
How to Invert Selection in Photoshop
Step 1: Make Your Selection
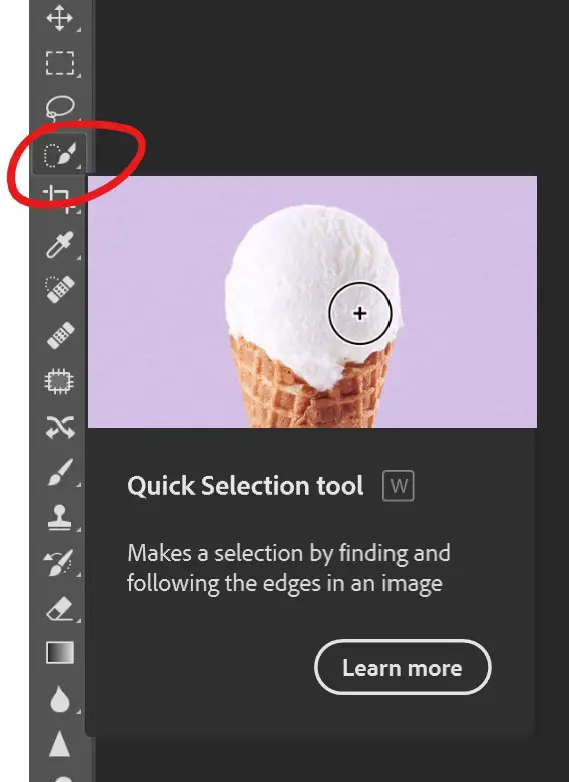
There are lots of possible ways to make a selection in Photoshop, including the Magic Wand Tool, Quick Selection Tool, Marquee Tool and more.
For this example, I will use the Quick Selection Tool to select the sky.
After drawing the tool over the sky, you can see the selection markers, the ‘marching ants’, confined to the edges of the sky.
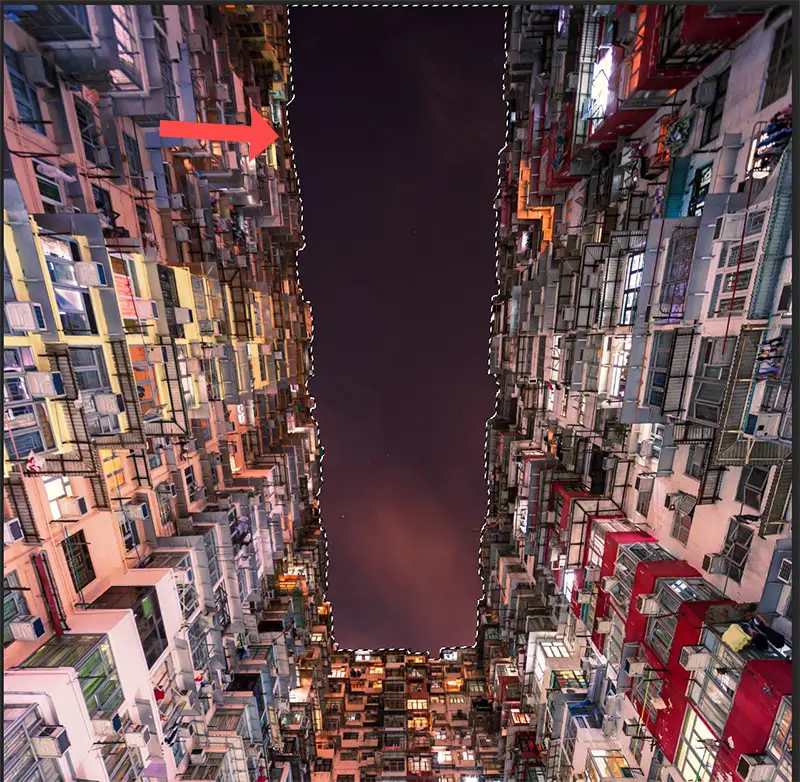
In this case, the selection is everything inside the marching ants. You can easily see this selection if I color it red.

This means that any adjustments you make, such as to color or contrast, will only affect the sky. But what if you wanted to invert this selection, so that you had the buildings selected and could easily make adjustments to them?
You could re-do the selection, which would be easy in this spceific image, but would waste time. If you have a more complex image, then this might not even be possible.
Step 2a: Invert Selection Using Keyboard Shortcut
The easiest way to invert a selection is the use the keyboard shortcut:
Ctrl + Shift + I on Windows Cmd + Shift + I on MacStep 2b: Invert Selection Using Right-Click Menu
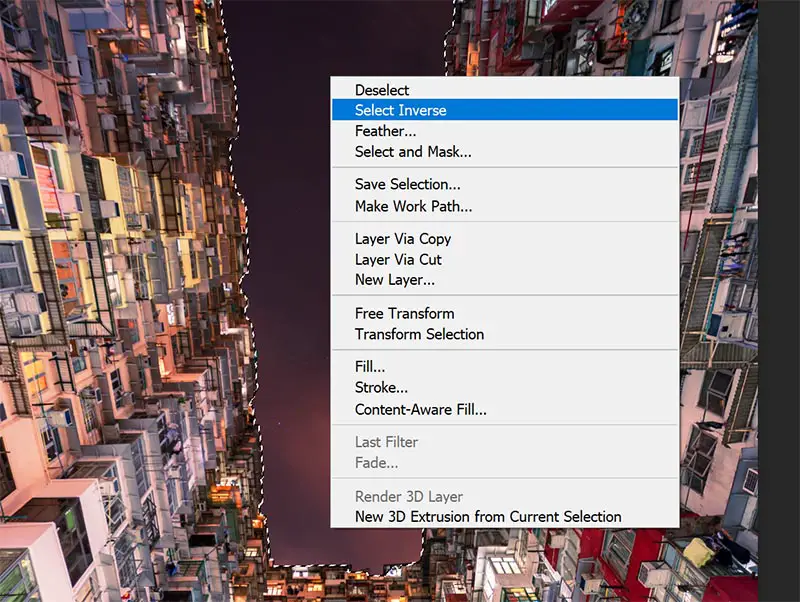
Or, with you selection tool active, you can right-click on your image, and choose Select Inverse.
Step 2c: Select Inverse Using Menu Bar
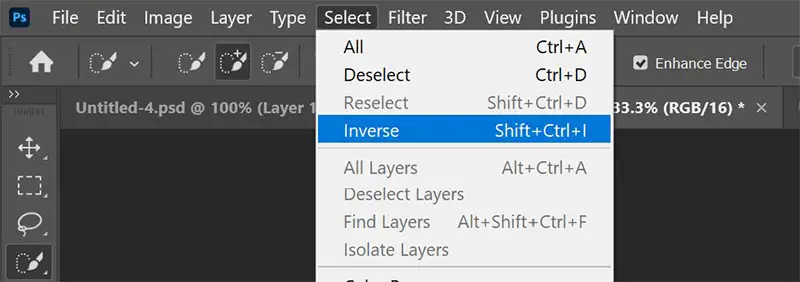
You can also do the same using the menu bar, following the menu Select -> Inverse. You can also see the keyboard shortcut here.
How to Confirm Your Selection is Inverted
It might not be immediately obvious that your selection is now inverted, but this can be confirmed by the position of the marching ants.
The marching ants will always totally encompass your selection, so on inverting your selection, they move around the border of your image, in addition to covering the original selection area.
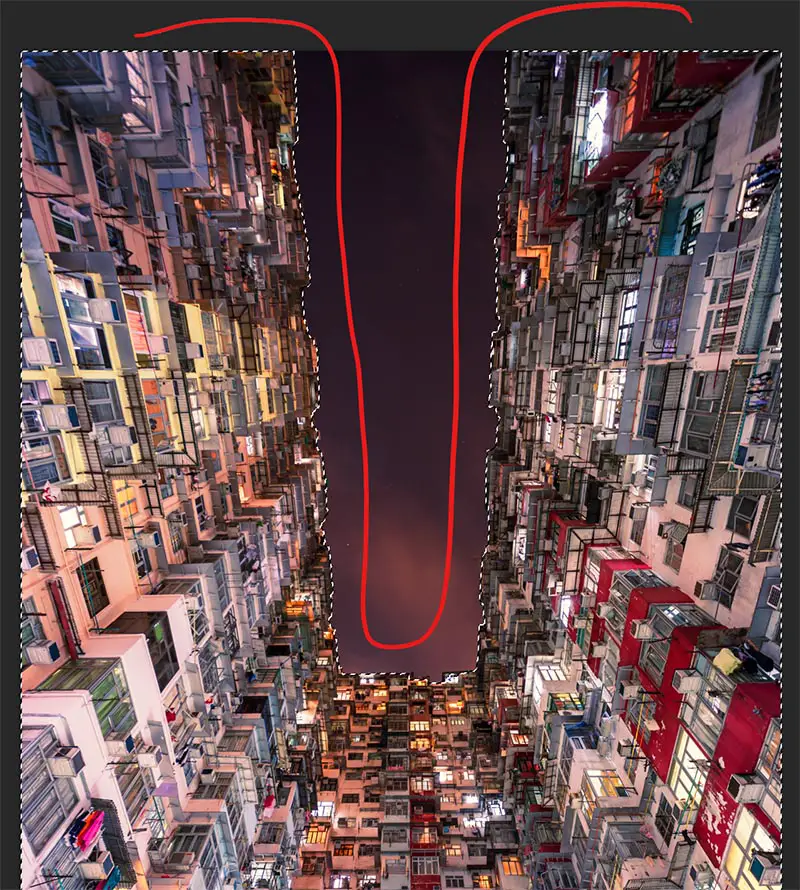
You are now free to make any adjustments, delete the inverse selection, or create any layer masks you like, safe in the knowledge that they will only affect the inverse of your selection, in this case the buildings.
Why Should You Select Inverse in Photoshop?
Although in the example shown here, there is not a lot of need to select inverse in Photoshop, it can be very useful in certain specific situations, such as where the selection you want is very complex, while the inverse is quick and easy to select.
This can save you a huge amount of time and effort, particularly when in comes to dealing with luminosity masks or saturation masks.
Refining a Photoshop Selection with Select and Mask
If you look at the details of my selection above, you can see that I actually didn’t do a very good job, with the lines not being totally confined to the edges of the buildings.
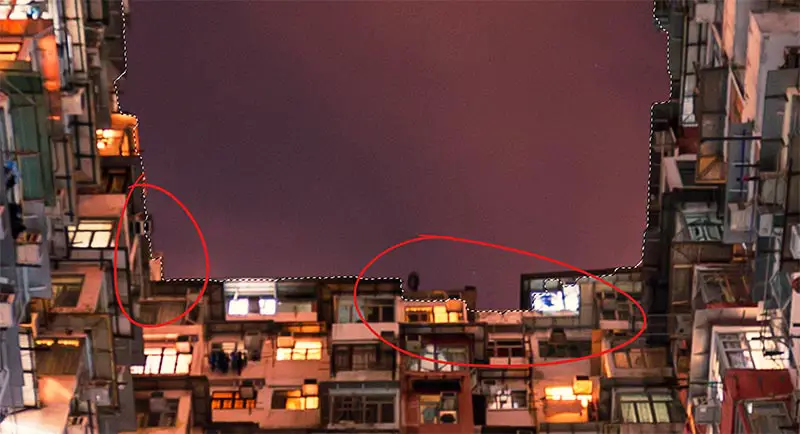
You may have noticed that on the toolbar when your selection tool is active, or in the right-click menu, there is an option to Select and Mask.

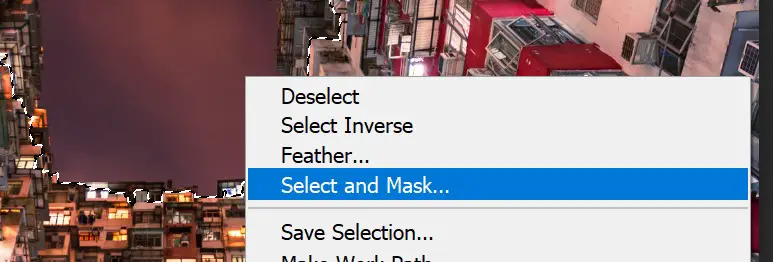
Clicking this opens up the Select and Mask window. In here, you can use the Smart Radius option to feather the edge, but you can also draw directly onto the mask (circled) to add this to your selection. Every brushstroke you add here is run through Photoshop’s algorithms, producing a much cleaner mask than if you did not use the Select and Mask tool.
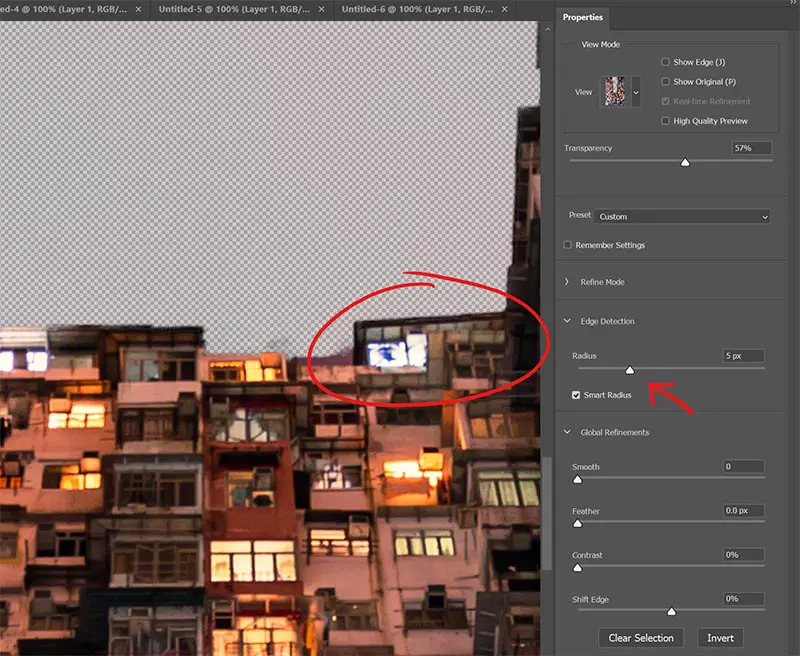
You can see from the screenshot above, that it is now possible to easily select the edge of the building, just by painting in the approximate area of the edge and letting Photoshop handle the selection.

Want More Photoshop Tutorials?
Learn how to crop layers in Photoshop
Dodging and Burning in Photoshop


Leave a Reply