Photoshop’s Clone Stamp Tool may suddenly stop working for a variety of reasons, but most of the time, you can restore the clone stamp tool to working order in seconds by changing a few basic settings. Usually, the tool settings and layer controls prevent the clone stamp from working, or it is always possible to resolve the problem by resetting the tool to its default settings.
How to Fix the Clone Stamp Tool in Photoshop
If the Clone Stamp tool is not working, fix it by first checking you are on the correct layer, that Sample settings are on All Layers, Blend mode is Normal and tool opacity is at 100%. If this does not work, then reset the Clone Stamp. Select it with ‘S’, then use the Clone Stamp toolbar dropdown menu, then the cog wheel for settings, and click on ‘Reset Tool’, although note that this will remove all Clone Stamp presets and preferences.

FIX 1. Check that You Have Selected the Correct Layer Or Document
Clone Stamp problems are usually caused by selecting the wrong layer or even document when using it.
Layers are often automatically created by Photoshop, such as when using the Text Tool, so it could be that you are working on the wrong layer without realising it.
Choosing the wrong layer in the Layers Panel may cause your adjustments to be hidden or sampled incorrectly.
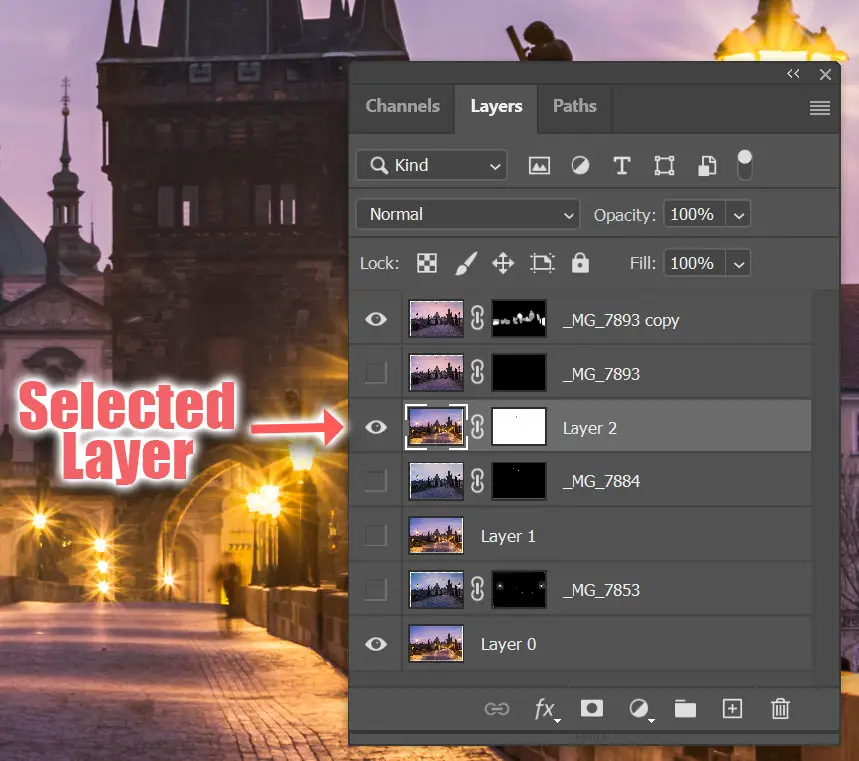
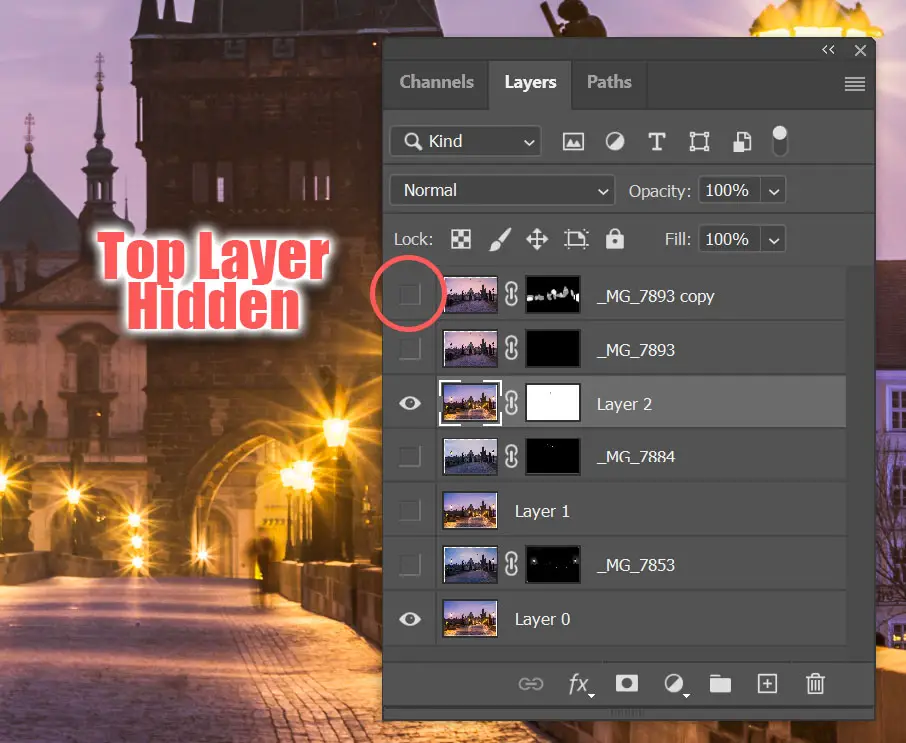
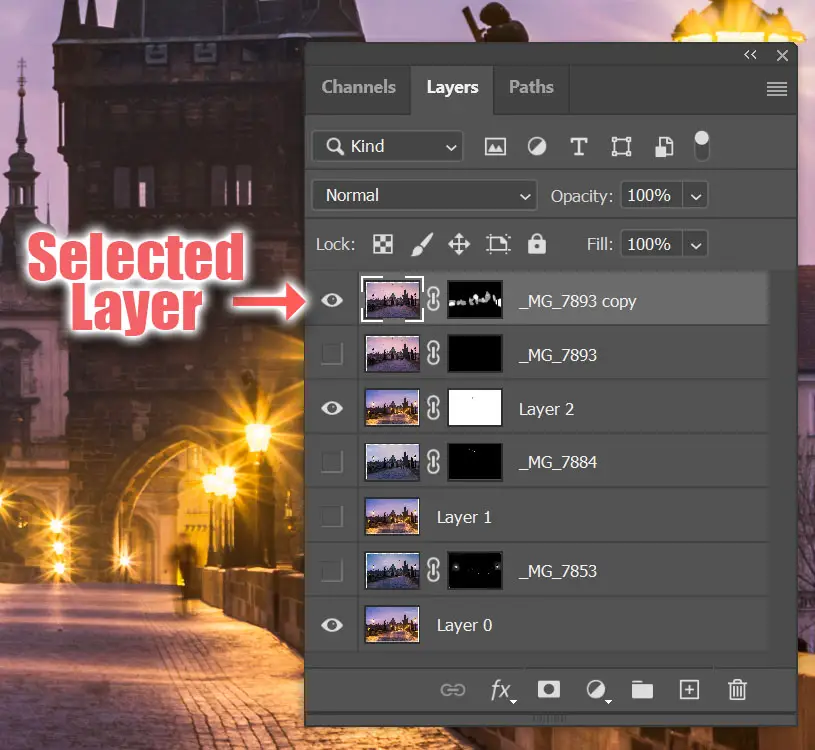
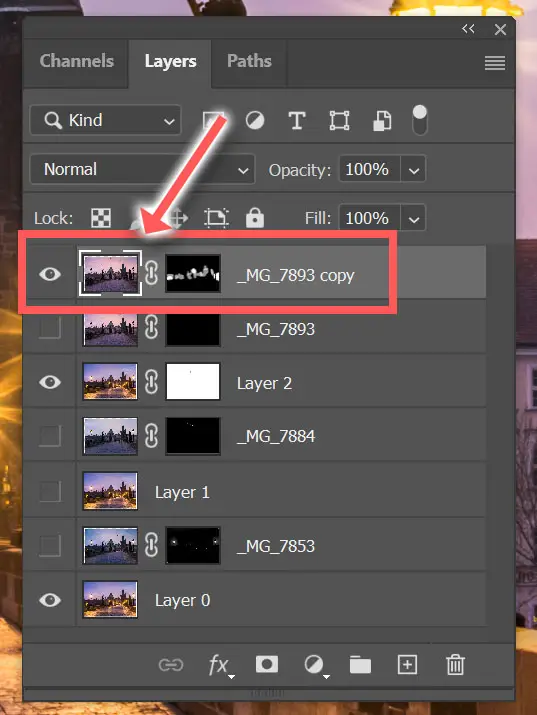
In the screenshot above, I have selected a layer that is hidden beneath a layer above it (_MG_7893 copy). Any use of the Clone Stamp will appear not to have any effect, because I am cloning into a layer that is not visible.
To fix this, you can either remove visibility from any layers above the layer you are currently working on, or just select the top-most layer, use Alt/Option to sample an area from this layer, and get to work cloning.
Additionally, since Photoshop allows you to clone from one document to another, make sure that you have actually grabbed a sample from the same document as the one you are cloning into.
It can be all too easy to select a sample with Alt/Option to work on one document, open a different image in another tab and then try to clone in the new document without first taking another sample.
FIX 2. Check You are Not Working on a Layer Mask
Another common reason for the Clone Stamp to not be working is that you have a layer mask selected.
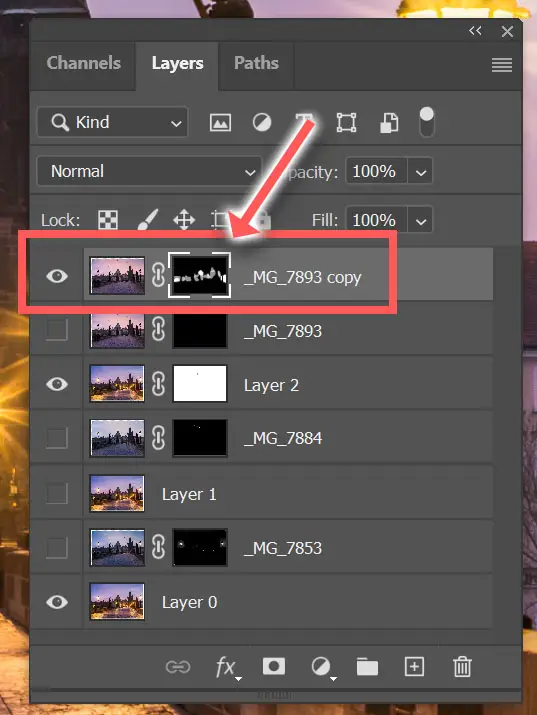
Check if the layer mask has a partial white border around it in the layers palette. If so, then it is selected rather than the layer that you want to work on.
Any cloning that you do will only apply to the layer mask.
To fix this, just click on the thumbnail of the actual layer itself. You will know that you have done this correctly when you see the white border move to the layer.
And your Clone Stamp tool should now work!
FIX 3. Text Layers Need to Be Rasterized
On a text layer, the Clone Stamp tool won’t work. If you try to use Clone Stamp, you should see a popup that informs you that you need to rasterize the layer.
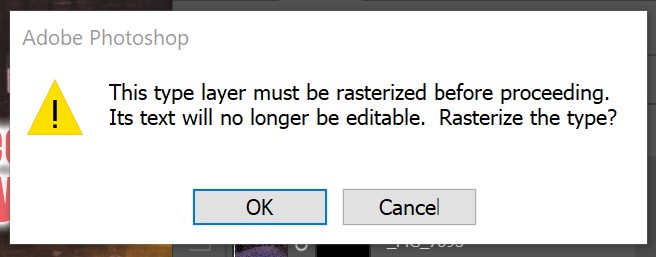
Click OK to rasterize the layer and use the Clone Stamp.
If you do not see this popup, then you can manually rasterize the Type Layer. It can be a good idea to first save a copy of the editable text layer, in case you need to make later changes to the text, as it will no longer be editable after rasterizing.
To do this, just duplicate the text layer by pressing Ctrl/Cmd+J. Turn off one of the two layers, and keep that one as a backup in case you want to edit the text later.
Then, Right Click on the layer you left visible, and select Rasterize Type.
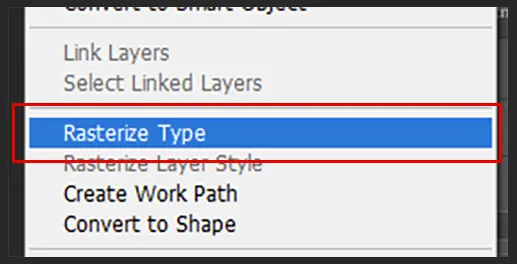
Now the text is a simple layer on which you can freely use the Clone Stamp Tool.

FIX 4. Ensure that your Sample Settings are Correct
Another possible way why your Clone Stamp is not not working is because the sample settings are incorrect. There are three different sample options in the Options Bar of the Clone Stamp Tool when it is active.

- Current Layer samples only the currently selected layer.
- Current and Below sample both the currently selected layer and the layer directly below it.
- All Layers samples all layers in the document.
If you have created a new layer, you will have to select Current and Below (and ensure that the below is what you want to clone), or All Layers for the Clone Stamp tool to work.
The sample setting should be set to Current And Below if, for example, you have a new transparent layer over an image layer. By doing so, you will be able to paint on your new layer while sampling the image layer immediately beneath it.


When cloning directly on a layer, and you don’t want to clone the effects of any adjustment layers, select the Current Layer sample setting.
Personally, I find that All Layers is the best all-round setting, but you will find that the settings will need to be changed constantly depending on what you are doing.
FIX 5. Check the Brush Settings
Your brush settings work with your clone tool in the same way as the regular paint brush or eraser tool.
So, firstly, in the Toolbar, select the Clone Tool or press S on your keyboard, and from there, choose the Brush Settings. You will be greeted with the Brush Settings Panel.
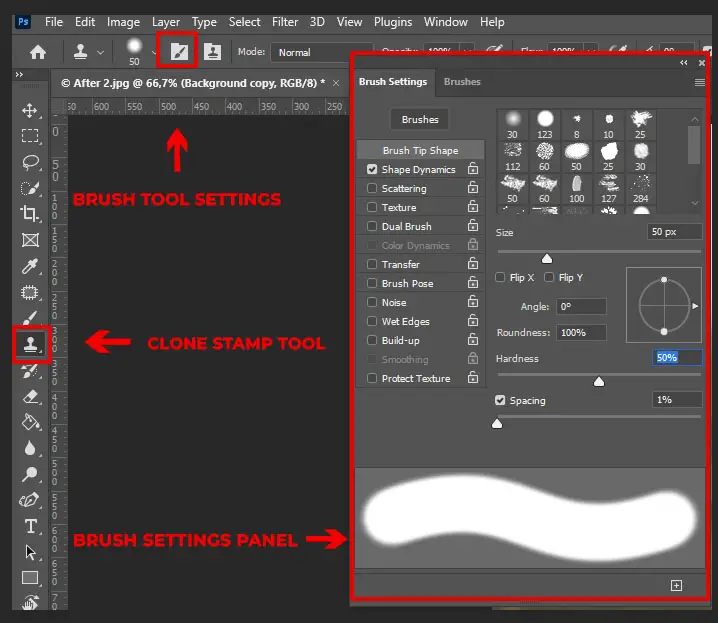
Ideal Brush Settings for Cloning
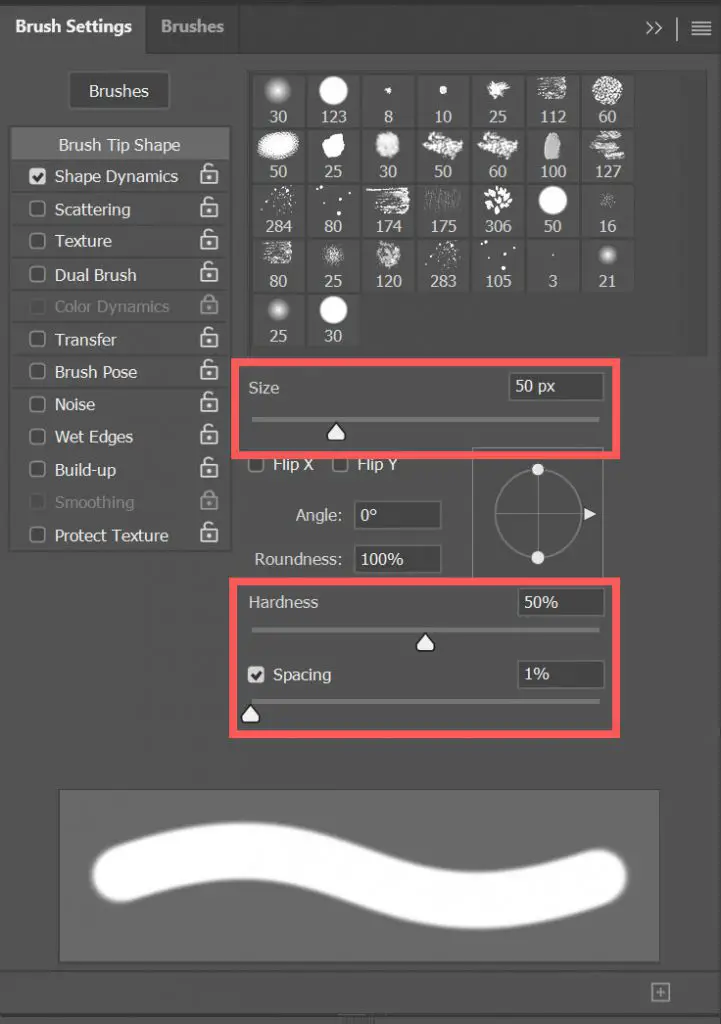
For accurate cloning, you need a medium-sized tip. Using a small-sized brush tends to result in uneven edges in your cloned area, while a larger brush covers too great an area and makes your cloning stand out, in a bad way.
There are some brush settings that make it seem as though the Clone Stamp tool is not working, so it’s a good idea to check these first.
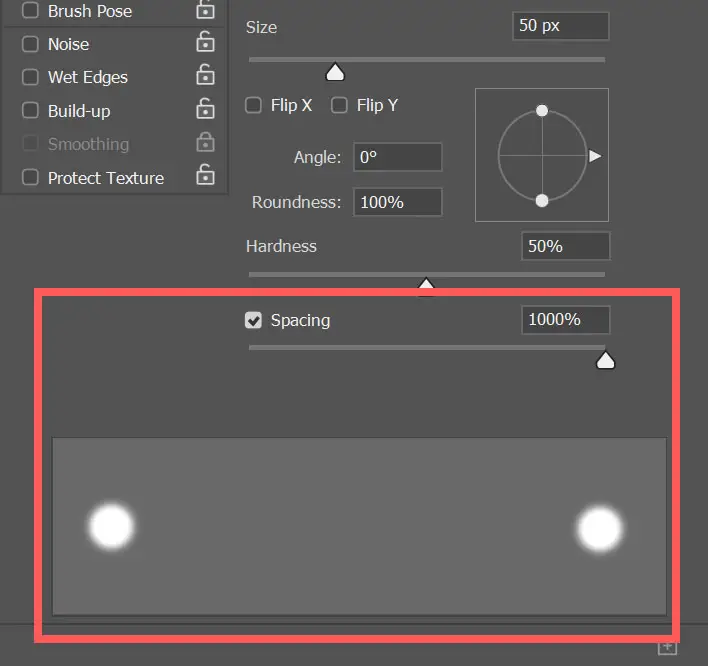
A large amount of Spacing in the brush tip would make the clone stamp tool appear to not work, as this will create gaps in your cloning.
Adjust the hardness percentage to at least 50% if you are using a smaller brush size and cannot tell whether you are cloning or not, as a lower hardness value can hide the fact that the tool is in fact working as expected.
Brush Style
You should also try out different styles of brushes, as some work better for cloning than others. A soft edge will give a better-blended effect when removing something (eg. a Person or Object). You can choose the soft and hard edge brushes from the Brush Picker, or you can adjust them manually with the hardness option.
To get to the Brush Picker, while your Clone Stamp Tool is selected, go to the Brush Icon in the Options Bar. From there, you can select the Soft Edge Brush.
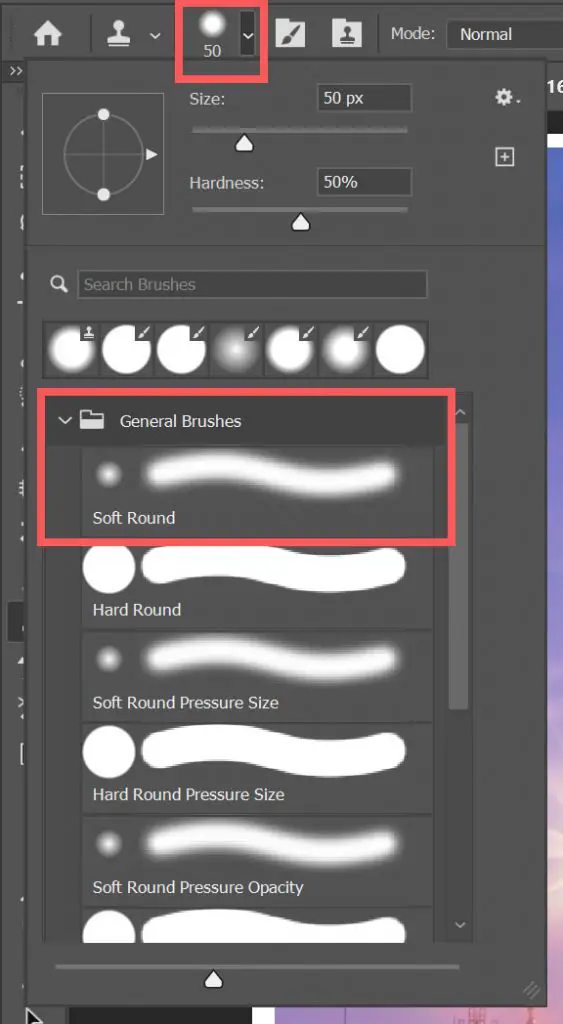
You can also right-click anywhere on the screen to get to the same Menu.
FIX 6. Check the Opacity and Flow Settings
The Clone Stamp tool has the same opacity and flow settings as many other Photoshop tools. Incorrect settings here are a common cause of your cloning being not visible, even though the tool itself is technically working correctly.
To troubleshoot this, make sure the Opacity and Flow options are both at 100%. You can find these settings in the Options Bar while the Clone Stamp Tool is active.

If these are set to too low a value, then you might only see a ghostly clone, or nothing at all.
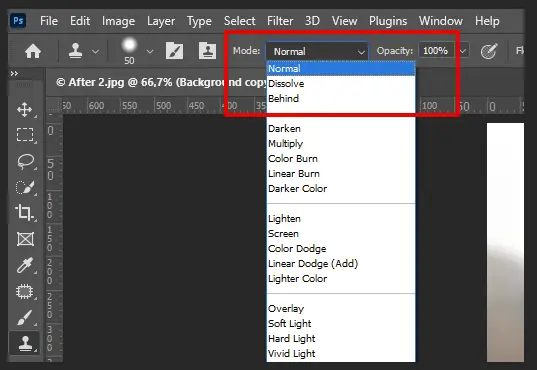
FIX 7. Make sure that the Blend Mode is set to Normal
With the Clone Stamp Blending Mode, you can change how your cloning adjustments blend with your image, in the same way as you can modify blending modes for individual layers.
If you have changed this setting and have forgotten to restore it to its original state, it is easy to believe that the clone stamp tool is not functioning correctly.
To fix this, the blending mode should be changed back to Normal. Select the Clone Stamp Tool, and go to the Options Bar. Set Mode to Normal.
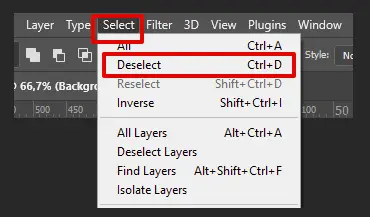
FIX 8. Check for Any Accidental Selections
If you have already made a selection of your image, then the Clone Stamp will not work outside this selection.
Sometimes these selections are made accidently using the Marquee tool (or any other selection tool), and are too small to see. In this case, nothing happens when you select the Clone Stamp tool and click Alt/Opt.
To fix this, go to the Select menu and click Deselect. Or you can use the shortcut Ctrl/Cmd+D.
FIX 9. Check your Sample Area
Another possible reason for a failure of the Clone Stamp is that you clicked on an empty or transparent area when you were taking the sample with Alt/Option, or your cursor may be at the edge of the artboard.
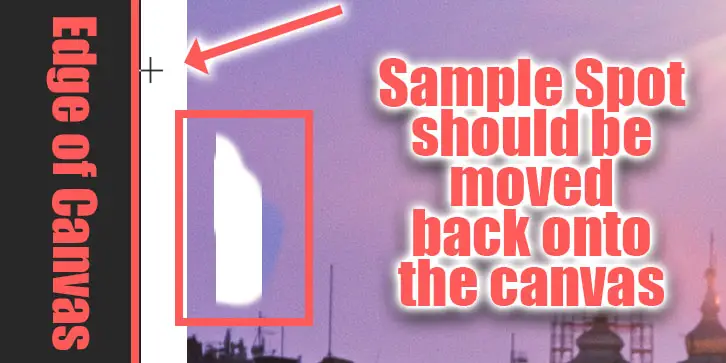
Try taking a new sample with Alt/Option on your active layer if you have hit the edge of your canvas.
Transparent Layers
If you took a sample using Alt/Option of a transparent layer, then nothing will be painted with the Clone Stamp tool.
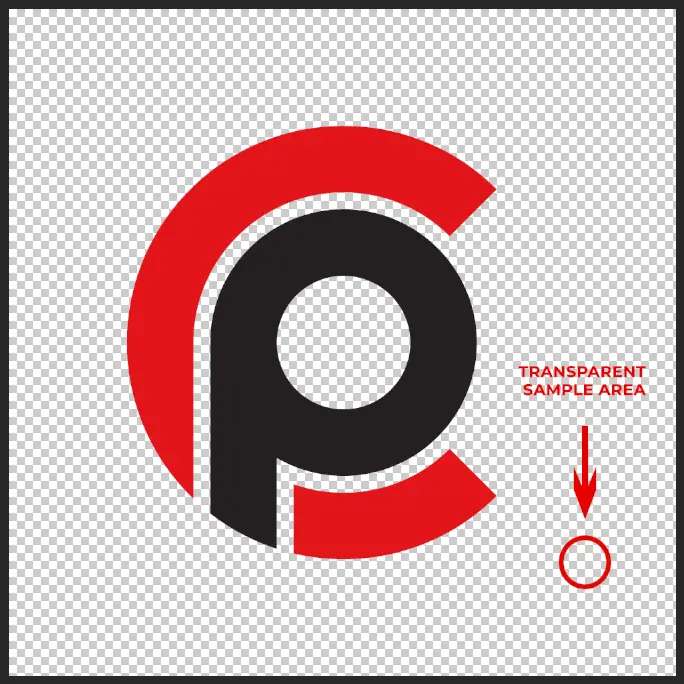
To clone this logo, for example, you would have to hold Alt/Opt and click on a non-transparent area of your canvas or layer. You can then clone as normal.

FIX 10. The Clone Stamp Tool may need to be Reset
If you are still struggling to get your Clone Stamp tool to work properly, then the final option is to try to reset the tool.
This is not to be undertaken lightly, as it will remove any of your preferences and presets from the Clone Stamp, but should at least get it working again if all else fails.
- First, make sure you have the Clone Stamp tool selected, either from the toolbar or by pressing ‘S’.
- From there, go to the Clone Tool Settings in the Options Bar, which is a dropdown menu next to the Clone Stamp icon, next to the Home icon.
- Once you click on the Stamp Icon, you will be greeted with an Option Menu.
- Then, select the Cog Gear to open a settings menu, and choose the Reset Tool option.
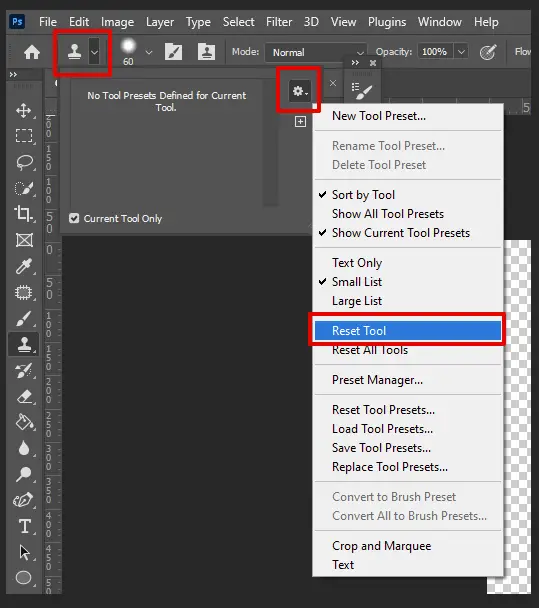
This fully resets the Clone Stamp and returns it to its default state from when you first installed Photoshop.
Hopefully, this has fixed your issue, but if not, there is one more step you can take.
FIX 11. Photoshop Preference file might be Corrupt
If none of these tips fix your issue, you might be dealing with a corrupt Preferences File. The Preferences File saves all of your settings and preferences, so resetting/deleting that file will reset all your Photoshop settings to default. In a sense, it will feel like a fresh install of Photoshop.
This is obviously a last resort, as you will lose any custom settings and presets that you have added to your install.
Method 1: Using Shift+Ctrl/Cmd+Alt
- Save all your work and quit Photoshop.
- Wait for a couple of seconds for all of its associated background processes to close.
- Then press and hold Shift+Ctrl+Alt on Windows or Shift+Cmd+Opt on a Mac, and launch Photoshop while holding those keys.
- Before Photoshop launches, a dialog box appears asking you whether you want to delete the Adobe Photoshop Settings File.
- When you choose Yes, Photoshop will launch with the Preference File reset, and everything will be set to the factory settings.
Method 2: Use the Preferences Menu
This method works only with Photoshop CC and newer versions.
- First, go to the Edit Menu.
- From there, go to Preferences and choose General. (You can also do that by using the Ctrl/Cmd+K shortcut).
- There you will find a button named Reset Preferences On Quit.
- If you press that button, when you close Photoshop, the Preferences File will be reset.
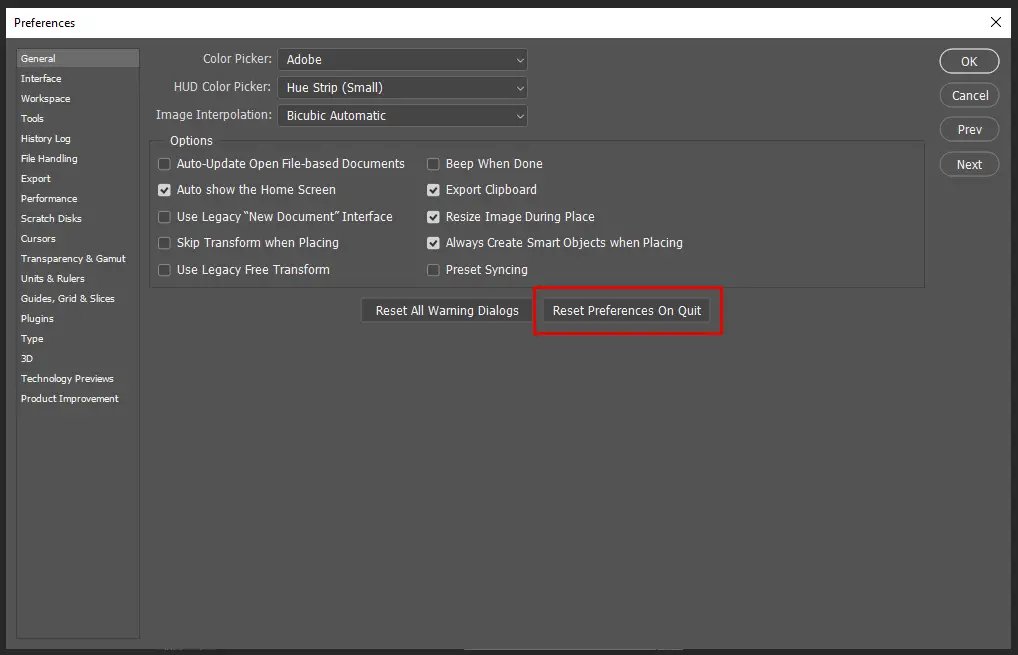
Using either of these methods, on the next Photoshop launch, you will notice that everything is reset to the factory settings.
Conclusion
If your Clone Stamp tool is not working, then you can almost always fix it by resetting the tool, but this is a last resort as it will also delete any presets you have saved.
Before resetting the Clone Stamp tool, you should check:
- That you have selected the correct layer or document
- That you are not working on a layer mask
- If you are working on a text layer that it is rasterized
- That your sample settings are correct
- That brush settings are correct
- Opacity and flow are at 100%
- The tool blend mode is set to Normal
- There are no accidental selections in your document
- Your sample area is not transparent or off the canvas
If none of these steps work, and you have tried to reset the tool, then all that is left is to contact Adobe Customer Support and hope that they can help you to resolve the issue.


Leave a Reply