Learning how to wrap text in Photoshop means that you can create professional-looking images that really showcase your skills.
In this article, I will cover two easy ways to make text wrap in Photoshop, whether that is around an image, a shaped text wrap inside an image, or warping text.
1. How to Wrap Text Around An Object in Photoshop
This method lets you easily wrap text around an image or object, and is where the text wrap follows the outline of the object. You draw an outline around your object, and the text will conform to that boundary.
I. Create an outline around your object
There are several ways to outline your object within your image, but the simplest is to use the Pen tool.
Access the Pen tool by pressing P or selecting from the tools palette.

Then draw where you want the edges of your text to be, by clicking to create a path with the pen.

This path that you have created will be one border for your text, but you also need to create borders along the straight edges of your image.
If you want to be super-accurate with your edges, you can hit Ctrl / Cmd + R to bring up the rulers, then drag a ruled line into your image to act as a guide.
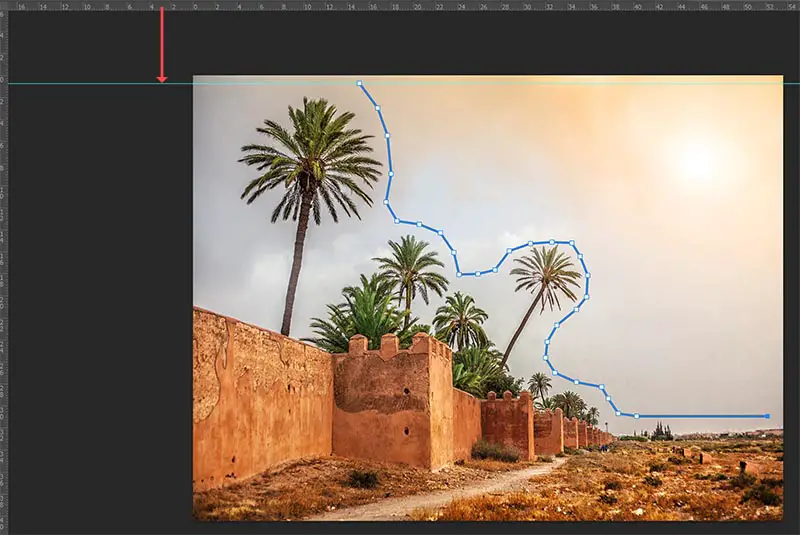
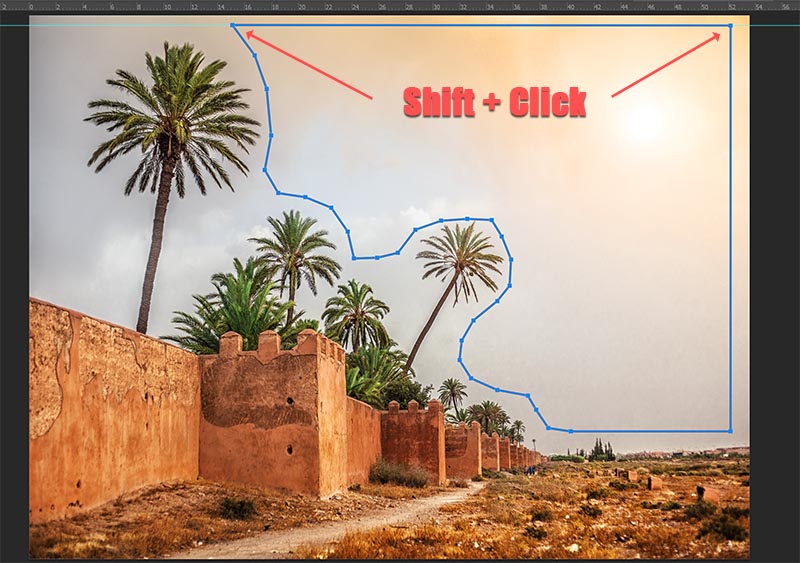
Continue using the pen tool, holding down Shift as you click with the pen, as this automatically snap the lines to either horizontal or vertical positions, without you having to be too accurate with your clicking.
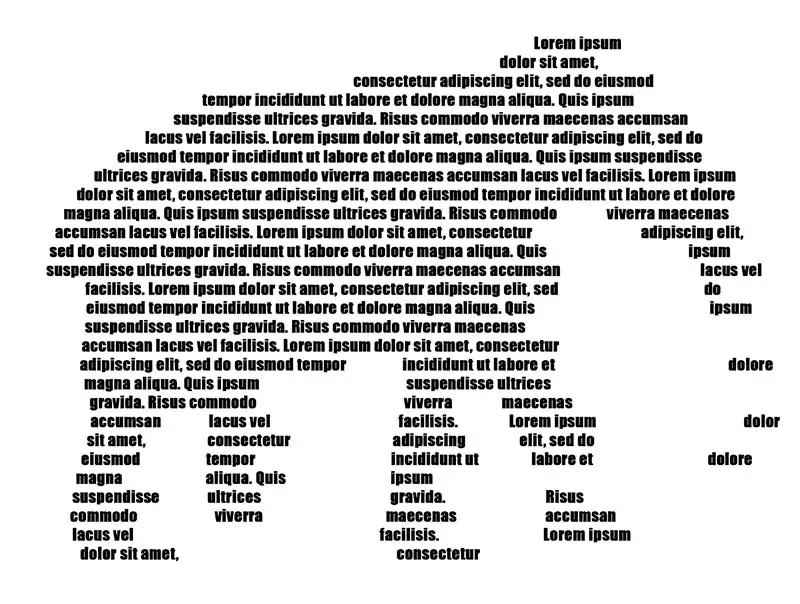
II. Text Wrap in Photoshop
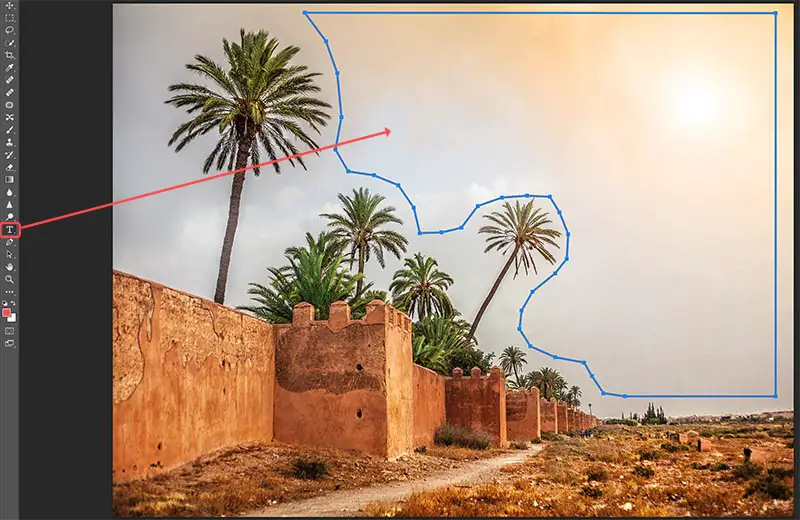
Next, take your Text tool (either from the tools palette or by pressing T), and click somewhere within your completed path. You will see that the outside of the text cursor changes from a square to a circle when inside your path.
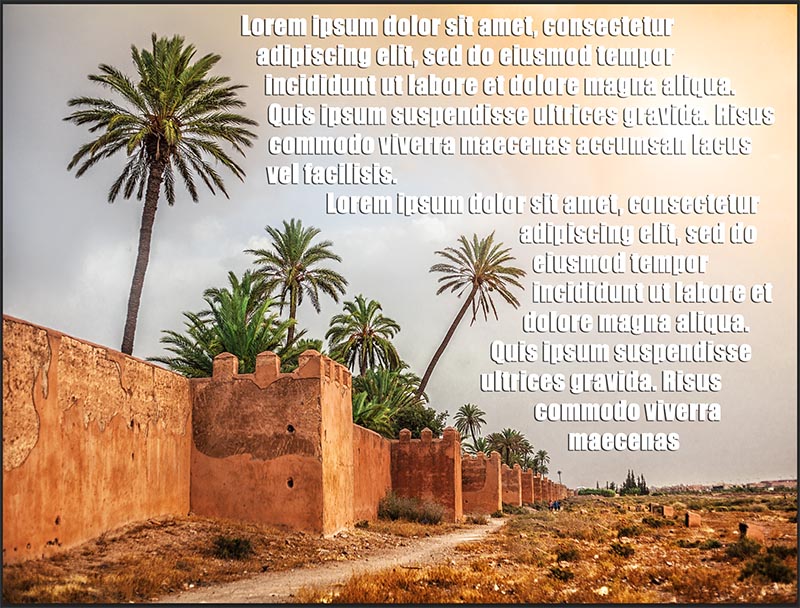
Then, to complete your Photoshop text wrap, simply enter text inside your path. This will be automatically constrained by the boundaries that you drew.
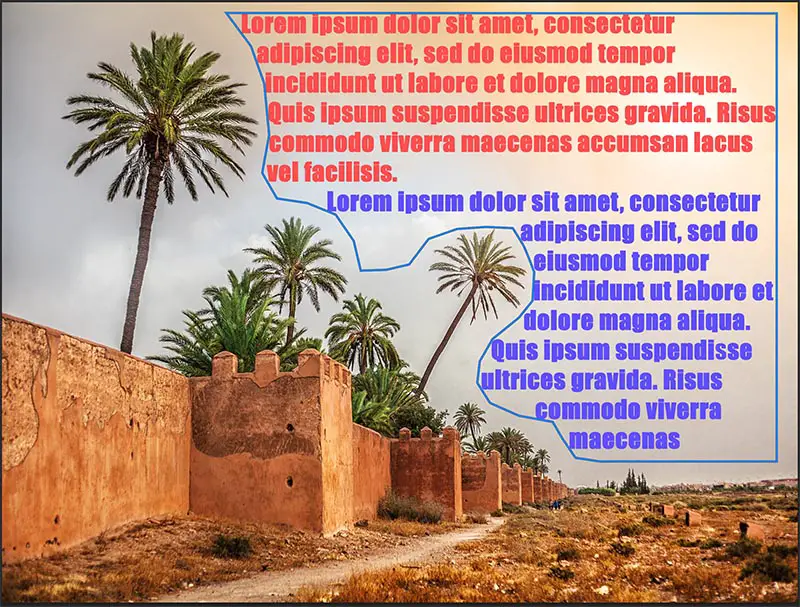
You can easily edit text color, size, spacing and more from within the text palette to create your final image.
2. How to Warp Text into a Shape in Photoshop
Rather than having text follow the standard left-to-right lines that you are used to, it is also possible to warp text into a shape in Photoshop. You can either use a shape that is included with Photoshop, or design your own.
How to Shape Text in Photoshop Using an Existing Shape
You can use a number of tools in Photoshop to create a shape, including those highlighted below. I will be using the Custom Shape tool for this example.

You can then select the shape you want your text to fit, in the toolbar.
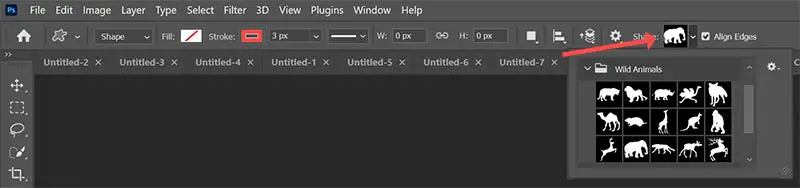
You should also decide if you want the shape itself to be visible. If so, you can leave the toolbar setting on Shape, otherwise you should change it to Path.

After deciding on whether you want to see the shape or not, drag your shape onto your canvas to draw it.
Then, click your Text tool from the palette, and hold it over the edge of your shape. The text cursor should change to a wavy line.
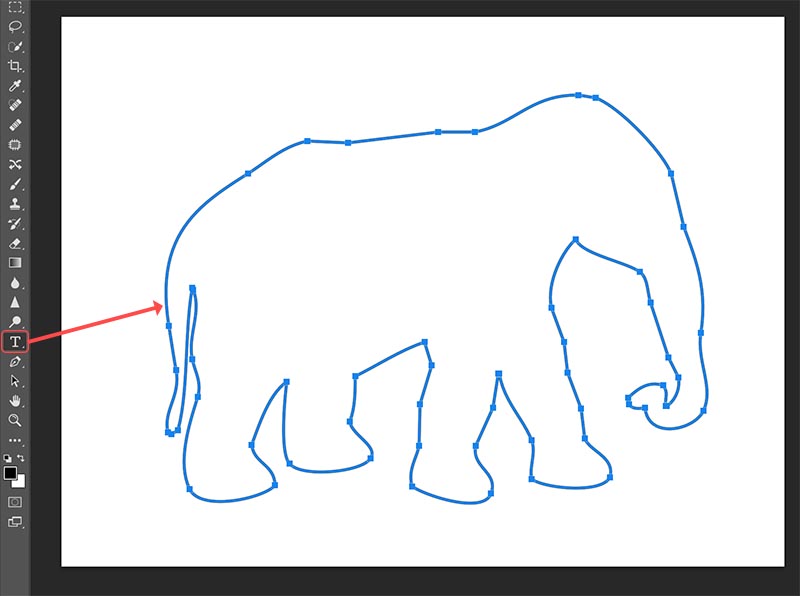
Once you see the wavy line cursor, click your text tool on the shape, and some boilerplate text will be added. You can modify this in the usual way, and easily create a really professional look to your text.
How to Fill a Shape with Text
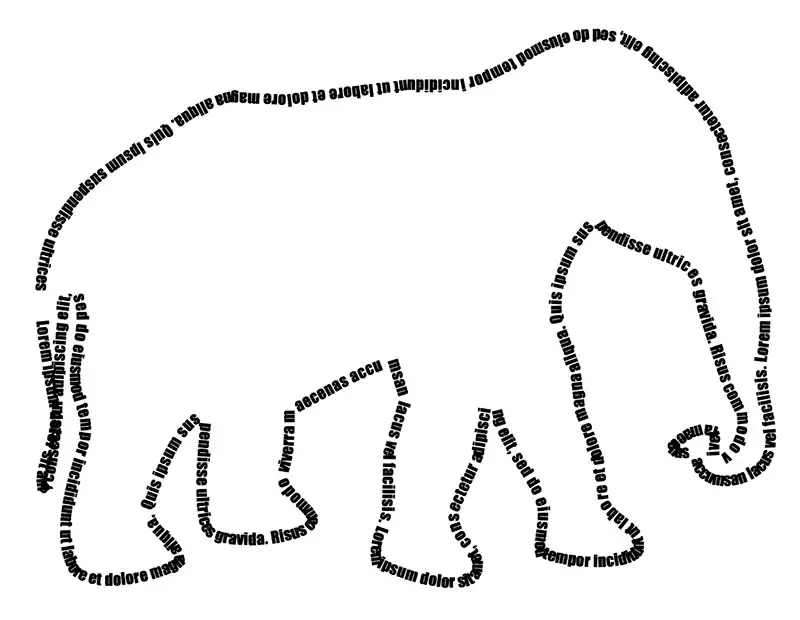
As we saw in part 1, if you click on the center of the shape with the Text tool, instead of the edge, then your text will fill the shape.
How to Shape Text into a Custom Shape
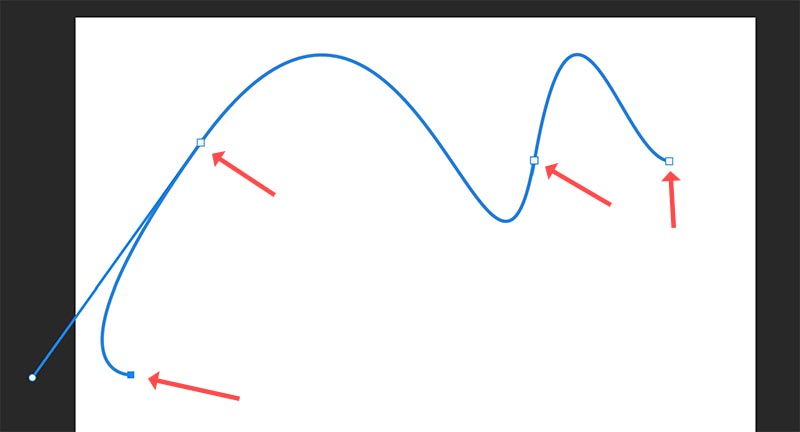
If you don’t want to use one of the pre-defined shapes, then it is quite easy to create your own. You can use a number of tools, but the easiest is probably the Pen tool.
As in part 1, first select your Pen tool from the palette.
Draw the shape you want to create on your canvas, using the anchor points to modify the curve radius.
Then with your Text tool selected, you can do a Photoshop word wrap to your custom shape by clicking on the shape, once your text tool cursor has changed to a wavy line.
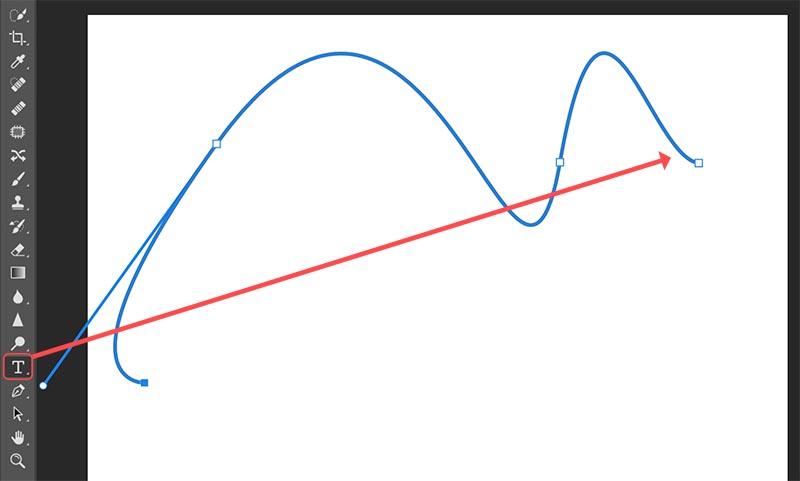
This adds standard text, which you can then modify as you see fit.
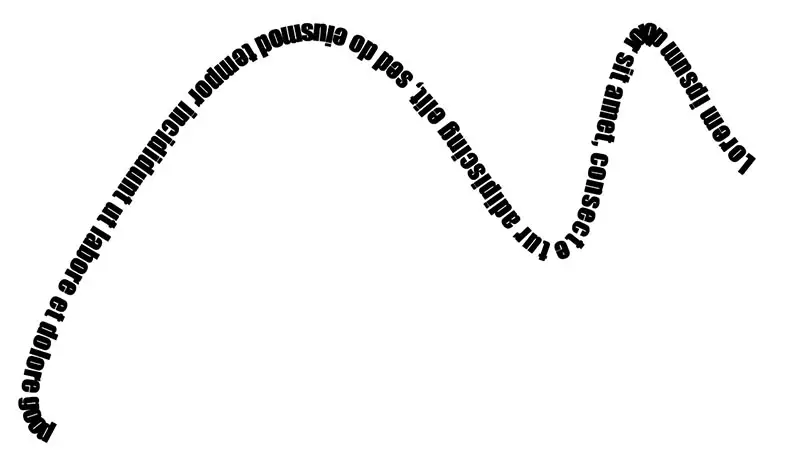
Fixing Upside Down Text
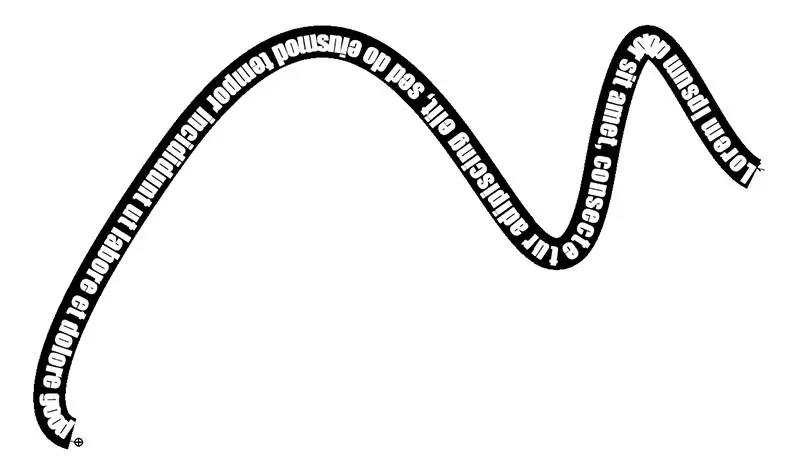
You can see with the custom shape above that the text has appeared upside down. This will commonly happen when you are fitting text to the edges of shapes, but can be easily fixed.
Let’s first see why the problem has occurred.

The blue line above represents the path that we drew. You can see that the text is attached to the underside of this path, which is why it is upside down. To make it the correct way up, the text should be moved to the other line of the path.
To move the text, first click on it, so that you have the text layer active, then click Ctrl / Cmd + A to select all of the text.
Then simply hold Ctrl or Cmd and drag the text to the other side of your path. It will then switch to being the correct way up.
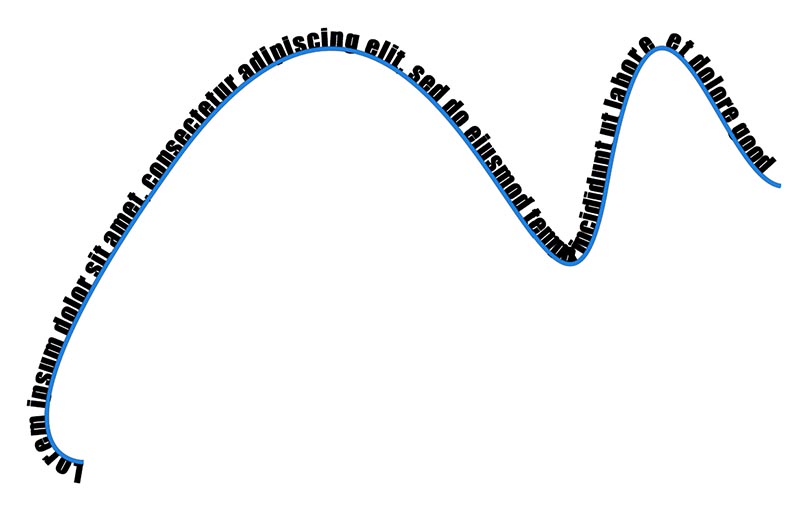
It’s easy to modify text in this way so that it is always easily legible.

Read More Photoshop Tutorials:
The best way to make images bigger in Photoshop
Get free RAW images for editing
How to crop layers in Photoshop
How to freehand crop in Photoshop


Leave a Reply