How to Move Your Lightroom Catalog
Whether you want to move your Lightroom library to an external hard drive or change your Lightroom catalog location for backup purposes, you need to make sure you capture all the information it contains, from previews to edits, and your catalog structure.
I have a Lightroom catalog containing nearly 70,000 images, so I understand how important it is to do this safely.
Luckily, it’s quite easy to change your Lightroom catalog location, which you can do using the information in this article, which includes details on your Lightroom library location, how to copy a Lightroom catalog to another computer, and the difference between moving and copying a catalog, among many other points.

What Does a Lightroom Catalog Contain?
Before you look into moving your Lightroom catalog, it’s a good idea to fully understand what exactly is in it, so that you can be sure that moving your Lightroom library is the best way to solve your problem, and so that if you go through with it, you don’t lose anything important.
Lightroom itself does not directly store your images, so moving your catalog will not move your image files. If you move your catalog to an external drive but do not move your image files, you will find the catalog pretty much unusable in the new location.
What is stored inside Lightroom are primarily any edits you make to your photos, such as any changes to white balance, colors, or exposure, along with any other changes to image metadata like ratings, keywords, and collections.
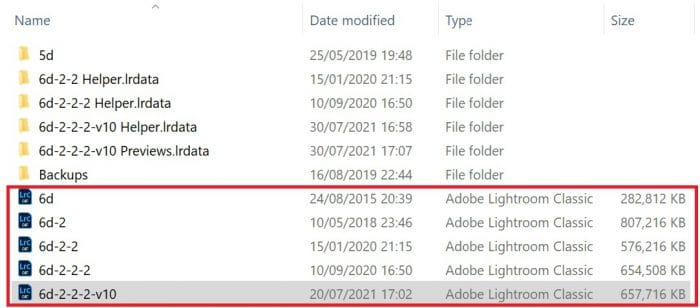
These edits and metadata do not take up much space – my main catalog of nearly 70,000 images takes up just over 640 MB for all of this data, and I have done a lot of editing within Lightroom. This data is stored inside a single catalog file – you can see five different catalogs in the screenshot below.
But what really takes up disk space is image previews, which fall into four types, from smallest to largest:
- Minimal: Small, low-resolution JPGs embedded in the image file by the camera.
- Embedded & Sidecar: Slightly larger camera-generated previews.
- Standard: Created by Camera RAW within Lightroom, these take up much more disk space than either of the previous two types.
- 1:1: Full-size images created by Lightroom, these are very large files.
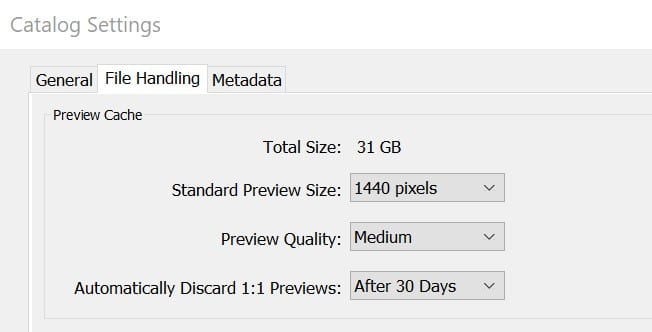
My catalog currently uses Standard previews, set to 1440 pixels on the long edge, and as you can see, this results in disk usage of 31 GB for my 70,000 images.
1:1 previews are automatically created when you zoom into an image in Lightroom, but you can set these to be automatically discarded after a set number of days.
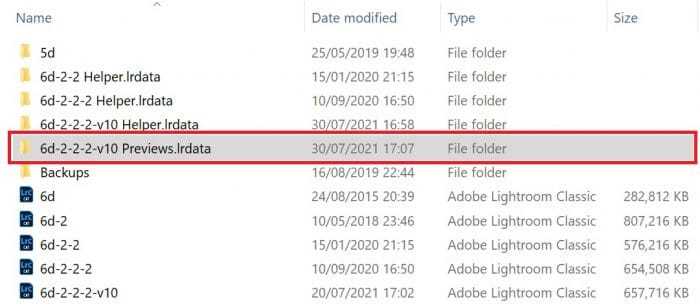
All of these previews are stored in a folder structure alongside your main catalog file, although you are not able to view these previews outside of Lightroom, as they use a proprietary file format.
When Should You Change Your Lightroom Catalog Location?
There are a few reasons why you might want to move your Lightroom catalog location:
- To access it from another laptop or computer
- Because of low disk space on your current hard drive
- To create a backup
Moving your Lightroom catalog to an external drive to fulfill one of these reasons is very common, although you should be aware that this can cause a slowdown depending on the speed of your port. In this case, you ideally want a USB-C external hard drive.
Dealing with Low Disk Space
If you intend to move your catalog because of low disk space, then bear in mind that the image files themselves will not move, and these are the largest memory hogs, followed by previews.
If you find that your previews are too large (you can see the current size by following the menus Edit -> Catalog Settings and then the File Handling tab on the popup), you can try reducing the Standard preview size and quality, and also only importing future images using the Embedded & Sidecar preview type.
Lightroom is designed to handle huge amounts of image data, with tens of thousands of images not a problem, in theory. My main catalog is now approaching 70,000 images and still works quickly and without issues. If you want to move your library because of speed reasons, then it may not be effective, as it is likely your computer hardware will cause any slowdown.
You can try deleting images in this case, but it would usually be more effective to upgrade your hardware.
Creating Backups
Although Lightroom itself creates backups, these are stored in the same location as the catalog, meaning that if you had a hard drive failure you could lose both your catalog and the backup.
One way around this is to add your Lightroom catalog as a cloud storage location so that it is automatically added to Google Drive, Dropbox, or similar, although this will almost certainly mean that you have to pay for extra cloud storage space, and you will need a fast Internet connection.
The Difference Between Moving a Lightroom Catalog & Copying a Lightroom Catalog
Although you might be using moving and copying interchangeably, you should make sure that you understand the difference before changing your Lightroom library location.
Moving a Lightroom catalog means that you will only access the catalog from the new location so that only one version of the catalog remains after the move. This is most appropriate for those changing locations because of low disk space.
Copying a Lightroom catalog means that your catalog remains in the same original location, but is also copied to a new location. This is best for backups, but remember that the two versions of the catalog will not be linked, and will not both update if you make any changes to one. Therefore, you will need to regularly replace the copy in order to stay up to date.
How to Change Your Lightroom Catalog Location
Once you have decided on moving or copying your catalog, the steps themselves are fairly simple.
1. Find Your Catalog Location
If you don’t already know your catalog location, then you can easily find it by following the steps below depending on your operating system.
Lightroom Catalog Location Windows 10:
- Open Lightroom
- Go to Edit -> Catalog Settings
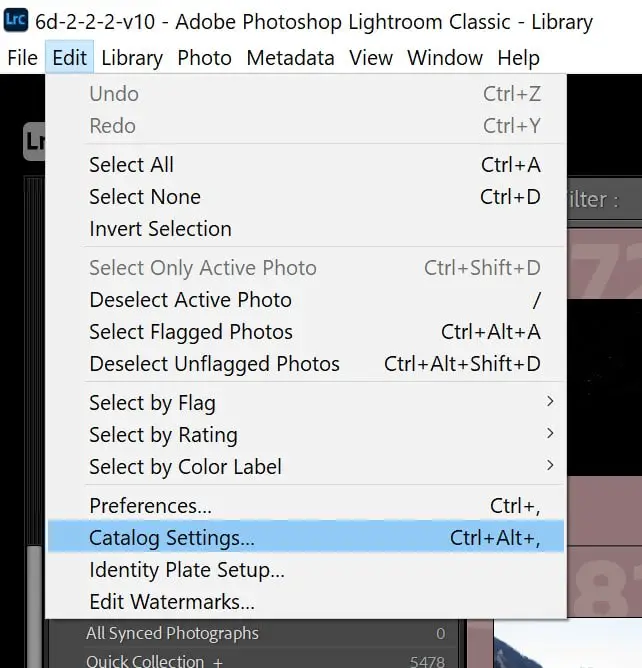
- In the General tab of the Catalog Settings popup, click the Show button next to the Location field
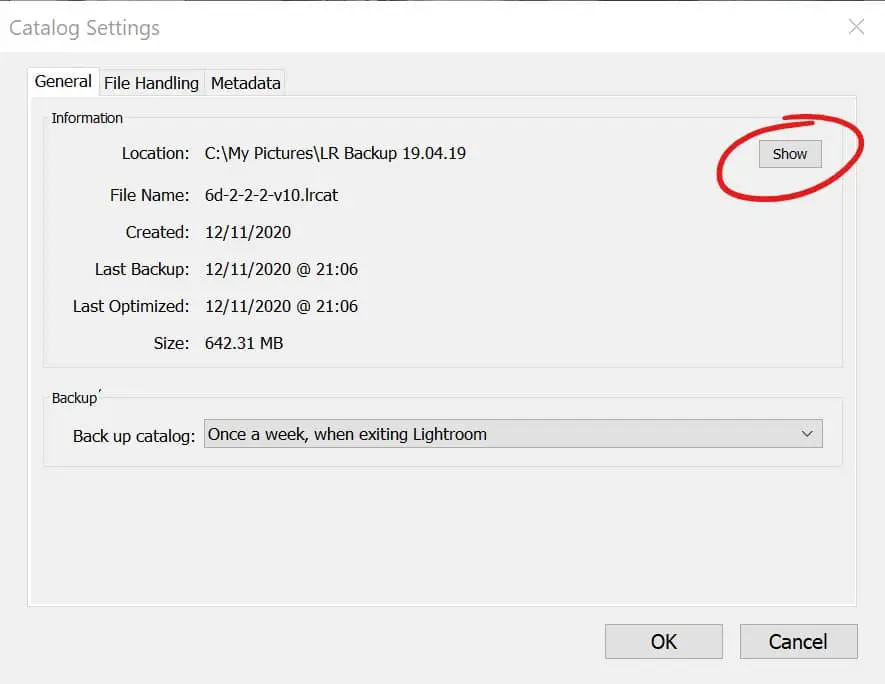
- An Explorer window will open with the folder containing your catalog location highlighted.
Lightroom Catalog Location Mac
- Open Lightroom
- From the menu bar, click Lightroom Classic -> Catalog Settings
- You will see the same Catalog Settings popup as above, so click the Show button on the Location line to open the folder
2. Drag and Drop the Catalog Files to the New Location
The exact steps that you take here depend on whether you want to move your catalog or copy your catalog to a new location.
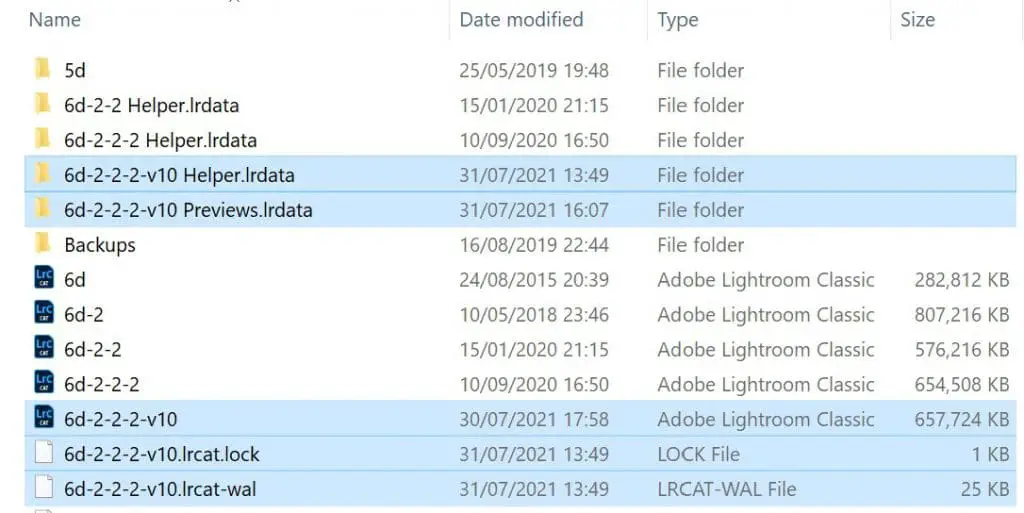
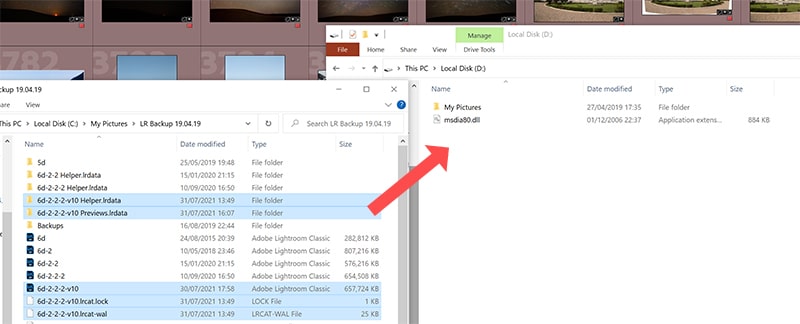
In either case, first close Lightroom, then highlight all of the files and folders within your Lightroom catalog folder that have the name of your catalog.
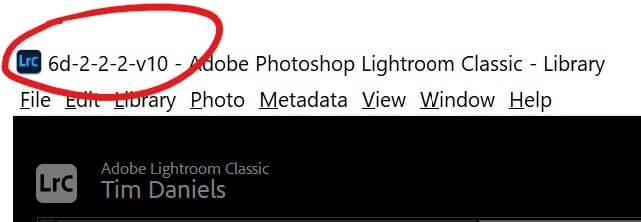
For example, my catalog is named 6d-2-2-2-v10 (!), which I know because the title bar within Lightroom displays this name.
So, I first highlight all the files with this name and the previews folder. If I only moved the LRCAT file and not the previews folder, the catalog would still work but would need to create entirely new previews. The only real crucial file below is the one of type ‘Adobe Lightroom Classic’. All of the others are not necessarily needed for Lightroom to work.
If you then want to move your Lightroom catalog (so that you only have one copy, but in a different location), drag these files and folders to your new location within Explorer.
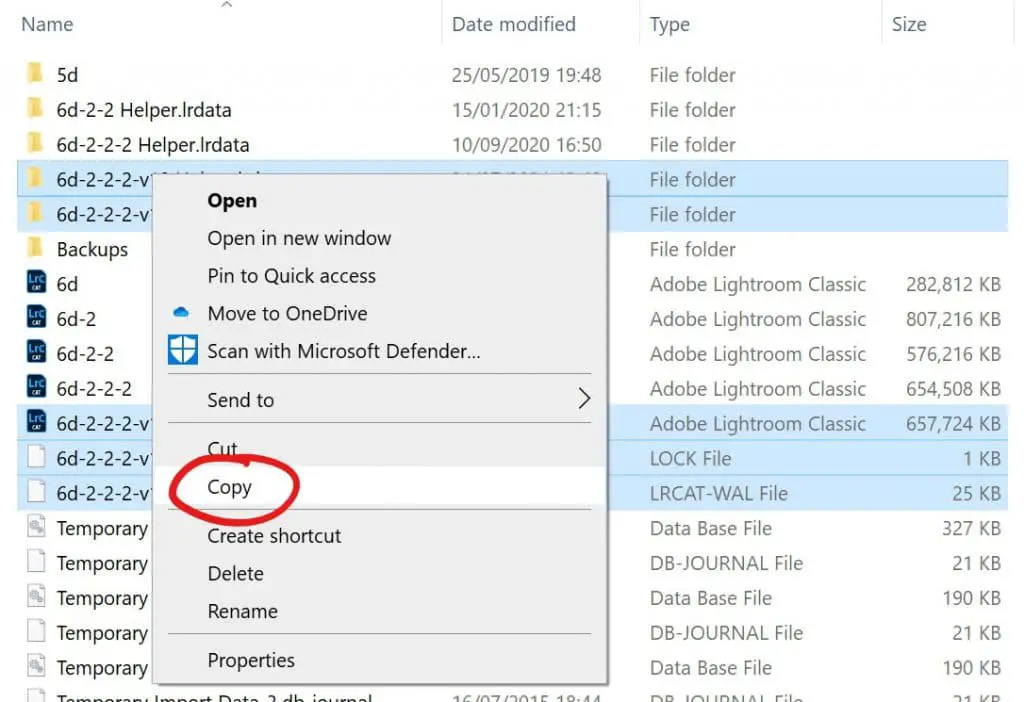
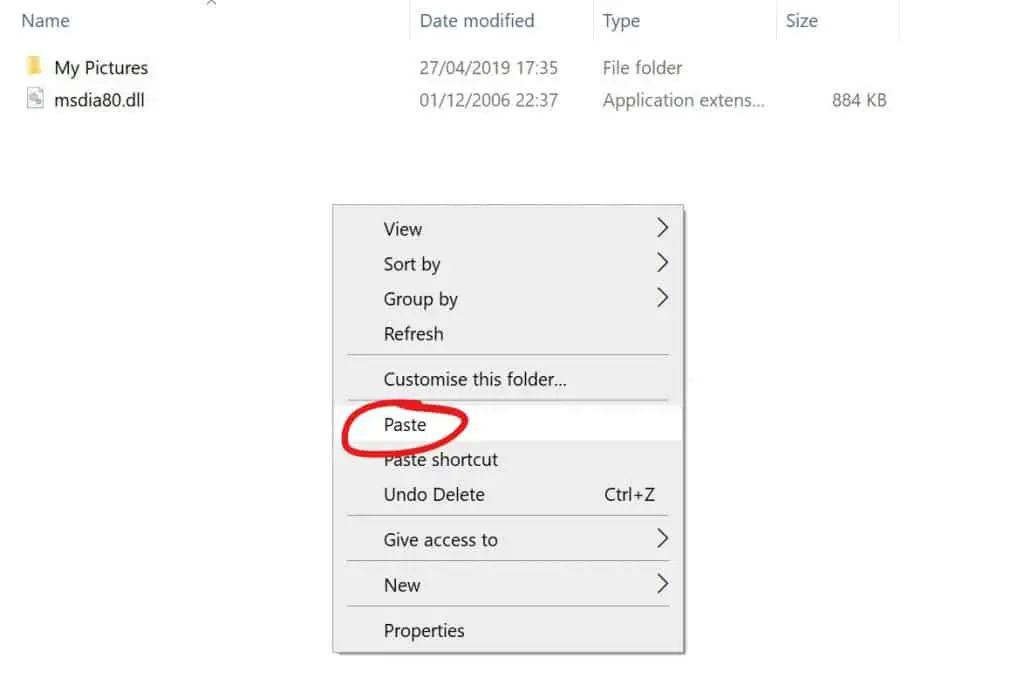
If you want to copy your Lightroom catalog (so that you have this original copy, plus one more in a different location), then first right-click and select Copy, then move to your new folder location, right-click, and select Paste.
3. Open Your Catalog in Lightroom & Confirm Its New Location
To make sure that Lightroom has been closed, double-click on the main catalog file in your new location to launch Lightroom.
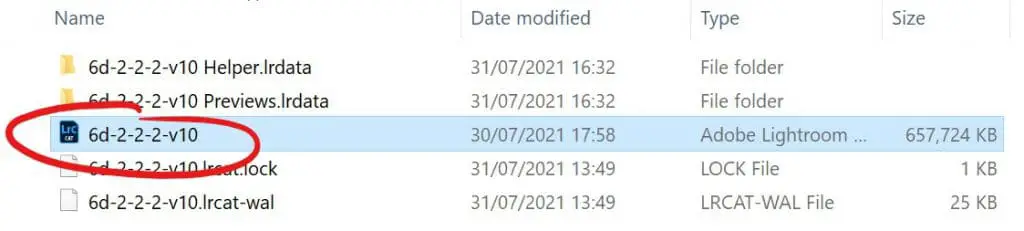
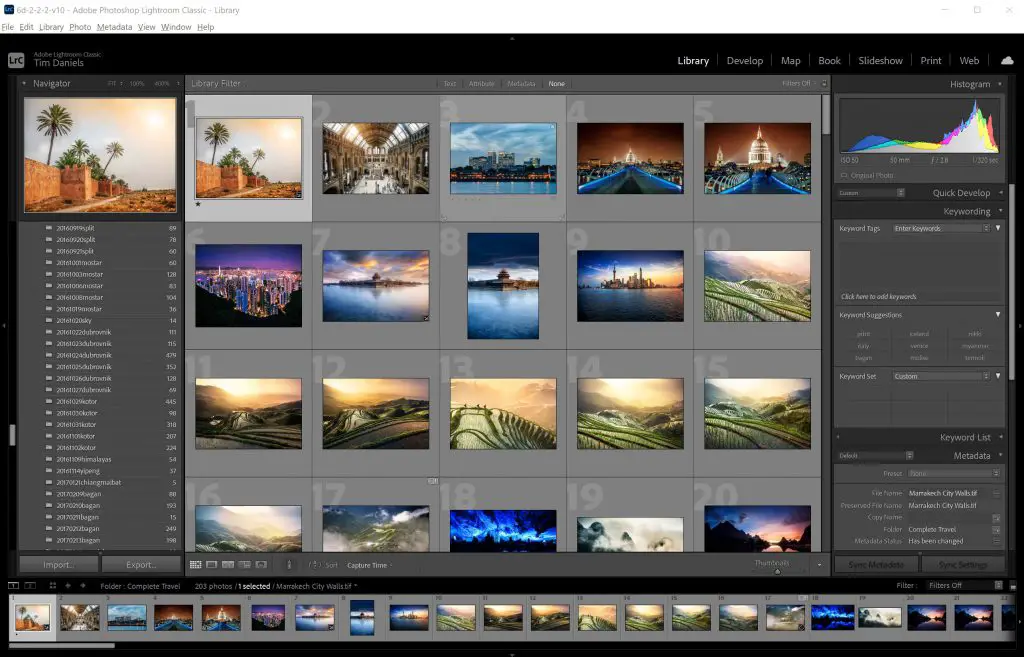
Lightroom should open up, and the catalog should look exactly the same as before.
To confirm that you are definitely seeing the version in the new location, it’s a good idea to repeat the process in step 1, to find your Lightroom folder location. This should now be your new location.
How to Find Your New Lightroom Library in the Future
By default, Lightroom opens the last catalog that you worked on automatically when starting up. If you want to switch between your old catalog (if you copied it rather than moved it), or any other catalog, you can do that by going to File -> Open Recent and selecting your previous catalog from here.
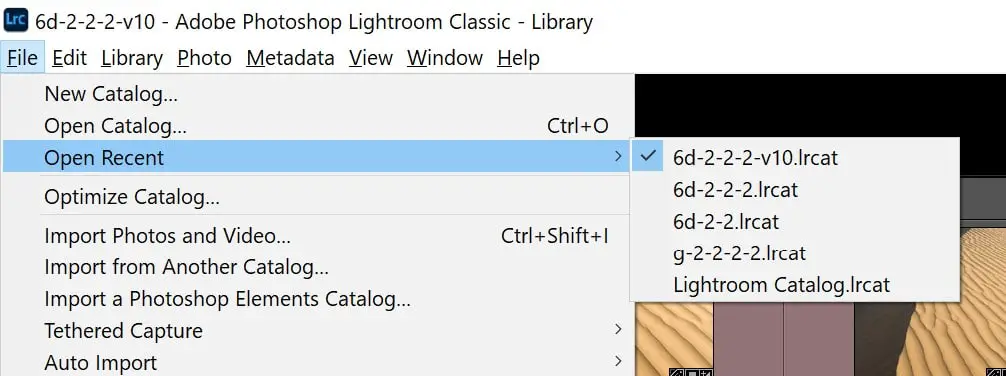
If you don’t see the catalog you want in this list, then either use the Open Catalog option or navigate to your catalog folder location and double-click on the Lightroom catalog file.
Hopefully, you should now have been able to move or copy your Lightroom catalog to a new location. If you have any problems, then please leave them in the comments below.
If you are a regular user of Lightroom, then you might enjoy the totally free Lightroom Develop System, a series of over 1000 guided presets to aid your photo editing. Get access below.
Subscribe to the mailing list and get a free download link right now
Or Read Some Free Lightroom Tutorials:
How to add powerful sunsets in Lightroom


Leave a Reply