This site is part of various affiliate programs. Links may give us a small compensation for any purchases you make, at no additional cost to you. Please read the disclaimer policy for full details.
Luminar Neo and Lightroom Classic both are capable photo editing software with unique capabilities of their own. Here’s a summary of what you can expect from them:
- Luminar Neo features a wide range of AI powered features from Skylum that dramatically increases the users’ efficiency – perfect for anyone looking to speed up their workflow with the help of AI.
- Lightroom Classic features a wide array of editing tools including tools to help you organize your photos. It doesn’t have all the bells and whistles but it gets the job done in a truly professional manner.
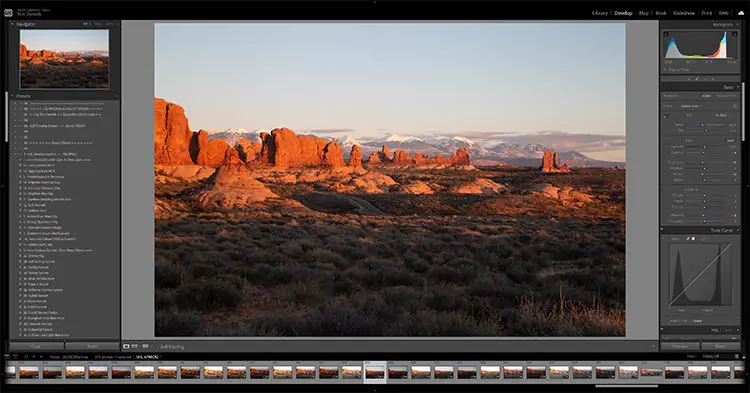
Adobe Lightroom has been the software of choice for professionals and amateurs alike for editing photos for a long time.
In recent years though, many new photo editors on the market have been challenging the dominance of Lightroom. This is a great thing for us consumers as we get to choose from among the best there is.
Luminar Neo from Skylum is one of the latest offerings from the company that is aimed towards the more serious photographers.
It builds on the company’s promise by featuring several new AI-powered photo editing features that makes the whole editing process so much more fun and convenient. But is that enough to make users switch from using Lightroom? Let’s try and find out!
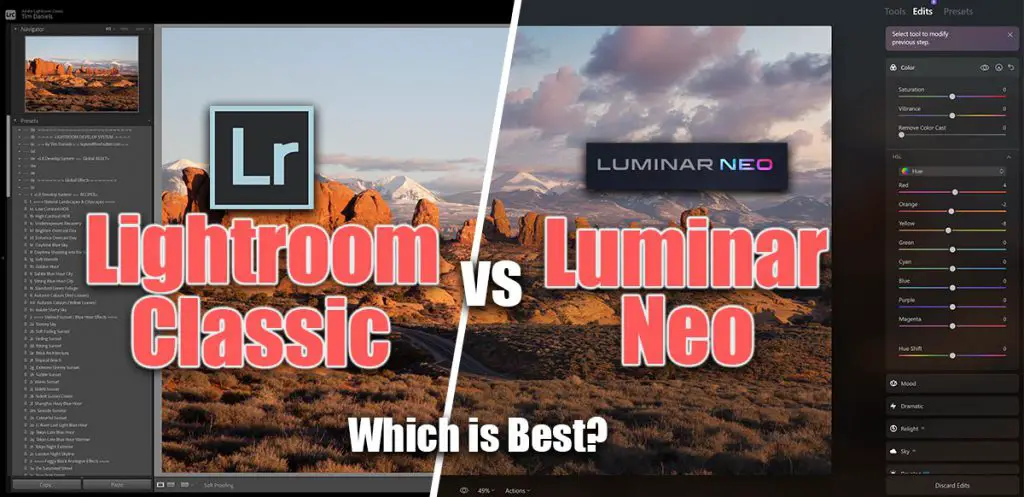
Luminar Neo vs Lightroom Classic : Pros and Cons
Packed with pro-level features
- Excellent AI features makes photo-editing quick and fun
- Option to work with layers
- Much cleaner user interface
- Sky replacement works wonders
- Dedicated adjustments for portrait and landscape editing
- Lacks cataloging features such as rating or keyword tagging
- Performance is laggy
- Overall less powerful than Adobe Lightroom
Fantastic cataloging and easy photo editing
- Excellent features for photo organization
- Color Range and Luminosity Range features are unmatched
- Lots of plugins and presets to extend Lightroom’s functionality and your photo editing ability
- Tethering feature for professional studio work
- Printing, layouts and map features work very well
- Not many AI assisted features
- While sky selection is available, there’s no easy solution for sky replacement
- Interface can appear unintuitive for new users
Get $10 off Luminar Neo with code TimDaniels10
What does Luminar Neo do well?
1. A very simple interface
Built from scratch as a more powerful version of Luminar AI, Skylum has designed Luminar Neo more for the professionals. It packs a whole lot of professional features and yet manages to present everything in a simple and visually appealing manner.
Luminar Neo has just 3 tabs that present their relevant modules in a contemporary and elegant way which makes working so much fun and easy. Let’s dive into each of them.
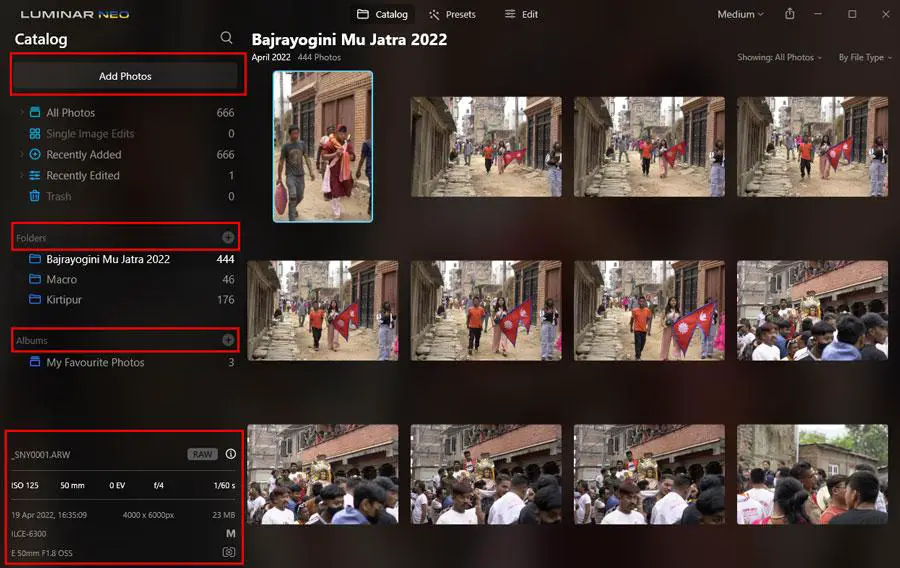
a. Catalog
The catalog tab is where you’ll start when working with Luminar Neo. You can easily add photos or albums directly by clicking on the Add Photos button, or simply add folders by clicking on the “+” icon in the Folders section. You can even create your own Albums and create a collection from different folders in those albums.
On the bottom left of the Catalog section is where you’ll see the EXIF metadata but sadly, there’s no way you can rate or tag your photos.
b. Presets
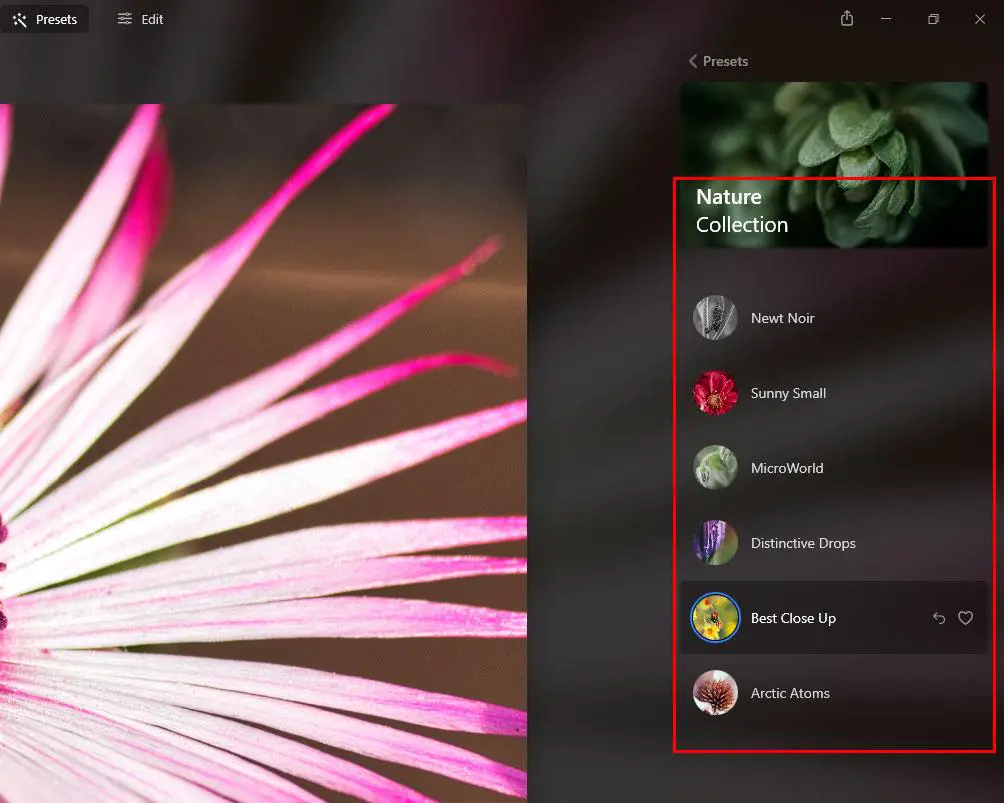
Next to the Catalog tab is the Presets tab. And looking at the way Skylum has placed the tabs, it seems that they want us to apply one of the presets to the imported image before we head on to the further editing process.
The fun thing is that the software seems to analyze the image in context and recommends presets accordingly in the ‘For This Photo’ section. For instance, when I uploaded an image of a flower, its first recommendation was a Nature presets collection.
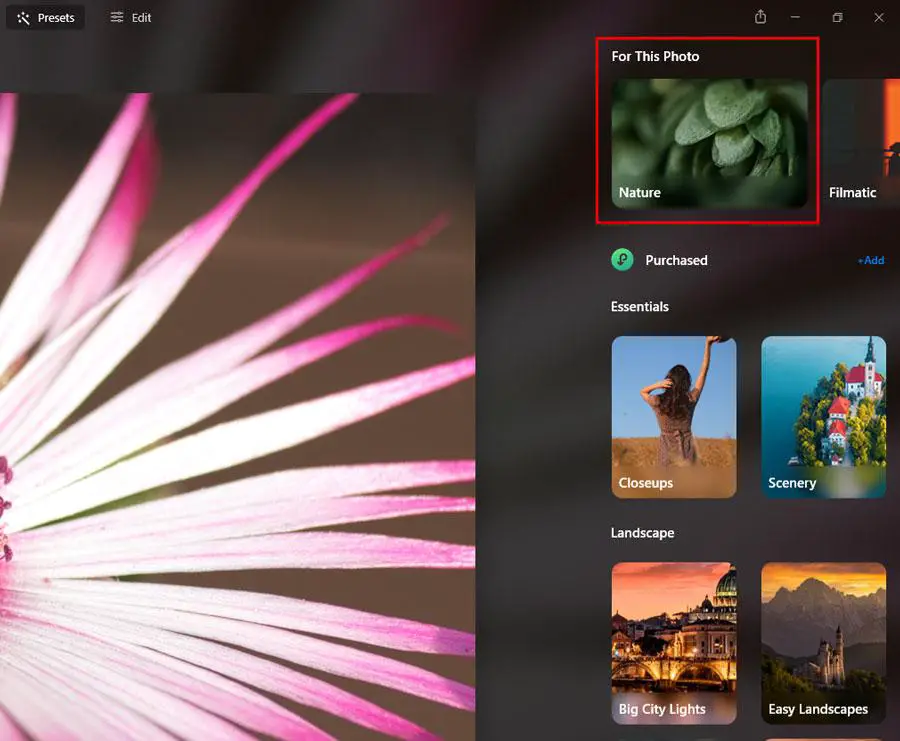
Besides the Nature collection, there are a ton of other collections like Essentials, Landscape, Mother Nature, Portrait, Cinematic and Lifestyle among others, which give a unique look to the image with a single click.
For reference, you can see how easily I was able to enhance the look of the following macro image with a single click using a preset in Luminar Neo.

(Photo by Sunny Shrestha)

(Photo by Sunny Shrestha)
Read More:
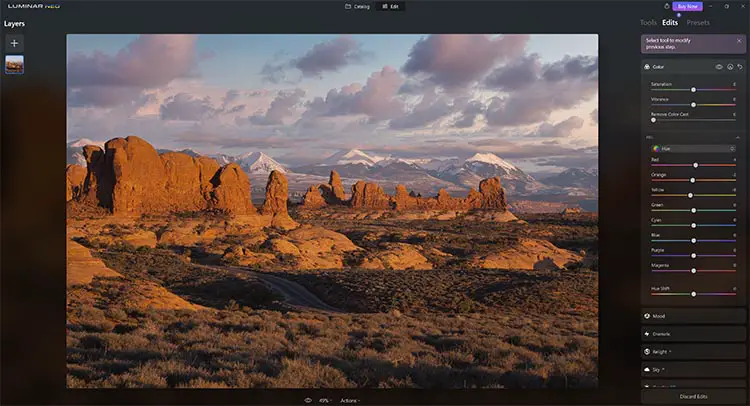
c. Edit
The Edit tab is where all the magic happens, with things are laid out pretty neatly here. Like in any other photo editing software, Luminar Neo also features the Develop tab (finally) which puts together all the basic adjustments.
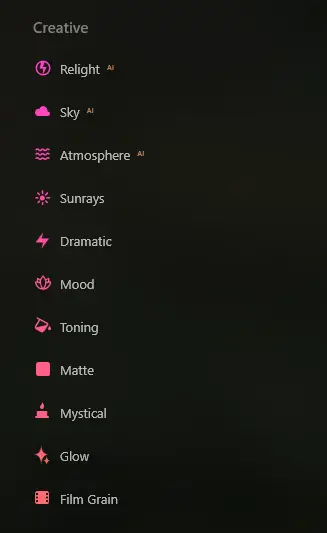
What I really liked about the editing tools compared to Lightroom is the way they’ve been presented. The useful features laid out in categories with clear labels such as Essentials, Creative, Portrait, and Professional to help you easily find the adjustments as per your needs.
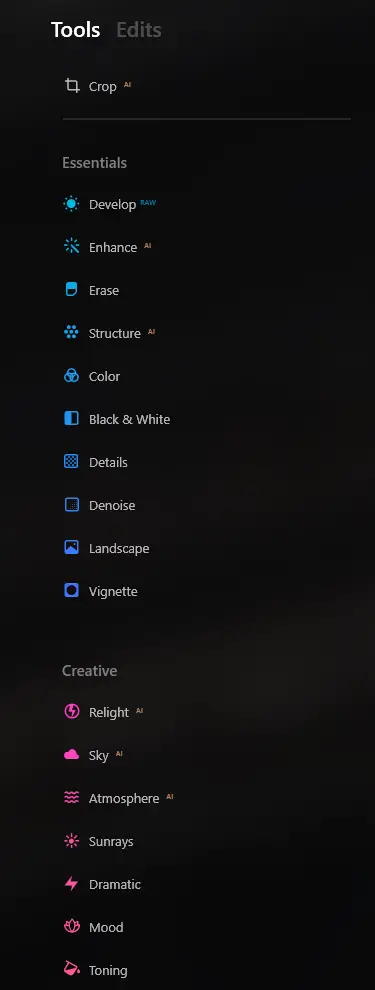
Luminar Neo presents all of these controls in a way that appears so clean, elegant, and understandable. Even if you’re new to this software, you should be able to find your way around it with ease.
2. AI Powered Features
Luminar Neo doesn’t just look shiny and cool on the outside. When it comes to features, it is still very much a capable program.
The AI-powered features really gives the software an edge, and also makes editing so much fun. I’ll take you through a few of the AI powered features in Luminar Neo that I really loved.
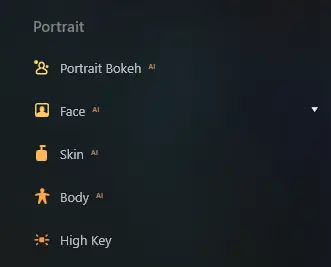
a. Portrait retouching
Luminar Neo has an entire section dedicated to retouching portraits which features a couple of AI-powered features to aid in the process.
The Portrait Bokeh feature allows you to create a separation between your subject and the background by automatically identifying the two and letting you blur the background more.
This gives a feeling of the image being shot at a wider aperture with a shallow depth of field. While Lightroom does have an option to select the subject, there’s no way to blur the background without jumping into Photoshop.
Moreover, you also get to separately control the background brightness and color temperature which is really impressive. And in case you’re not happy with the auto masking and edge refinement, you still have the option to manually override them using Brush Control, Depth Correction, and Edges Correction features.
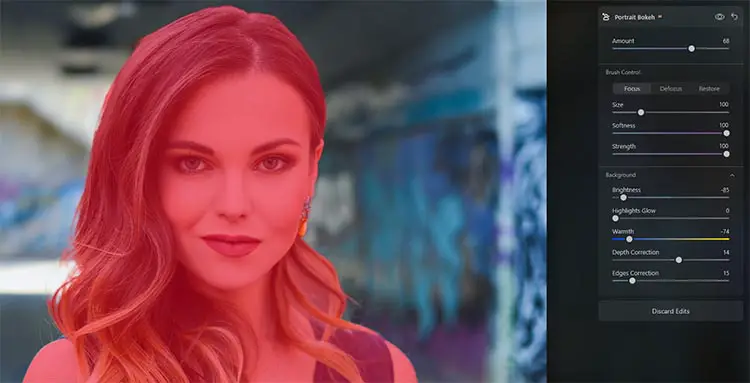
Here’s a quick before/after comparison of the Portrait Bokeh feature for your reference.


Furthermore, Luminar Neo also allows you to independently edit the face, the eyes, and the mouth region, which makes the work of a portrait photographer so much easier.
This is also something that Lightroom totally lacks.
With these features, you can control the illumination on the subject’s face, slim the face down, change the color of the eyes, whiten the eyes, improve the eyebrows, and even play around with the lips color and teeth whitening. The possibilities are endless!
With Lightroom, you’ll have to apply masks manually if you want to achieve any of these enhancements.

Have a look at the before and after of the same portrait and judge for yourself.


b. Landscape retouching
Just like portrait retouching, you get a ton of features which you can use to uplift your landscape images in a matter of a few clicks.
Of the various features, the most notable is the Relight AI feature.
With this feature, Luminar Neo calculates the depth of a photo and creates its 3D map. This way it is possible to spread the light naturally in 3D space on a 2D image.
So, without having to draw a manual gradient like in Lightroom, you can easily control the brightness and color temperature of the foreground and background separately with the help of sliders.

In a matter of less than 5 clicks, I was able to darken the foreground a bit and warm up the color temperature in the sky region. While Lightroom also lets you select the sky, I still love the ease and precision that Luminar Neo provides.

And while Relight AI is the newer addition in Luminar Neo, my favorite feature in Luminar Neo still has to be the Sky replacement tool. Luminar Neo does a spectacular job of replacing the boring sky and while doing so, also lets you relight the scene and refine the mask manually for the perfect setting.

I am especially impressed by the fact that I hardly ever need to refine the mask, but I’m still glad that the feature is there if needed.


Another one of my favorite features to edit landscapes is how you can easily manipulate the sun and sunrays. In the Sunrays adjustment, you’ll find options to place a sun of your own, adjust its brightness, radius, and even add sun rays. Again, achieving same result with Lightroom will need you to jump over to Photoshop.
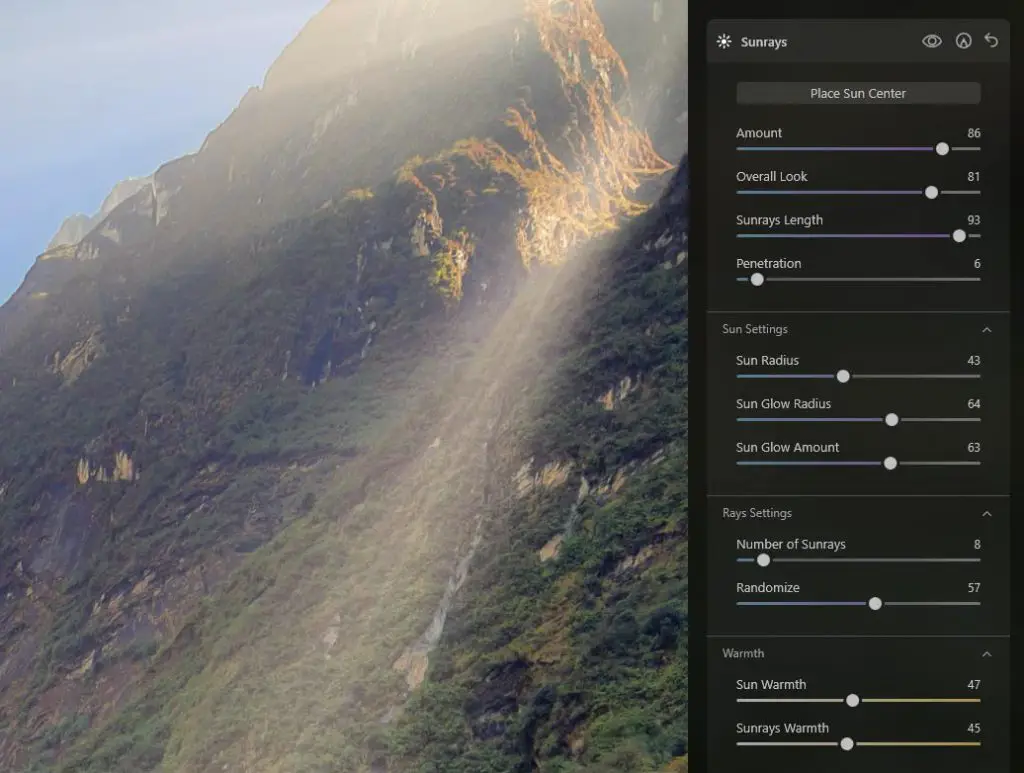
Just look at the difference the sun and sun rays make to this image.

c. Object removal
Cleaning up your images got a whole lot easier with Luminar Neo, especially on two fronts – removing power lines, and dust spots. In the Erase tool, Luminar Neo has these two brand new features that hope to get the work done in a matter of a single click.
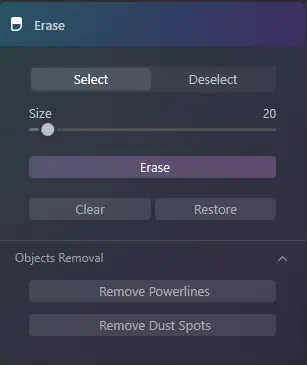
While you need to search meticulously for the sensor dust spots to heal or clone them out in Lightroom, it is just a matter of a single click in Luminar Neo.
The ‘Remove Dust Spots’ tool does all the hard work of looking for the dust spots and cleans them out automatically in Luminar Neo. In my case, it worked effortlessly every time.


The Remove Powerlines feature is also a welcome addition and gives us a head start in getting rid of the hideous power lines.
In the period of my testing, while the feature was never able to get rid of the entire power cables every time, it did make my work a whole lot easier. I’d have to spend a lot more time cleaning it up in Lightroom.
However, in the next iterations, I’m sure Skylum will improve this awesome feature.

(Image by Maxim Hopman on Unsplash)

(Image by Maxim Hopman on Unsplash)
Here’s the final image that I was able to get after cleaning it up using the Erase function manually.

(Image by Maxim Hopman on Unsplash)
d. AI Masking
One of the real advantages of Luminar Neo is the addition of AI masking, which can automatically create masks for:
- People
- Sky
- Flora
- Architecture
- Water
- Mountains
- Man Made Ground
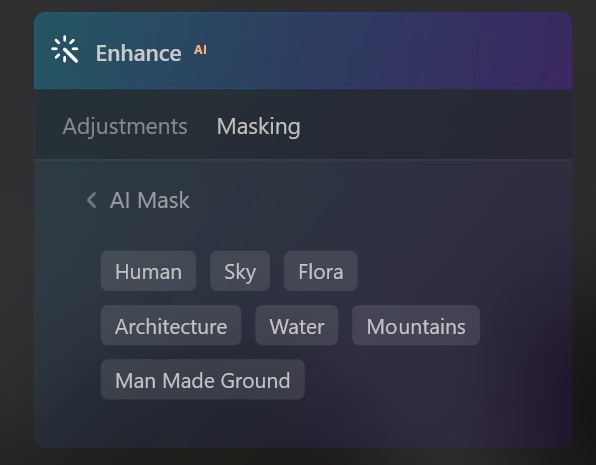
AI mask can be used with pretty much all of the individual editing modes, and can be incredibly effective.
It takes maybe 15 – 20 seconds for the algorithm to run on a photo once you ask it to create AI masks, but these are then available for you to select and copy at will.
Sometimes the masks are not so effective at capturing all of the elements of a photo, but they can work remarkably well.
Here’s an example of asking Neo to select all man-made ground, and doing a really good job:
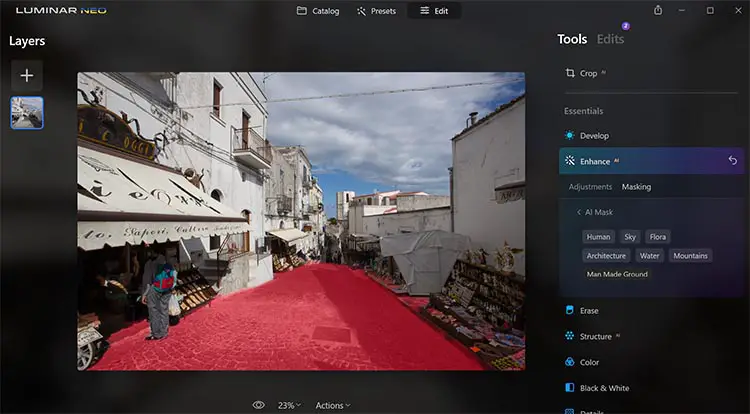
(Image by Tim Daniels)
And also doing well at selecting architecture in this image:
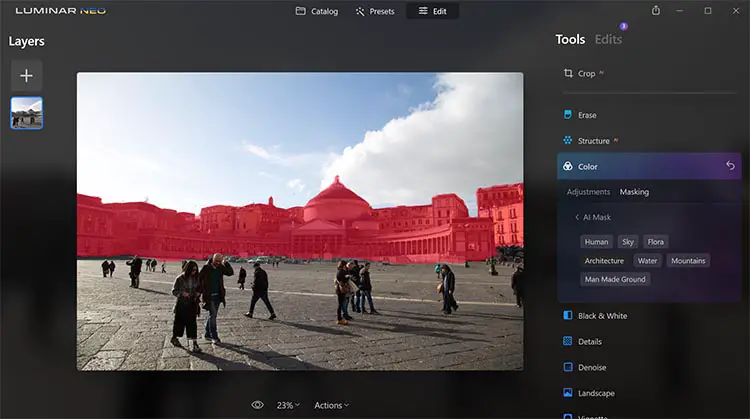
(Image by Tim Daniels)
These masks can be perfected by hand, which will be necessary in some cases, but make no mistake, AI masking is a really useful starting point to edit an image, and works much better than Lightroom’s auto-masking.
3. Layers
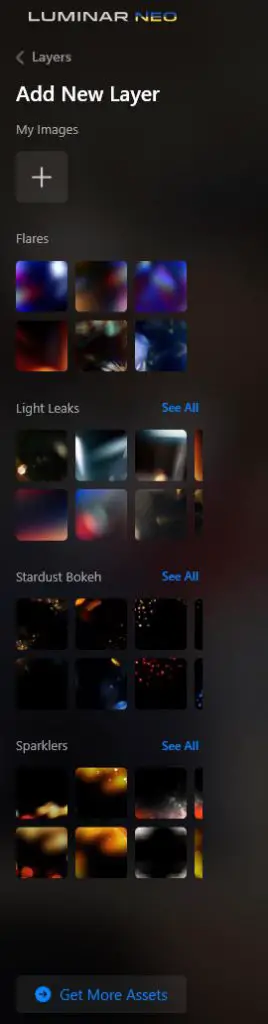
Luminar Neo has support for layers (finally) that lets you either add another of your images on top, or use some of the effects that Luminar Neo has built into it.
To every image that you decide to stack, you can apply all the same adjustments and enhancements that you have available with a single layered image.
While this is also a welcome feature, it’d have been much better if we could add just the adjustments as layers – like we can do in Photoshop or Capture One.
I added the built-in light leaks and stardust bokeh images as layers to my image and they did a great job enhancing the look of my image instantly.
If I were to try to do this in Lightroom, it wouldn’t have been possible without jumping into Photoshop.


Get $10 off Luminar Neo with code TimDaniels10
What does Lightroom do well?
Luminar Neo definitely appears shiny and appealing, but there are still a couple of areas where Adobe Lightroom Classic has an edge.
Lightroom has been in the industry for a far longer period and already has a huge user base ranging from beginners to top-tier professionals. Lightroom covers a greater ground when it comes to features and does not concentrate on such a small niche like Luminar does with its AI features.
The following are some of the features where Lightroom outperforms Luminar Neo.
1. Photo organization tools
Lightroom wins hands down when it comes to photo organization tools, as Luminar Neo still doesn’t have any such features yet.
The Library module of Lightroom is where you will find some awesome features such as Keywording, Keyword List, Metadata, and Comments that help you in organizing your photos based on context. This makes it a lot easier when you need to search for certain photographs.
You can also get plugins like those from Excire that use AI to search your Lightroom catalog, automatically keywording every image according to its content.
Another awesome feature that I really love about Lightroom is the ability to filter the photos based on the technical aspects such as Exposure Info, Camera Info, and Lens type. This way you can filter photos that were shot with a certain lens, at a certain aperture, and even at a particular focal length. How awesome is that?
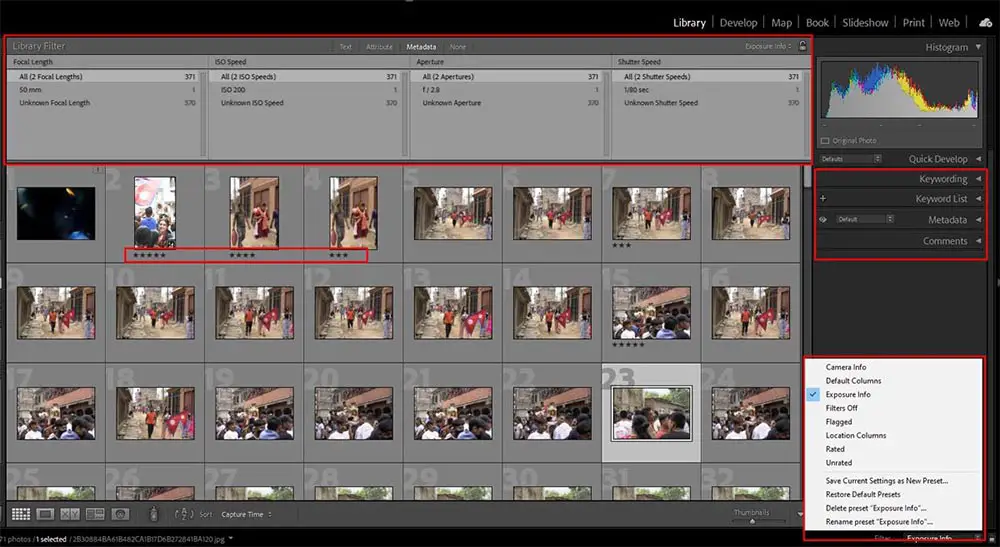
One more useful feature that I like in Lightroom is how you can rate each photo from 1 to 5 stars based on their potential within the library itself. Once rated, you can later cull them out based on the star rating using the filter option. This greatly optimizes your workflow.
2. Range masks
Color Range mask and Luminance Range mask in Lightroom have got to be one of the best features of the software.
What they basically allow you to do is that, based on your initial selection, Lightroom automatically selects the other regions in the image that have a similar color (in case of color range), or similar brightness level (in case of luminance range).
You can fine-tune the selection further using the brush tool or the range slider.
Once you select your required range, you can easily make any sort of adjustments to them and speed up your workflow.
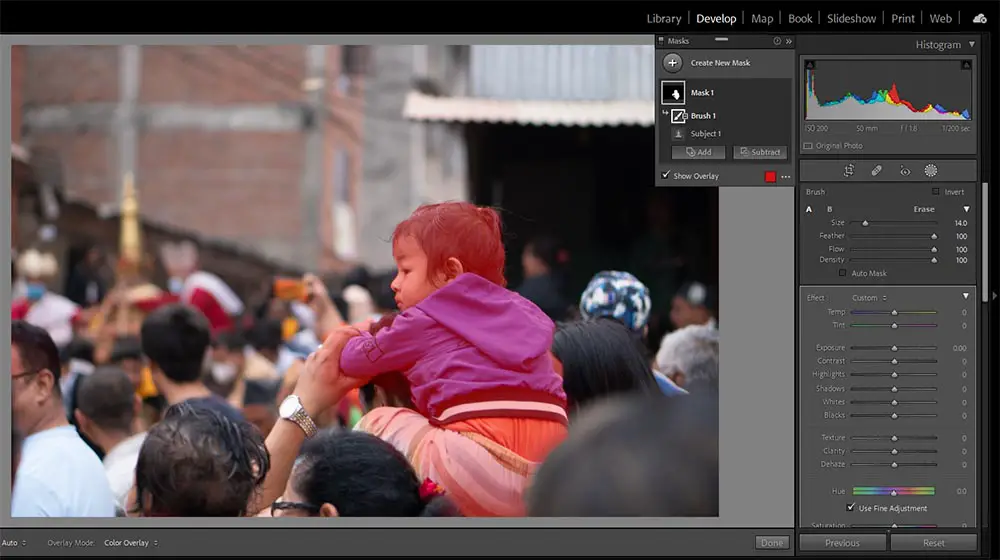
In the example below, I used the luminance range to select just the brightest parts of the photograph. You can notice the mask overlay which is colored red. With this selection, I was easily able to bring down the highlights in those regions.
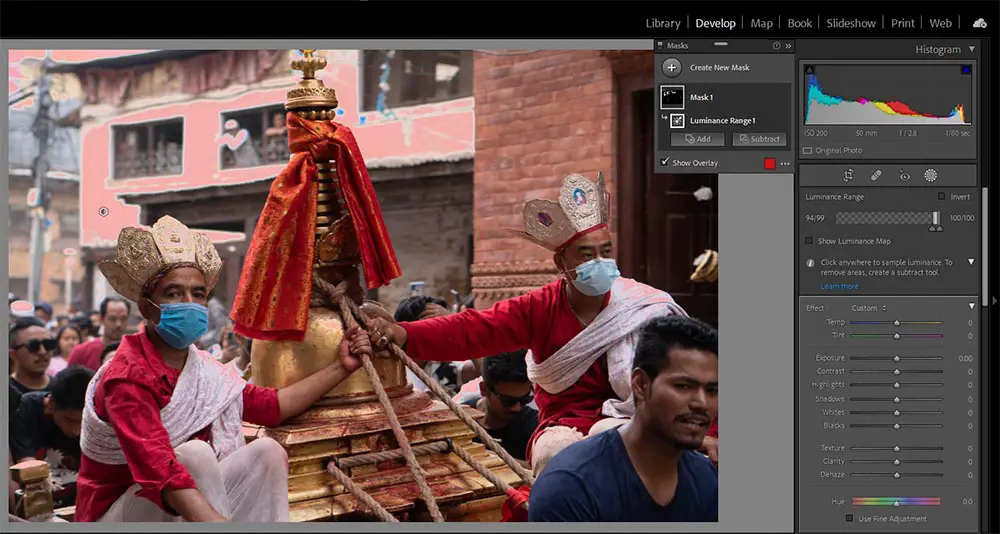
(Photo by Sunny Shrestha)
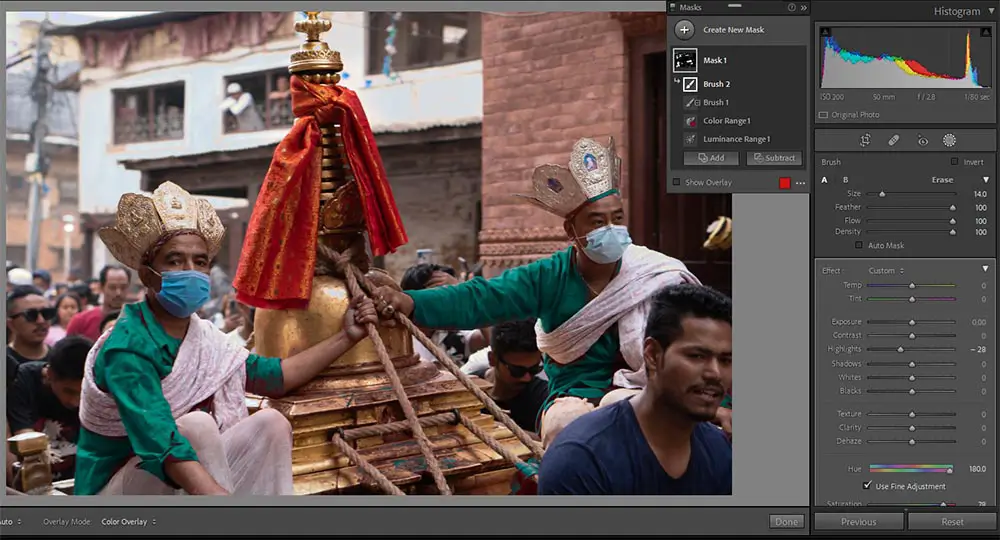
Next, in the example below, I selected just the red color and changed the hue of the priests’ shirts to green.
But since the shirt’s color matched the color of the cloth over the statue, I had to Subtract that region using the brush tool. It’s really that easy and efficient.
3. Subject Selection
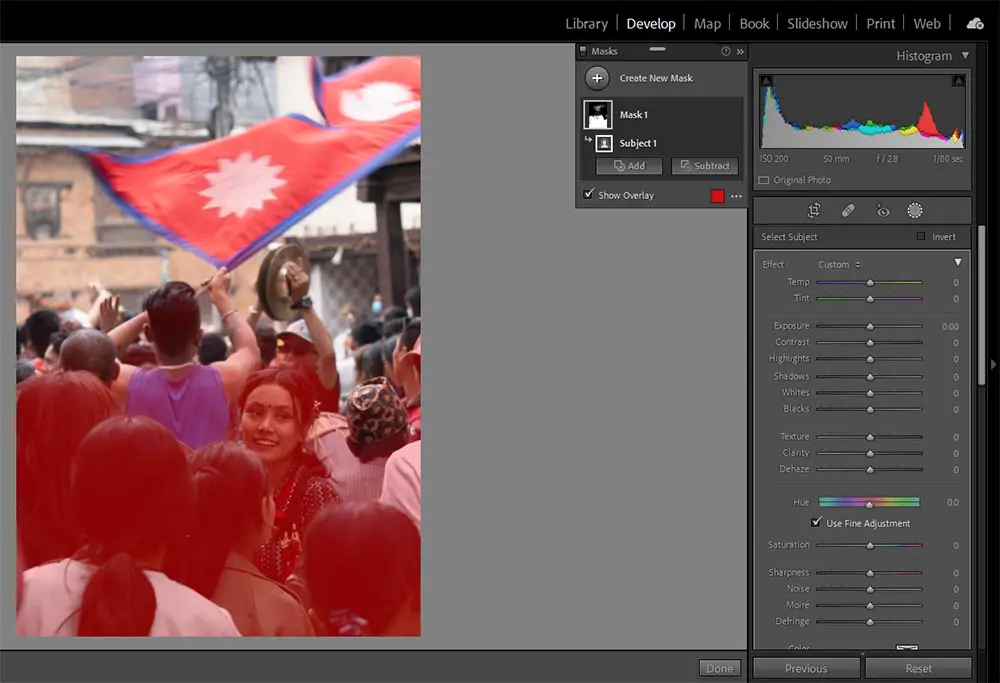
The aim of any editing process is mostly to enhance the look of the subject. Keeping this in mind, Lightroom has a Select Subject mask whose objective is to place a mask over the subject so that we can start right away to make adjustments to the subject.
I tried this feature in a simpler context and without a doubt, Lightroom was able to identify the subject and overlay it with a mask.
However, when I tried the same feature in a more complex environment where the actual subject was surrounded with other people, Lightroom made its best guess, but I had to clean it up using the brush tool. I’m not complaining though as it took me very little time to clean it up.
And here’s the final result after I cleaned it up.
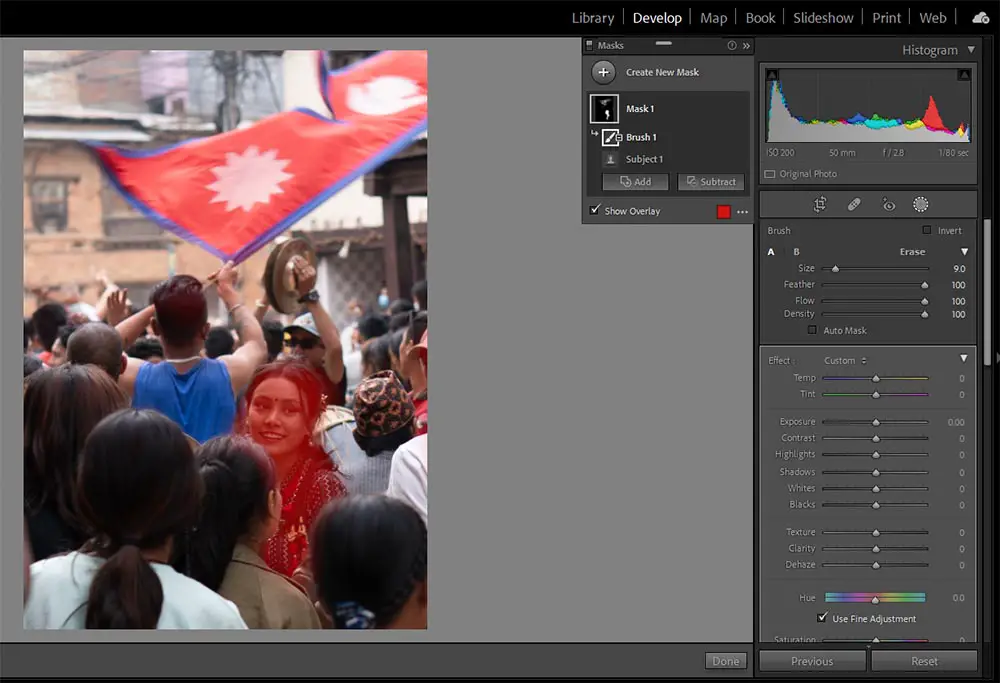
And here’s the side-by-side comparison after I slightly increased the exposure on the subject.


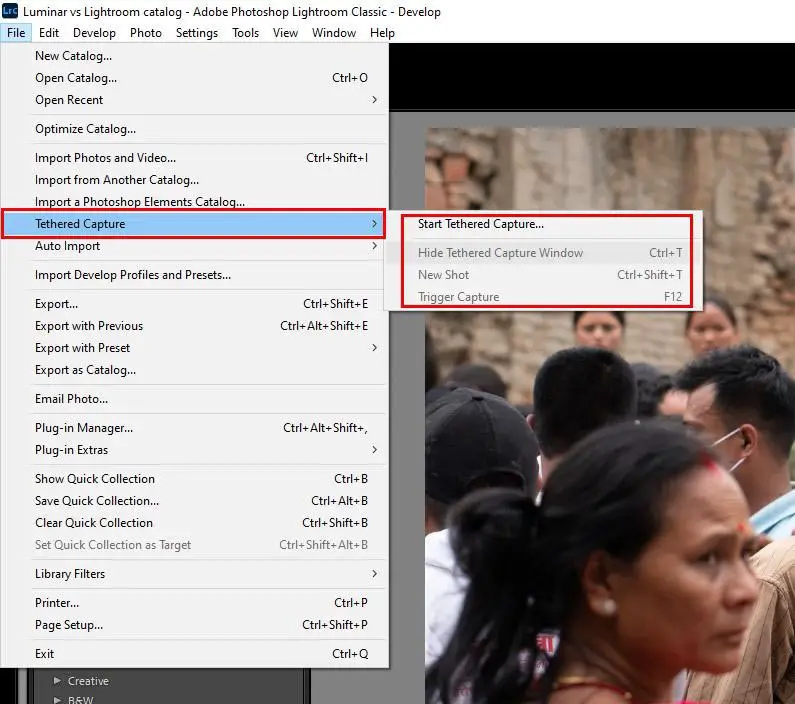
4. Tethered capture
At this point, it’s almost like Lightroom is showing off as Luminar Neo has no support for tethered capture.
Using this feature, you can hook up your camera to Lightroom and control the camera from your computer to take photos. The photos can then be imported directly to Lightroom for further editing purposes.
If you’re a portrait photographer or a product photographer who needs to work in the studio while paying utmost attention to details, you’ll love this feature in Lightroom.

Similarities between Luminar Neo and Lightroom
Both Luminar Neo and Lightroom are very capable programs, with each having a certain focus on a particular niche. However, at their core, both of them have some similarities when it comes to their functionality.
It is great to see both of them applying algorithms to help the users select some key areas of the photos quickly and easily. For instance, both of these programs have features that let us choose the subject and the sky. This definitely helps us speed up the workflow.
Talking of speeding up the workflow, the support for presets is something both have in common. Using presets dramatically speeds up the workflow by giving us a great starting point with a single click.
Something to note in this context is that Lightroom has a greater support for presets than Luminar Neo, as Lightroom has been in the market for a much longer time.
All in all, both are great photo editors that support raw files and feature basic to advanced editing tools.
Is Luminar Neo better than Lightroom?
This is the question that most of you must be asking but the answer is not so simple.
To give a quick example, here is a photo edited in both Luminar Neo and Lightroom. Although the basics of the editing are the same, the addition of the sky from Luminar Neo’s sky replacement tool really makes this image something special for me.

(Photo by Tim Daniels)

Luminar Neo has an edge over Lightroom when it comes to the cutting-edge features powered by AI. If you’re looking for features in a photo editor that allow you to do the most in the least amount of time, then Luminar Neo is the one for you.
Although Skylum says that Luminar Neo has been designed with professionals in mind, it works equally great for beginners who want to get quick results without tampering with the adjustment sliders too much.
Get $10 off Luminar Neo with code TimDaniels10
On the other hand, if you have been a long time Lightroom or Photoshop user, you’ll find yourself at home with Lightroom Classic.
While there are not that many AI-powered features like in Luminar Neo, there’s nothing you can’t achieve using the wide array of masking options in Lightroom.
Further, if you’re a professional, or someone who loves to keep their photos organized, you’ll find the catalog features in Lightroom are far superior to those in Luminar Neo.
Read More:


Leave a Reply