This site is part of various affiliate programs. Links may give us a small compensation for any purchases you make, at no additional cost to you. Please read the disclaimer policy for full details.
Your Samsung TV screen can be too dark because of incorrect picture settings, such as Motion Lighting or Eco Mode being on, or be a sign of a failing backlight.
Usually, this happens right after it goes out of warranty, and this means that most people just get rid of their broken TV and buy an expensive new model.
But it is actually pretty easy to fix a Samsung TV screen that’s darker than normal, provided you are happy to put in a little effort.
In this guide, I’ll cover every possible fix for a Samsung TV dim screen, and I’m very confident that you can use this to get your TV back up and running again.
Why is My Samsung TV So Dark?
| Reason | Fix |
|---|---|
| Software Glitch | Cold booting or power cycling your TV can often fix issues stuck in the flash memory. |
| Incorrect Picture Settings | Try setting your picture mode to Dynamic and switch off Motion Lighting and Eco Mode in the Expert Settings menu. |
| Pulse Width Modulation (PWM) Problems | Switch the PWM settings to 100 in the Service Menu to stop it auto-dimming. |
| Picture Gets Darker Over Time | This is likely a failing backlight that can be fixed by replacing the LED strips. |
If your Samsung TV picture darkens over time, then this indicates a failing backlight, but if it goes dim after an update, it could just be a software change that can be fixed by adjusting your backlight settings.
I’ll cover all of the possible fixes below.
1. Cold Boot Your Samsung TV
With modern electronics, it’s possible that your Samsung TV is too dark because of something stuck in your TV’s flash memory, which can also be a problem if you see a white screen on your TV.
Power cycling or cold booting your TV will clear out any issues with non-permanent memory and reset your mainboard without losing your personal settings.
This is quick and painless and won’t cause you to lose any of your saved settings.
- Switch off and unplug your TV.
- Hold down the physical power button on the TV for at least 15 seconds.
- Wait for at least 30 minutes for any residual power to drain from the TV’s capacitors (which are capable of storing charge for several minutes).
- Plug your TV back in and try switching it on. You should see a red light if you have been successful.

Make sure you do wait for the full 30 minutes before plugging your TV back in – you would be surprised how long the components within your TV can hold a charge, and you want to make sure it has fully reset.
Although this seems a very basic step, don’t overlook it because, in the vast majority of cases, a simple soft reset fixes most issues.
Most people will now have their TVs fixed and back up and running. If this isn’t you, then we’ve got a few more basic fixes to try before getting into the hardware fixes.
2. Samsung TV Dark Picture Test
Most Samsung TVs have an option to change the brightness or other aspects of the picture, but first try running a picture test to check if the dark screen is software-related.
For TVs made before 2021, go to Settings -> Support -> Self Diagnosis -> Picture Test.
For TVs made after 2021, go to Settings -> Device Care -> Self Diagnosis -> Picture Test and follow the on-screen instructions.
If this hasn’t helped, then using your remote control, navigate to the Home screen, then Settings and All Settings and go to the Picture menu.
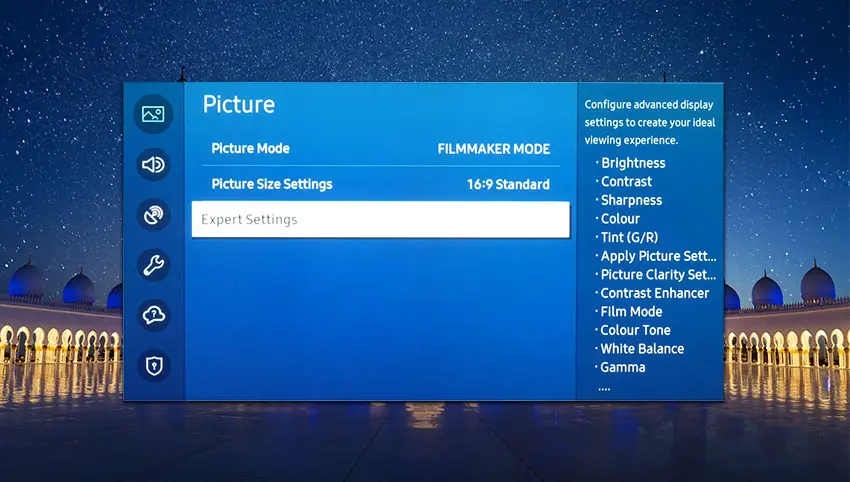
Try setting the Picture Mode to Dynamic, and if that doesn’t fix your problem, then go to Expert Settings.
This allows you to change the brightness of your TV’s backlight and hopefully will let you change it enough to totally fix your dark screen.
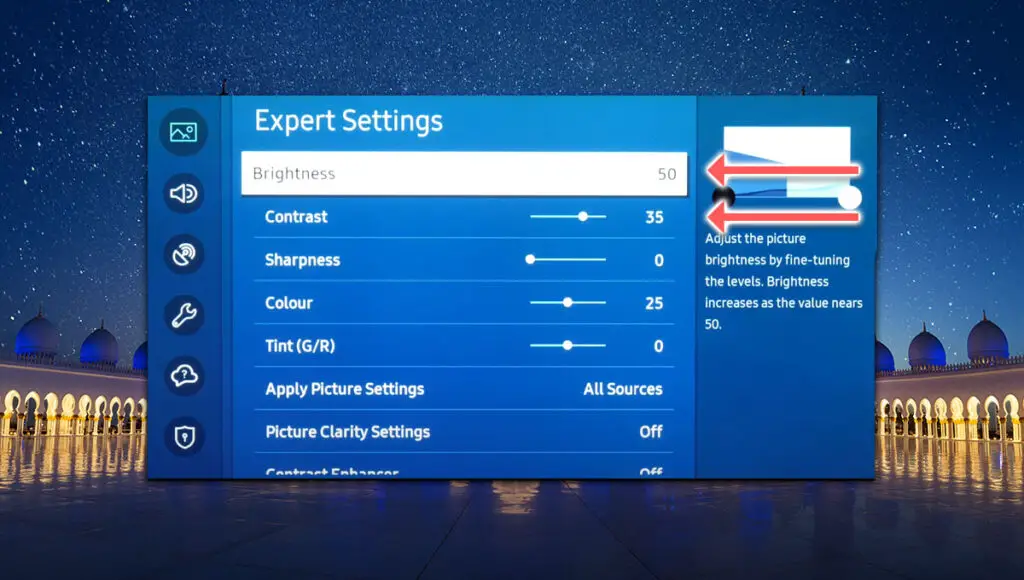
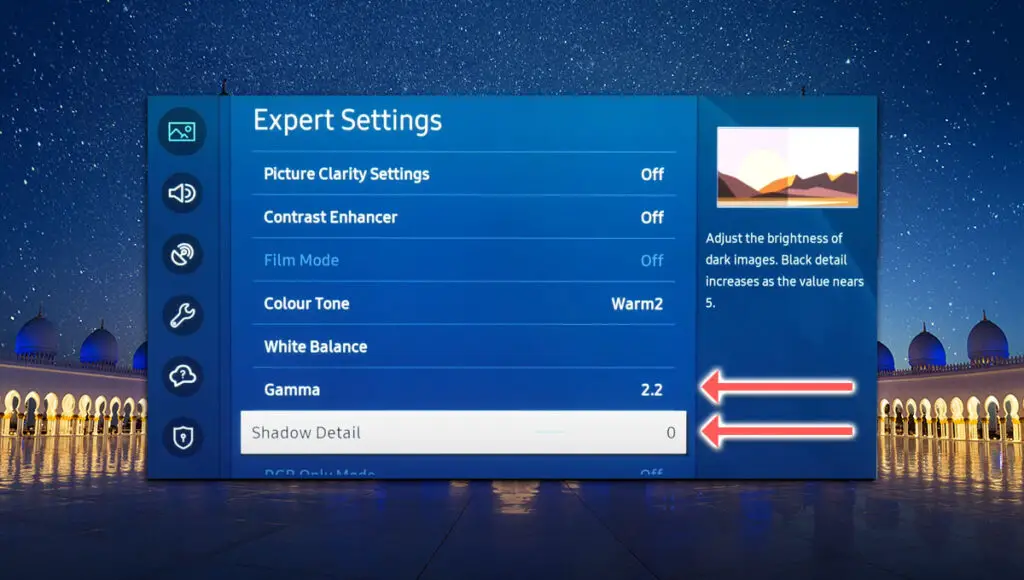
You should start with the Brightness setting, increasing this as much as possible, then take a look at Contrast, Gamma, and Shadow Detail, and hopefully, you will be able to get a decent picture.
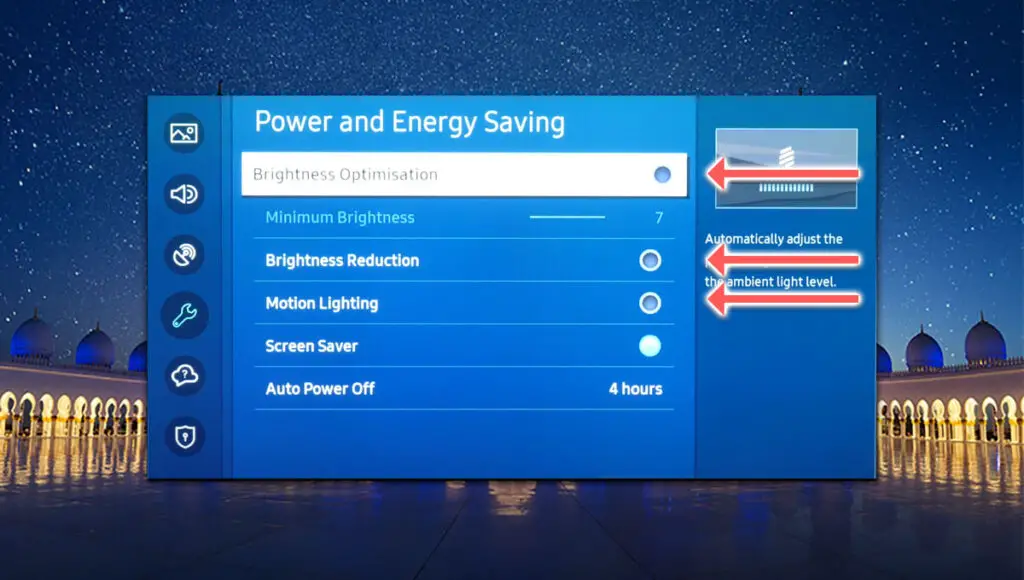
If not, you should then go to Power and Energy Saving in the All Settings menu, and switch off Brightness Optimisation, Brightness Reduction, and Motion Lighting if it’s in this menu.
If you can’t switch off Motion Lighting, this is probably because Game Mode is on. Switch this off from the main menu.
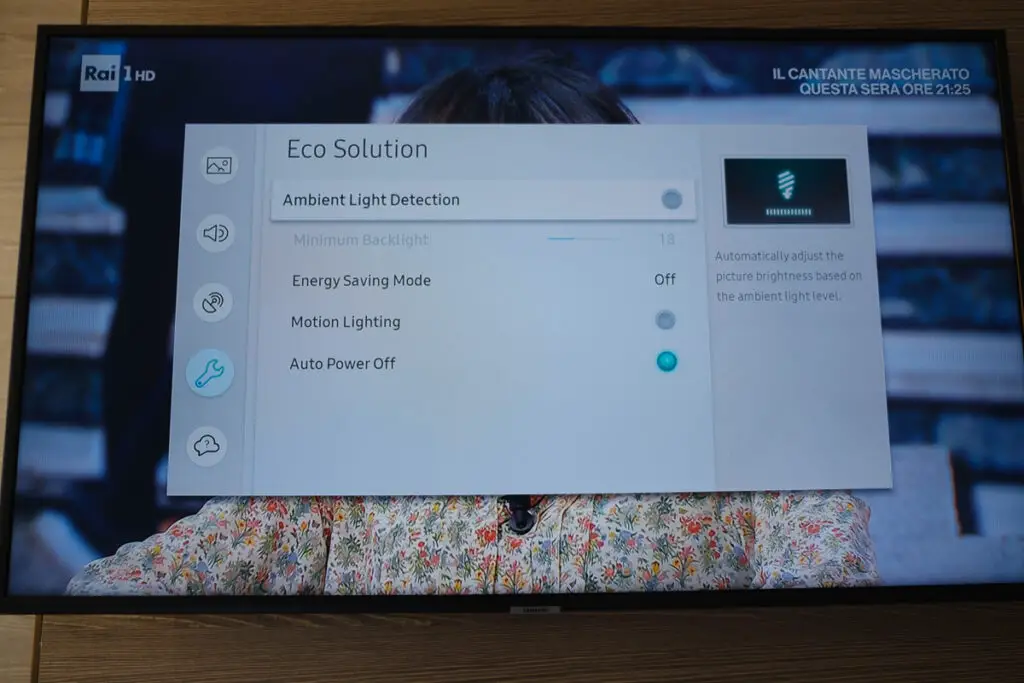
In the System menu, go to Eco Solution and switch off Energy Saving, Motion Lighting (if it’s here instead) and Ambient Light Detection, as this has an effect on the backlight’s brightness.
3. Adjust PWM in the Service Menu
Warning: changes in the Service Menu cannot be reset without changing your main board, so any changes are at your own risk.
The service menu on Samsung TVs lets you access areas designed for TV engineers.
You have to tread carefully here, but there are some options here that you should change if your TV is either auto-dimming too much or if you cannot get the backlight brightness to change at all where you adjust it in the regular menu.
To access the Samsung TV service menu:
- Switch your TV off.
- Enter one of the below button sequences using your remote:
- Info + Settings + Mute + Power
- Mute + 1 + 1 + 9 + Power
- Mute + 1 + 8 + 2 + Power
- Sleep + P.STD + Mute + Power
- P.STD + Menu + Sleep + Power
- Display/Info + P.STD + Mute + Power
- Display/Info + Menu + Mute + Power
- Your TV will start up and show the Service Menu.
- Follow the menu options SVC -> Other Setting -> CAL Data Restore.
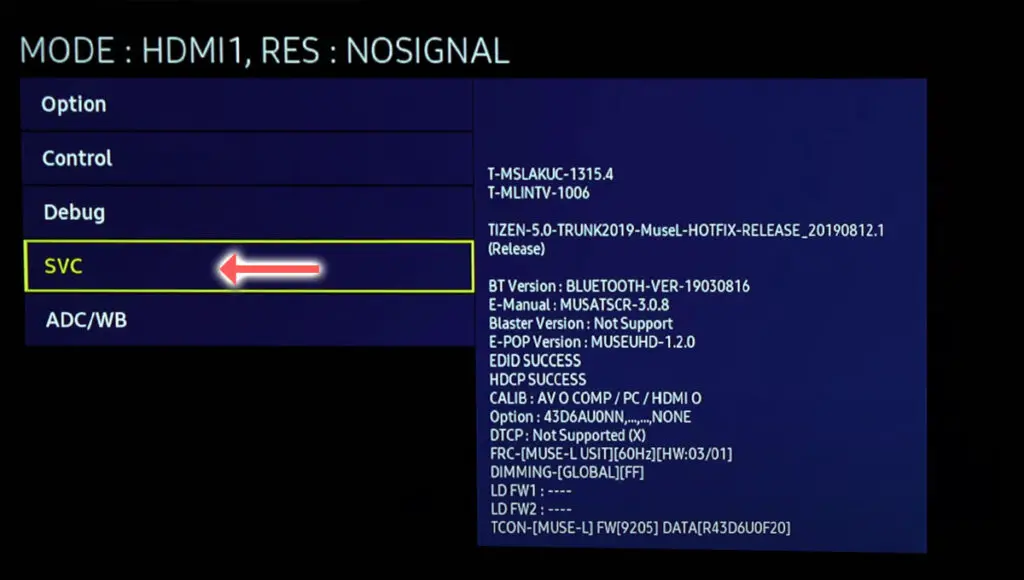
- Press OK to skip the USB prompt, then back up to the main Service Menu by using Return on your remote.
- Scroll to Advanced, which will have now appeared.
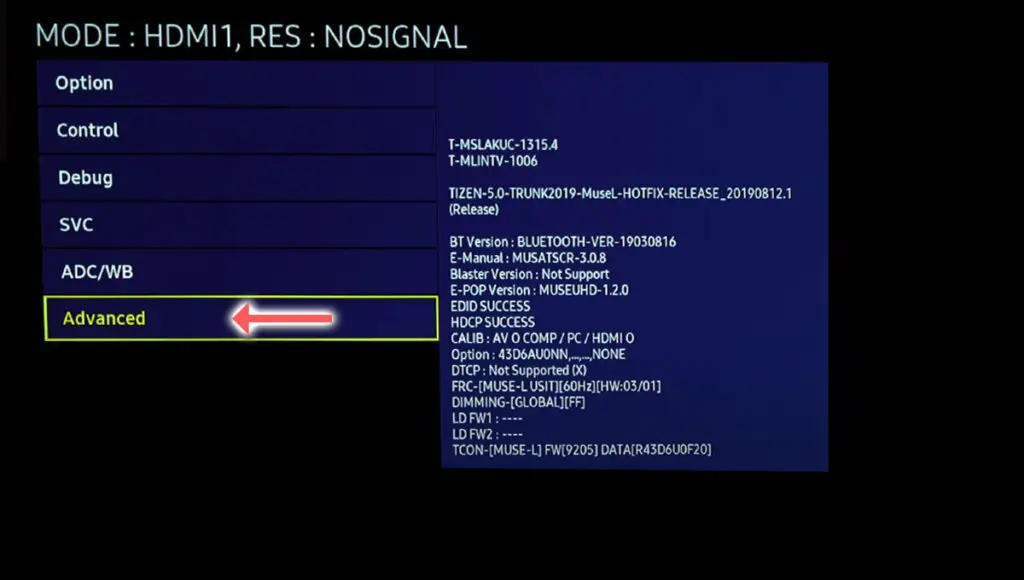
- For older Samsung TVs, press 0000 (four zeroes) on the number pad. If you are using a Frame TV or newer model with the Bluetooth remote, then press and hold the Volume + button for 5 seconds.

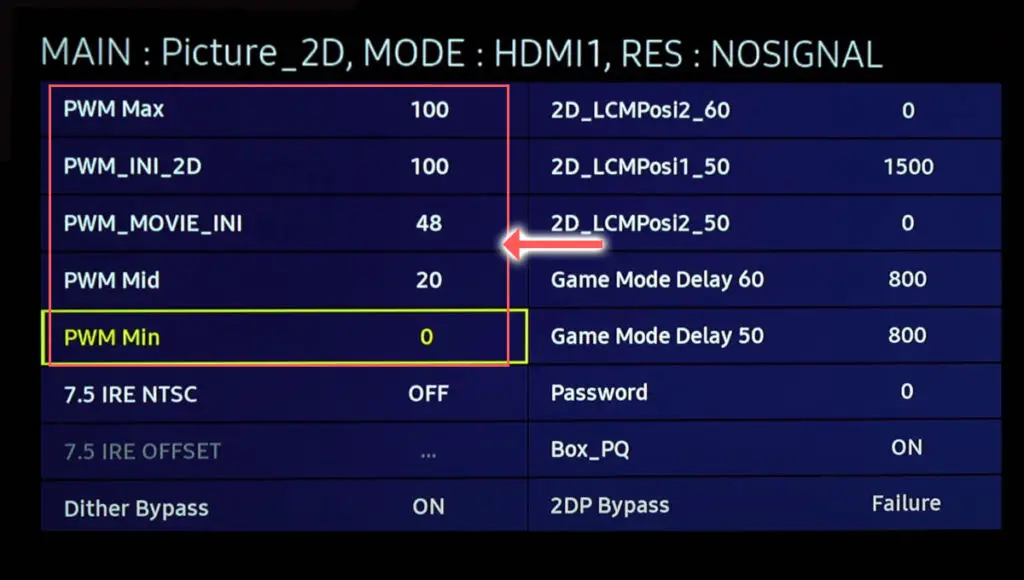
- Go to Picture_2D, which will now appear on the main menu.
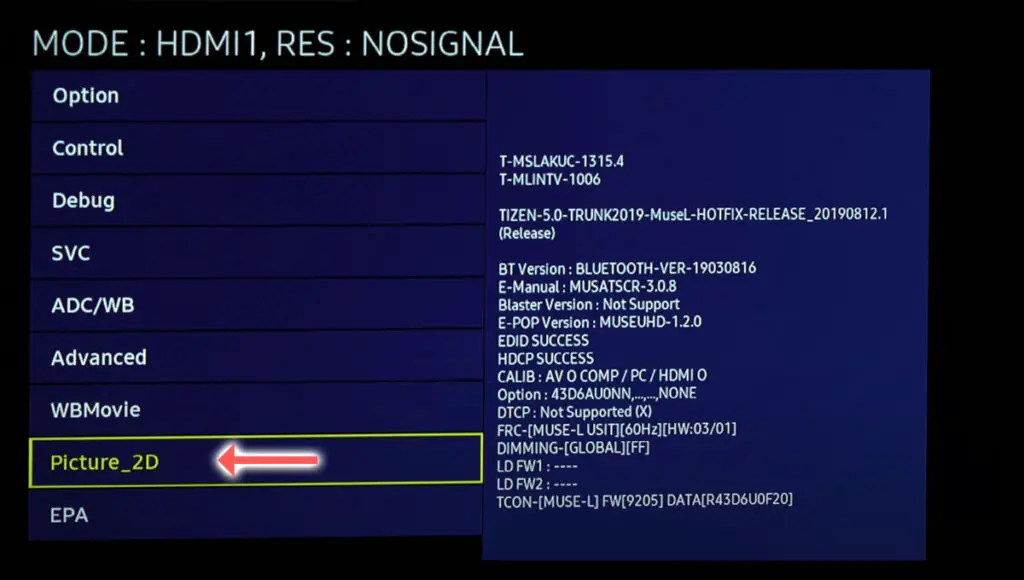
- Then go to SubSetting.
- Change all five of the PWM settings to 100. This will effectively disable Pulse Width Modulation (PWM), which is the cause of your TV getting brighter and dimmer according to each scene of your movie.
You can see these steps in the video below.
Switching all of these PWM settings to 100 will stop your Samsung TV auto-dimming, but you should note that firmware updates are likely to reset these, so you may have to come back into the Service Menu to redo this.
Depending on your model, you might instead see Local Dimming options here. In this case, change Local Dimming to 1 and restart your TV.
4. Samsung TV Picture Darkens Over Time
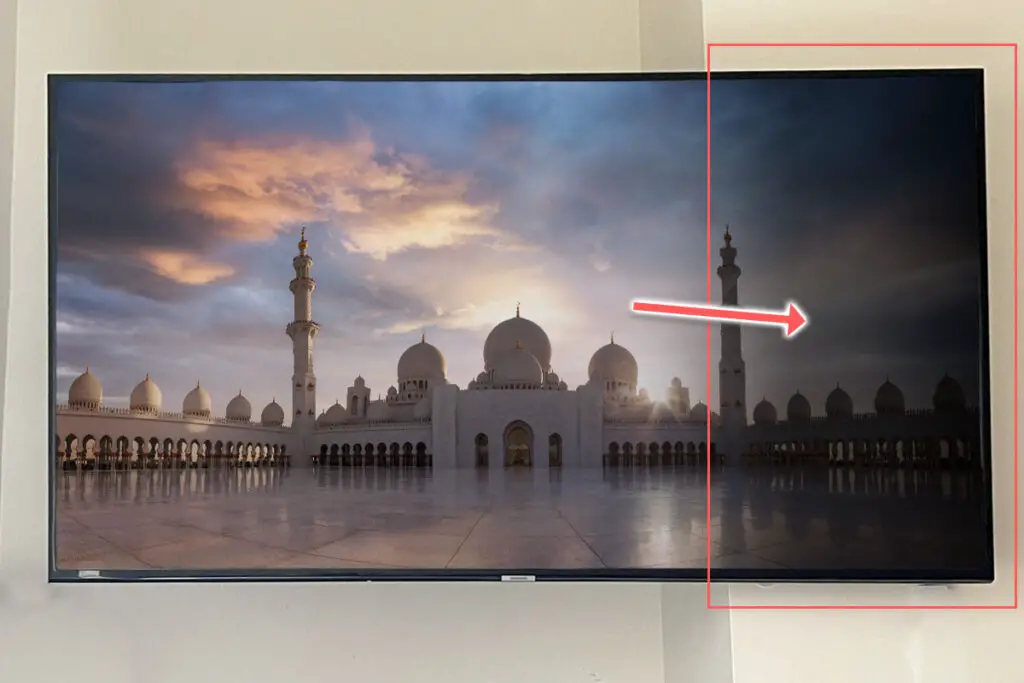
If your Samsung TV picture darkens over time, then you have a backlight issue.
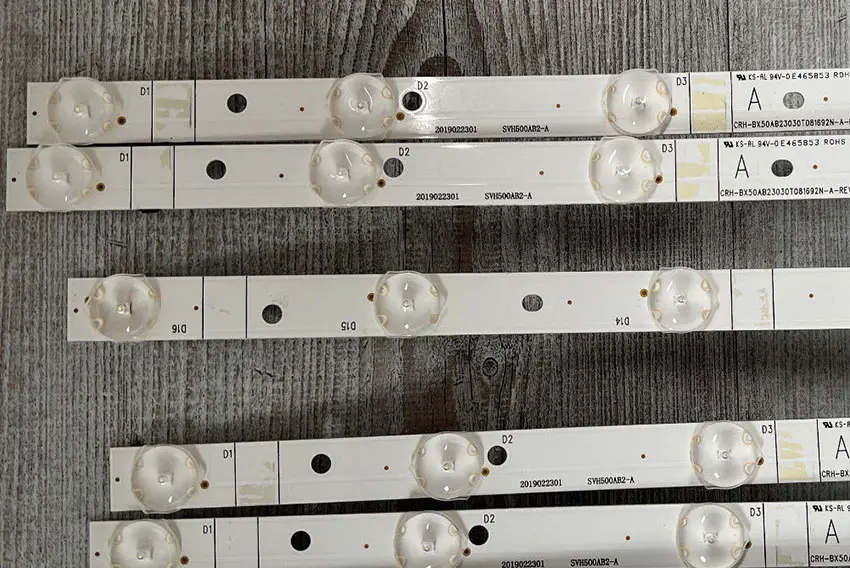
Backlights on modern Samsung TVs come in LED strips of varying lengths. Older models used lengths that spanned the entire frame of the TV, but due to cost savings, more recent TVs use a set 16″ LED strip which is connected in series for each row to span your TV.
These cold-soldered connectors are a notorious failure point on Samsung TVs but can be easily fixed if you are willing to re-solder a joint yourself.
Equally commonly, the LED backlights themselves can fail. This is due to repeated current overpowering, which over time causes thermal degradation of the LEDs leading to burnout. You can replace any failed LEDs by just removing the entire strip and replacing it.
The problem with fixing the LEDs is that they are located in the most difficult-to-access part of your TV. So if you are not comfortable with a larger repair job, then now is a good time to seek help from a professional.
You need to remove the back panel, remove all of the circuit boards and connectors, then another layer of screws for the front panel, and only when you have fully removed the LCD panel can you get to the backlights.
You will also need a multimeter to test the backlight strips to find out where the problem lies.
To fix a failed backlight:
- Unplug your TV, hold down the power button and wait for at least 30 minutes. There are large capacitors in the power board for the backlight and these can hold charge for an extended period of time.
- Place your TV face down on a large table or workbench. Make sure there is nothing that can scratch the screen on your work surface.
- Ground yourself.
- Open your TV by unscrewing the screws in the back panel. It should come apart in two pieces: front and back.
- Put the back panel somewhere out of the way and take a look at the circuit boards that have been revealed.
- You will see a T-Con panel for translating the signal into a TV picture, a power board and a main board. Any wires or ribbons that are near the edge of the TV should be disconnected, and the three boards will also need to be removed.

- Then remove the screws around the edge that hold the bezel of the TV.
- With some care, you should be able to remove the bezel and panel, and reveal the TV backlight underneath, which will be in strips of LED lights.
- Use a voltmeter or TV backlight tester to check whether they are working, and replace any failures.
The video below covers checking and replacing the LED backlights, with some additional tips on when you should seek to replace your backlight driver board instead.
It’s also possible that one of the connectors linking the LED strips as they span the width of your TV has failed. This can be fixed by checking the connectors with a multimeter and re-soldering and broken connections. This article has a good study on this.
5. Run a Firmware Update
It’s always sensible to try running a firmware update if nothing else has worked.
Firmware updates often reset PWM settings and introduce improved tolerances for the backlight settings that make them work more accurately.
Smart Samsung TVs support auto-updating of firmware, but you can’t assume that this is turned on for you.
To check that auto-updating is on for firmware/software on your Samsung TV over Wi-Fi:
- Press the Menu or Home button on your remote and go to Settings.
- Click Support.
- Then Software Update.
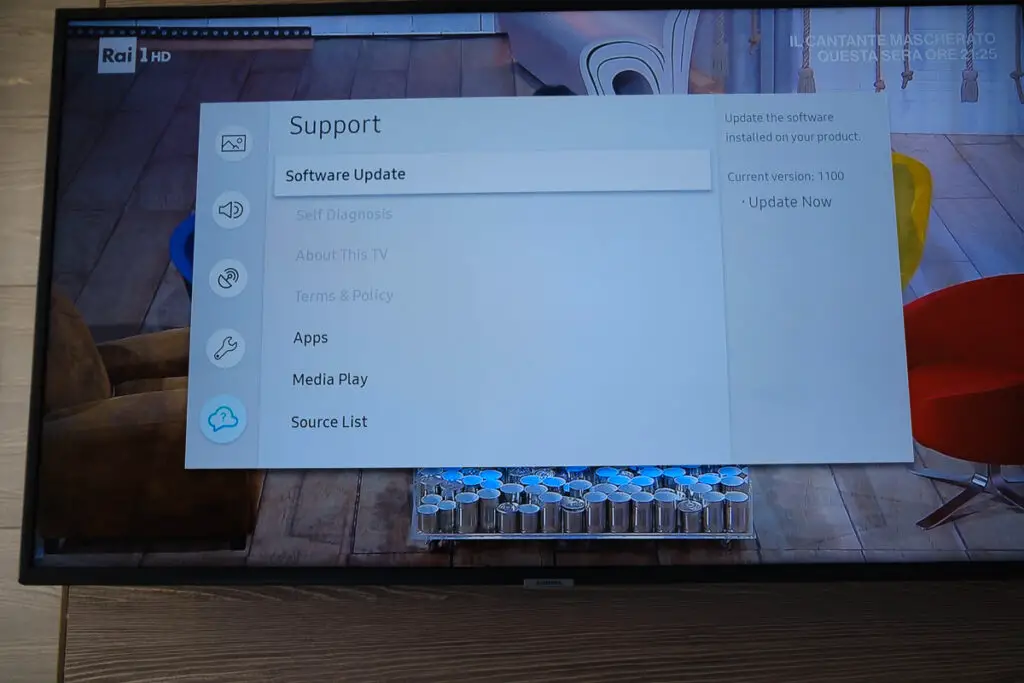
- Agree to any terms and conditions that may pop up, then switch on Auto Update.
For older Samsung TVs, you’ll need to update the firmware by USB. To do this:
- Press the Menu or Home button on your remote and go to Settings.
- Go to Support.
- Then Contact Samsung or About This TV.
- Take note of the Model Code and Software Version currently installed.
- Go to Samsung’s Support site and enter your model number.
- Select Manuals & Downloads and look for the newest firmware version.
- If this Firmware Version is later than the version you noted was installed on your TV, then download it, along with the Firmware Update User Manual which will give you full instructions on how to install your update.

6. Factory Reset Your Samsung TV
Returning your TV back to its factory settings is a more extreme step, as it will delete any personalization features, downloaded apps or connected devices, but it’s always worth a shot when other methods haven’t worked.
To factory reset a Samsung Smart TV:
- Press the Menu or Home button on your remote and go to Settings.
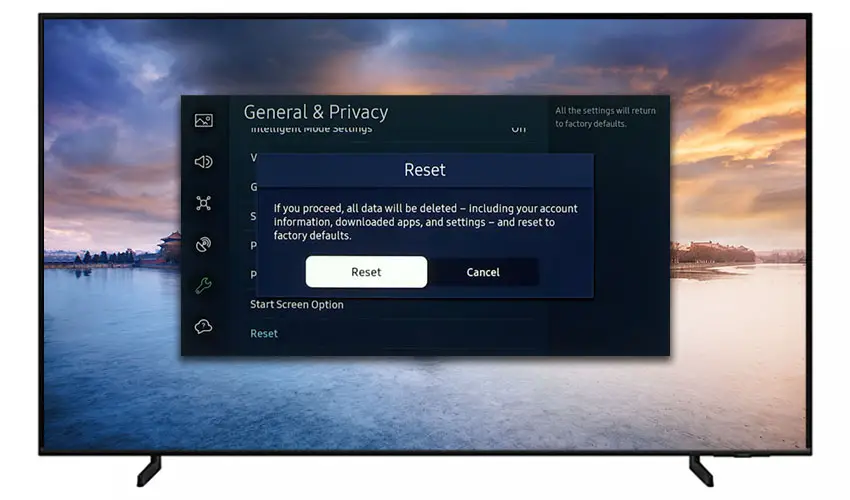
- Then General & Privacy.
- And Reset.
- Enter your PIN, which by default is 0000 (four zeroes) for Samsung.
- Then select one final Reset in the popup.
Samsung has provided a video of these steps in the video below.
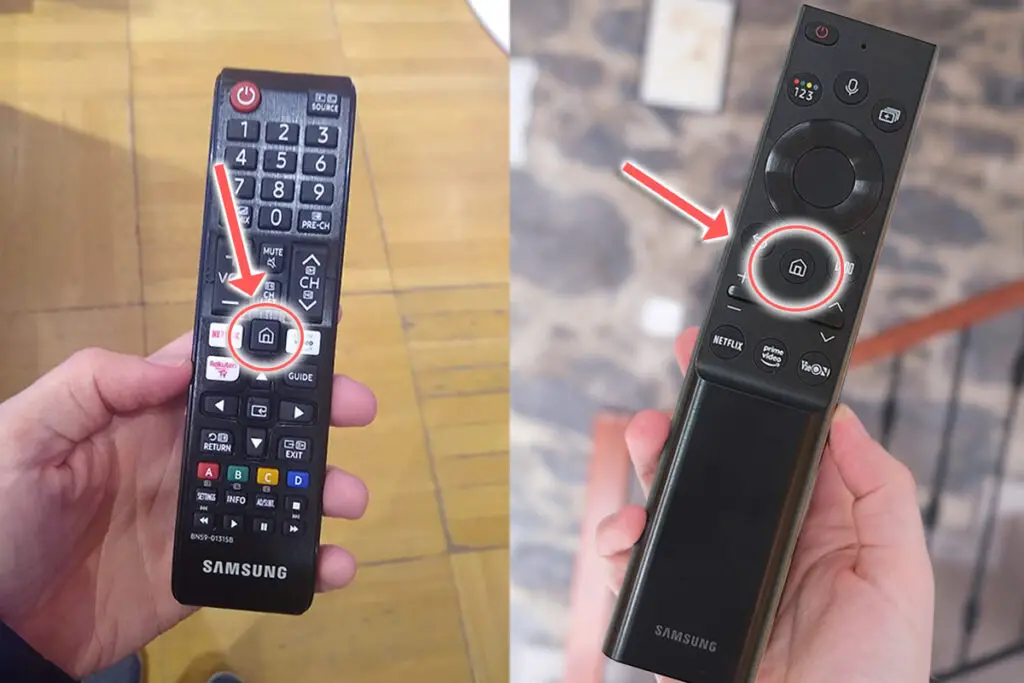
If your Samsung remote is not working, then you can get to the same menu items by using the physical Menu button that is most likely underneath your Samsung TV’s logo, next to the Power button.
Press this and use the Volume + and – or Channel + and – depending on model to follow the steps above.
That should brighten up your screen without you having to delve into hardware problems, but just in case you still have a problem then this will be caused by the backlights, which we will look at next.
Samsung TV Support and Warranty
You can check your current warranty status at Samsung’s warranty site.
Unfortunately, warranties typically only last a year unless you have already paid to extend it.
Although you are unlikely to see a dark screen on a Samsung TV under one year old, this can happen. If so, return your TV under warranty and get it fixed.
You can also try to contact Samsung support directly to see if they can offer any help.
You can use the Samsung support site to help diagnose your problem, but if you are at this stage, then you are better off calling them directly at:
- 1-800-SAMSUNG (726-7864)
They are in the office 7 am – 12 am EST, 7 days a week, but their automated chatbot is available on their site 24/7.
Even if Samsung won’t fix your TV, they might still offer you a discount on a future model if you pester them hard enough! Always worth a try!
Conclusion
- A Samsung TV might have a dark screen because of either a failing backlight, incorrect PWM settings, or because of Eco Mode/Motion Lighting.
- You can change PWM settings in the Service Menu, usually accessed by pressing Mute + 1 + 8 + 2 + Power on your remote.
- Eco Mode and Motion Lighting can be changed from the Expert Settings in the Picture menu, or through the System menu.
- A screen getting darker over time is because of a failing backlight, which can be fixed by changing the backlight strips.
If you still are having problems with your TV, then try Samsung support, but otherwise, you will be looking at a new TV.
Read More:


Leave a Reply