This site is part of various affiliate programs. Links may give us a small compensation for any purchases you make, at no additional cost to you. Please read the disclaimer policy for full details.
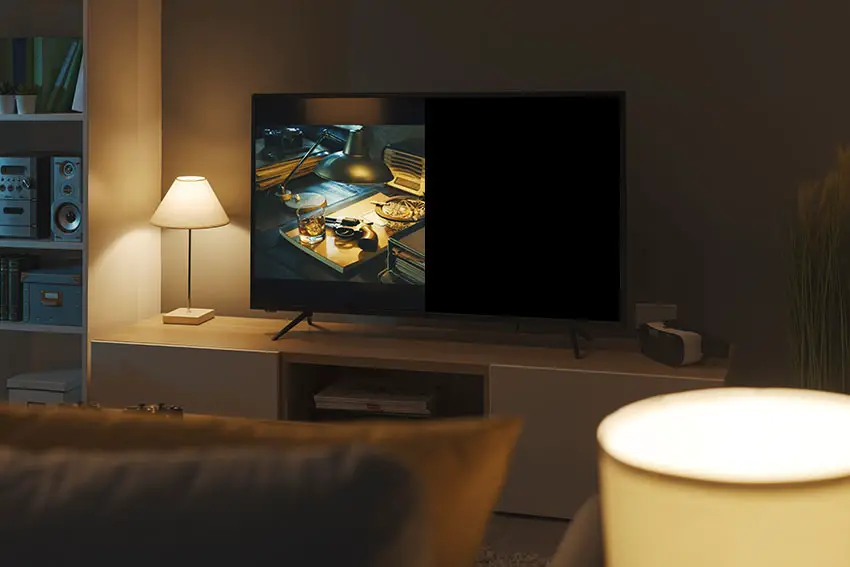
It’s pretty common to see a Samsung TV half black screen or half dark screen after you’ve had your TV for a year or two.
Usually this happens right after it goes out of warranty, and this means that most people just get rid of their broken TV and buy an expensive new model.
But it is actually pretty easy to fix a Samsung TV with half dark screen, provided you are happy to put in a little effort.
In this guide, I’ll cover every possible fix and I’m very confident that you can use this to get your TV back up and running again.
Samsung TV Half Black Screen
To fix a Samsung TV half black screen by either replacing any failed LED backlights or re-soldering any faulty connections between LED strips, or by adding strips of tape to the ribbon cable connecting the T-Con board to the panel to block any faulty clock signals.
Because people mean different things by “Samsung TV half black screen”, or “Samsung TV half screen dark”, the issue can be caused by a couple of different problems, both of which have different solutions.
For example, a dark band across your Samsung TV is caused by a backlight issue, while either the left or right hand side of the TV screen being totally blank is likely a T-Con issue.
We’ll cover every possible fix below, but make sure you read the description for each carefully so that you can match the correct fix to your exact problem.
You can watch a quick oveview of each of these steps in the video below, with more detail for each step contained in this article.
1. Cold Boot Your TV
With modern electronics, it’s possible that the half black screen on your Samsung TV is caused by something stuck in your TV’s flash memory, which can also be a problem if you are seeing white spots on your TV.
Power cycling or cold booting your TV will clear out any issues with non-permanent memory and reset your main board without losing your personal settings.
This is quick and painless and won’t cause you to lose any of your saved settings.
- Switch off and unplug your TV.
- Hold down the physical power button on the TV for at least 15 seconds.
- Wait for at least 30 minutes for any residual power to drain from the TV’s capacitors (which are capable of storing charge for several minutes).
- Plug your TV back in and try switching it on. You should see a red light if you have been successful.

Make sure you do wait for the full 30 minutes before plugging your TV back in – you would be surpised how long the components within your TV can hold charge, and you want to make sure it has fully reset.
Although this seems a very basic step, don’t overlook it because in the vast majority of cases a simple soft reset fixes most issues.
Most people will now have their TV fixed and back up and running. If this isn’t you, then we’ve got a few more basic fixes to try before getting into the hardware fixes.
2. Change the HDMI Cable Socket
There’s a strong possibility that a poorly seated cable is creating signal noise which is displaying as a half black screen.
This comes down to either a:
- Faulty HDMI cable with a break in it
- Damaged HDMI port with broken pins
- Poor HDMI connection where the cable and connector are not fully making contact

To check your HDMI and other cables:
- Switch off your TV.
- Remove any HDMI or other physical cables connected to the back of your TV.
- If you have any compressed air, use that to clean the contacts both of the cable and in the connector on the TV. If you don’t have compressed air, then blow gently on them.
- Firmly push the cables back into their slots on the TV.
- Switch your TV back on again.
It that hasn’t fixed the problem, then try using a different HDMI input. Most TVs have 3 or 4 HDMI ports.
If you have one that is on a different part of the TV then that would be the best one to try, as it this should have a separate connection to the TV’s main board.

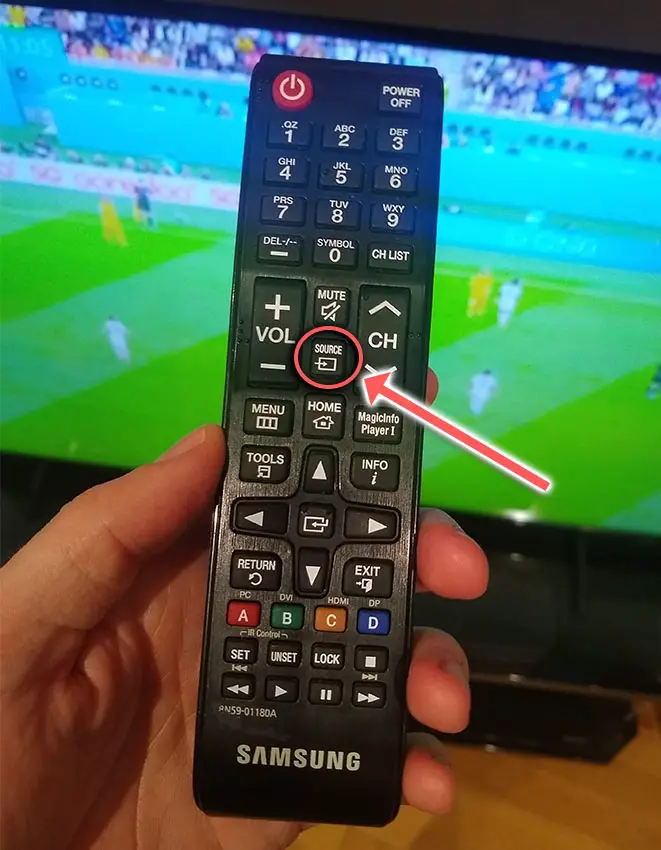
Plug you HDMI cable into the new port, note the number next to it, then choose this HDMI input on your TV, by using the Input or Source button on your TV remote or the Input or Menu button on your TV itself.
You can also try removing all external devices, including those connected by Bluetooth and any coaxial or signal cables, so that the TV only has a power cable going into it.
When you turn your TV on, this means the screen will be totally black as it is not receiving any picture, potentially making it tough to see the half black screen.
Pull up the on-screen menu to see if the half black screen is still there. If it is, this means that your external connections are fine and the problem is located within the hardware of your TV.
If the half black screen has gone, then try re-seating your HDMI and other cables one by one, until you find the damaged cable that needs replacing.
3. Update Your TV’s Firmware
Software and firmware issues have been known to cause problems with the display on Samsung TVs.
As with any product, you should ensure that you have updated your TV’s firmware to the latest version, even if it is new.
Smart Samsung TVs support auto-updating of firmware, but you can’t assume that this is turned on for you.
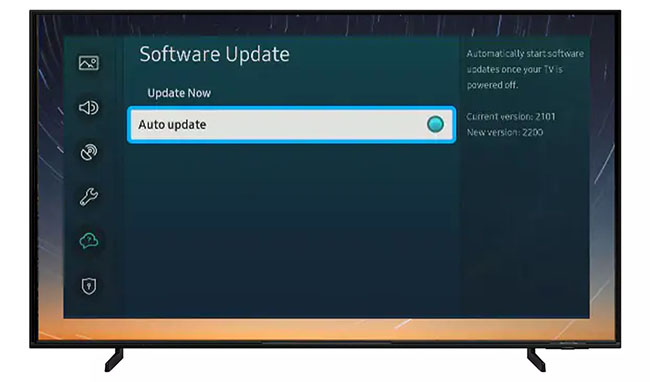
To check that auto-updating is on for firmware / software on your Samsung TV:
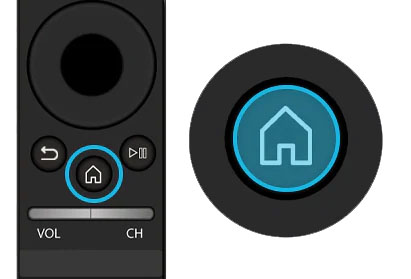
- Press the Menu or Home button on your remote and go to Settings.
- Click Support.
- Then Software Update.
- Agree to any terms and conditions that may popup, then switch on Auto Update.
For older Samsung TVs, you’ll need to update the firmware by USB. To do this:
- Press the Menu or Home button on your remote and go to Settings.
- Go to Support.
- Then Contact Samsung or About This TV.
- Take note of the Model Code and Software Version currently installed.
- Go to Samsung’s Support site and enter your model number.
- Select Manuals & Downloads and look for the newest firmware version.
- If this Firmware Version is later than the version you noted was installed on your TV, then download it, along with the Firmware Update User Manual which will give you full instructions on how to install your update.

4. Change Your Picture Settings to Remove the Half Dark Screen
Most Samsung TVs have an option to change the brightness or other aspects of the picture.
Using your remote control, navigate to the Home screen, then Settings and go to the Picture menu.
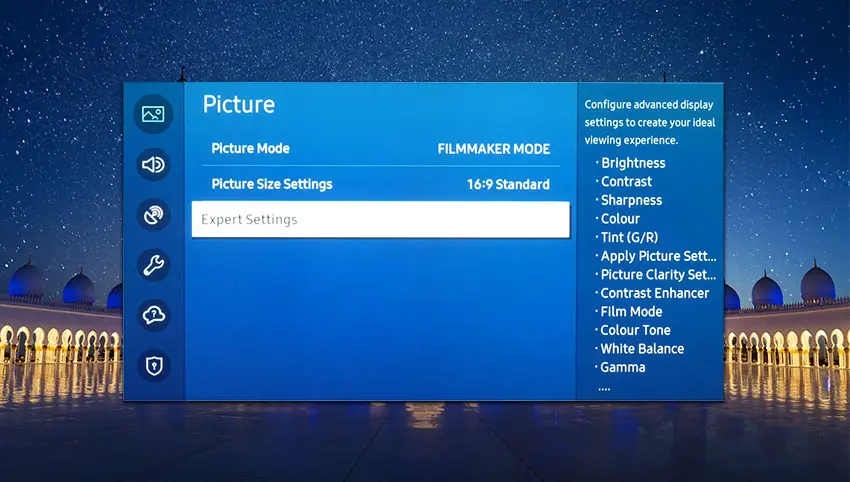
You can try the various picture modes to see if they fix the half dark screen, and if not, then go to Expert Settings.
This allows you to change the color space of your TV and hopefully will let you change it enough to totally remove any dark bands on your TV.
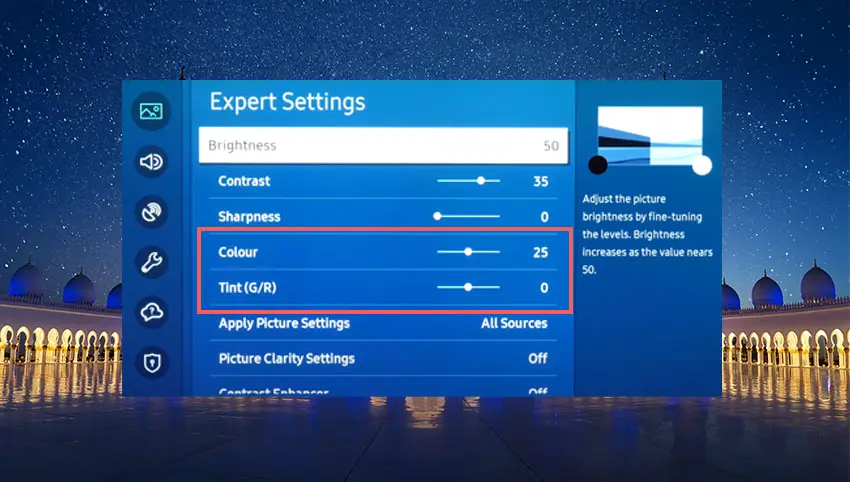
You can use the Color and Tint options, and you can also try changing the Gamma and White Balance, and hopefully you will be able to get a decent picture without any color tint or spots.
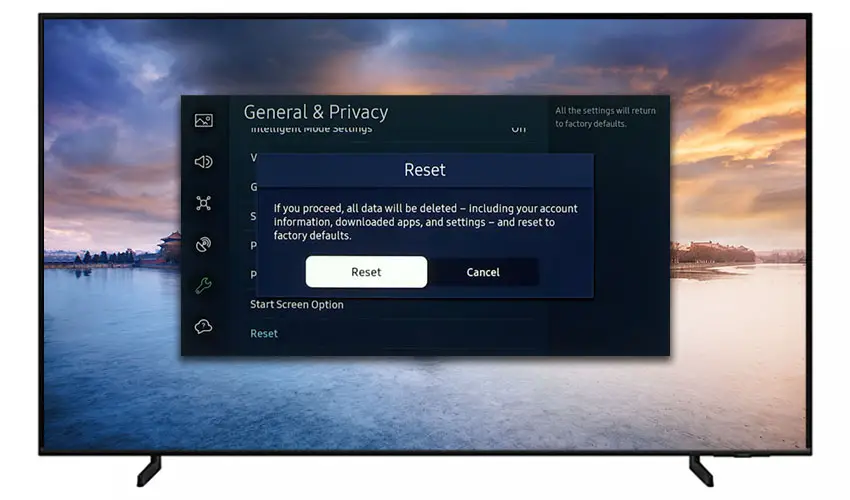
5. Samsung TV Factory Reset
Returning your TV back to its factory settings is a more extreme step, as it will delete any personalization features, downloaded apps or connected devices, but it’s always worth a shot when other methods haven’t worked.
To factory reset a Samsung Smart TV:
- Press the Menu or Home button on your remote and go to Settings.
- Then General & Privacy.
- And Reset.
- Enter your PIN, which by default is 0000 (four zeroes) for Samsung.
- Then select one final Reset in the popup.
Samsung have provided a video of these steps in the video below.
If you don’t have your remote or it’s not working, then you can get to the same menu items by using the physical Menu button that is most likely underneath your Samsung TV’s logo, next to the Power button.
Press this and use the Volume + and – or Channel + and – depending on model to follow the steps above.
That should solve most half black screen issues without you having to delve into hardware problems, but just in case you still have a problem then this will be caused by the backlights, which we will look at next.
6. Check Backlight for Dark Areas On Screen

If you are seeing dark areas on screen, or either the top half, bottom half, left side or right side is darker than its counterpart, or your Samsung TV screen is darker than normal, then you have a backlight issue.
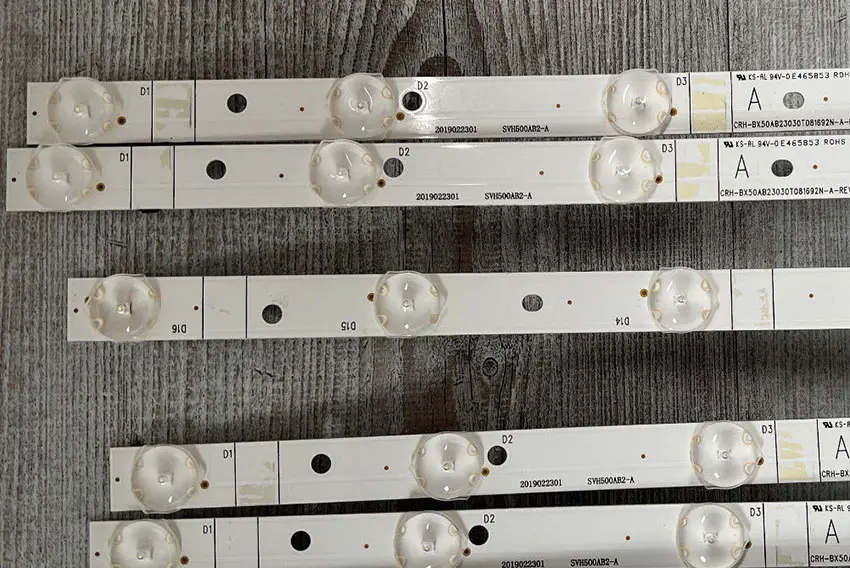
Backlights on modern Samsung TVs come in LED strips of varying lengths. Older models used lengths that spanned the entire frame of the TV, but due to cost savings, more recent TVs use a set 16″ LED strip which is connected in series for each row to span your TV.
These cold soldered connectors are a notorious failure point on Samsung TVs, but can be easily fixed if you are willing to re-solder a joint yourself.
Equally commonly, the LED backlights themselves can fail. This is due to repeated current over powering, which over time causes thermal degradation of the LEDs leading to burnout. You can replace any failed LEDs by just removing the entire strip and replacing it.
The problem with fixing the LEDs is that they are located in the most difficult to access part of your TV. So if you are not comfortable with a larger repair job, then now is a good time to seek help from a professional.
You need to remove the back panel, remove all of the circuit boards and connectors, then another layer of screws for the front panel, and only when you have fully removed the LCD panel can you get to the backlights.
You will also need a multimeter to test the backlight strips to find out where the problem lies.
To fix a failed backlight:
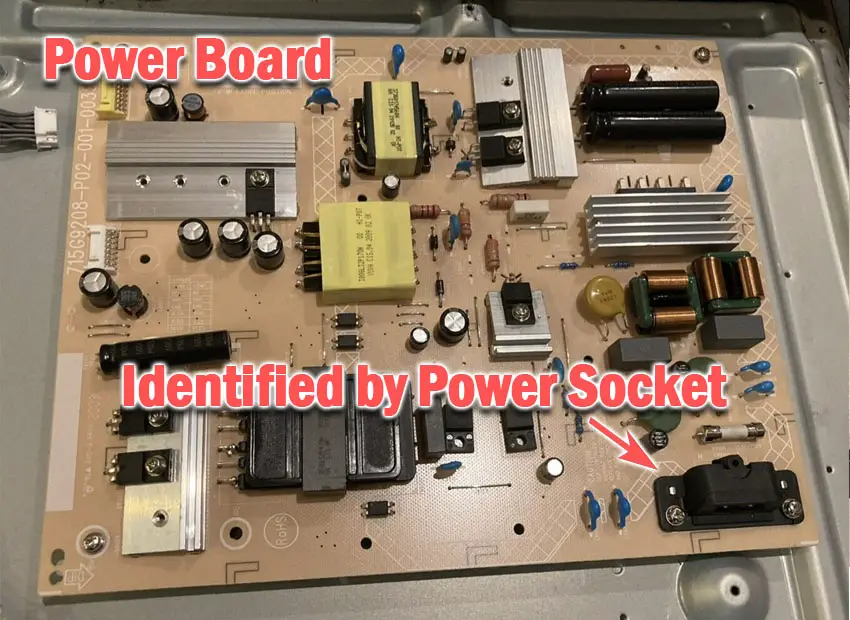
- Unplug your TV, hold down the power button and wait for at least 30 minutes. There are large capacitors in the power board for the backlight and these can hold charge for an extended period of time.
- Place your TV face down on a large table or workbench. Make sure there is nothing that can scratch the screen on your work surface.
- Ground yourself.
- Open your TV by unscrewing the screws in the backpanel. It should come apart in two pieces: front and back.
- Put the back panel somewhere out of the way and take a look at the circuit boards that have been revealed.
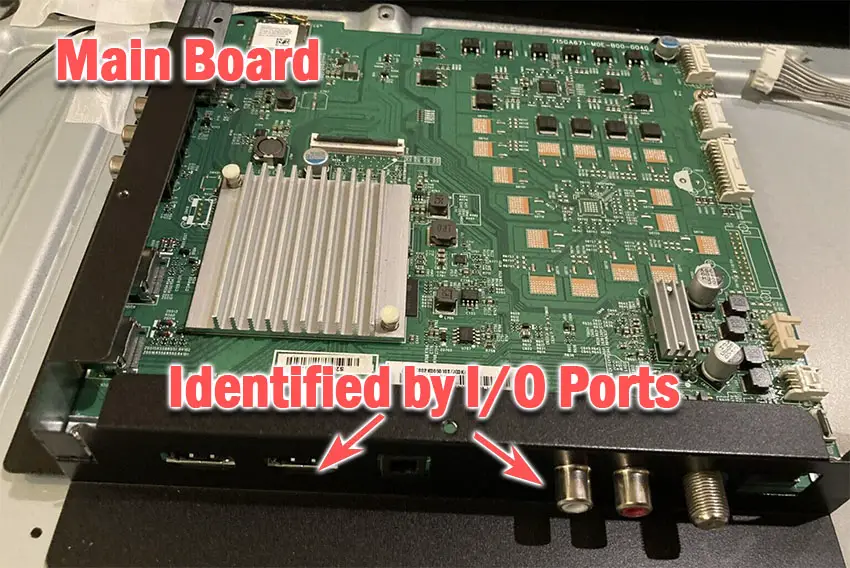
- You will see a T-Con panel for translating the signal into a TV picture, a power board and a main board. Any wires or ribbons that are near the edge of the TV should be disconnected.
- Then remove the screws around the edge that hold the bezel of the TV.
- With some care, you should be able to remove the bezel, panel and reveal the TV backlight underneath, which will be in strips of LED lights.
- Use a voltmeter or TV backlight tester to check whether they are working, and replace any failures.
The video below covers checking and replacing the LED backlights, with some additional tips on when you should seek to replace your backlight driver board instead.
It’s also possible that one of the connectors linking the LED strips as they span the width of your TV has failed. This can be fixed by checking the connectors with a multimeter and re-soldering and broken connections. This article has a good study on this.
Rarely, the backlight issue can be caused by a faulty main board. You can follow the next step to identify it, clean the contacts going into it and replace it if necessary.
7. For Half Your Screen Being Black, Check Your T-Con Board
If either the left or right hand side of your Samsung TV screen is totally black, extending from the edge to the center or your screen, then there is a problem with your T-Con board or the cabling connecting it to your screen.
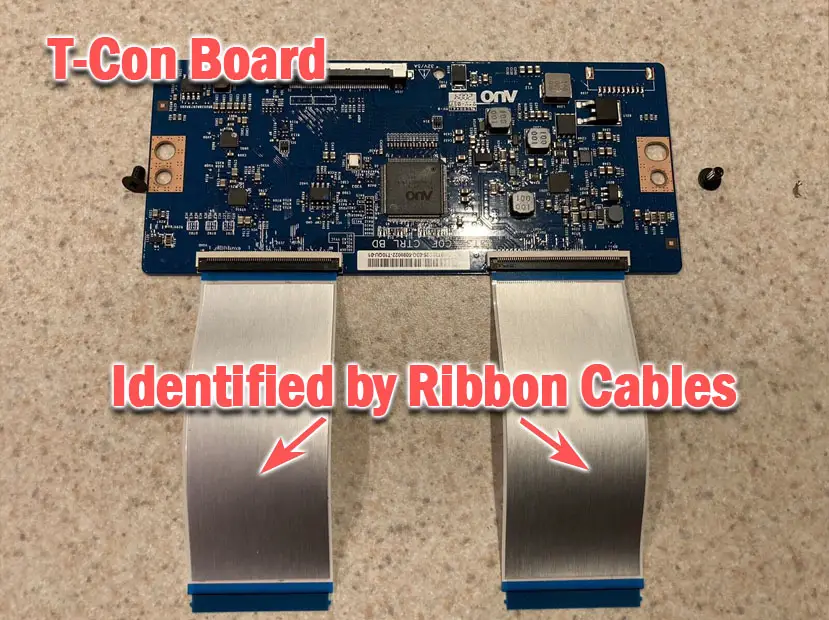
The Timing Control (T-Con) board is a small PCB board that drives your TV’s panel, translating the signal into a picture on your screen.
It’s hidden away under the back panel, behind the screen, and is the cause of a half black TV screen because it connects to the LCD / OLED panel with ribbon connectors which can come loose or get covered in grime or dust, impeding their contact.
To access the T-Con board, you need to remove the back panel. If you’re not confident doing this, then now is the time to get an expert in. Otherwise:
- Unplug your TV, hold down the power button and wait for at least 30 minutes. There are large capacitors in the power board for the backlight and these can hold charge for an extended period of time.
- Place your TV face down on a large table or workbench. Make sure there is nothing that can scratch the screen on your work surface.
- Ground yourself.
- Open your TV by unscrewing the screws in the backpanel. It should come apart in two pieces: front and back.
- Put the back panel somewhere out of the way and take a look at the circuit boards that have been revealed.
- You will see a T-Con panel for translating the signal into a TV picture, a power board and a main board.
Or see this in action in the video below.
The position of the boards will vary by model, but the T-Con board can be identified by the ribbon cables connecting it to the TV’s panel. Identify the main three boards you will see in the images below.
Start by giving everything a good clean, preferably with compressed air or a non-static brush. It’s possible that dust in the connections can block the signal.
Then, you should be able to remove the cables on the T-Con board by pushing the locking cover down and they will then easily come away from the board. Don’t try to force them out without unlocking them first.
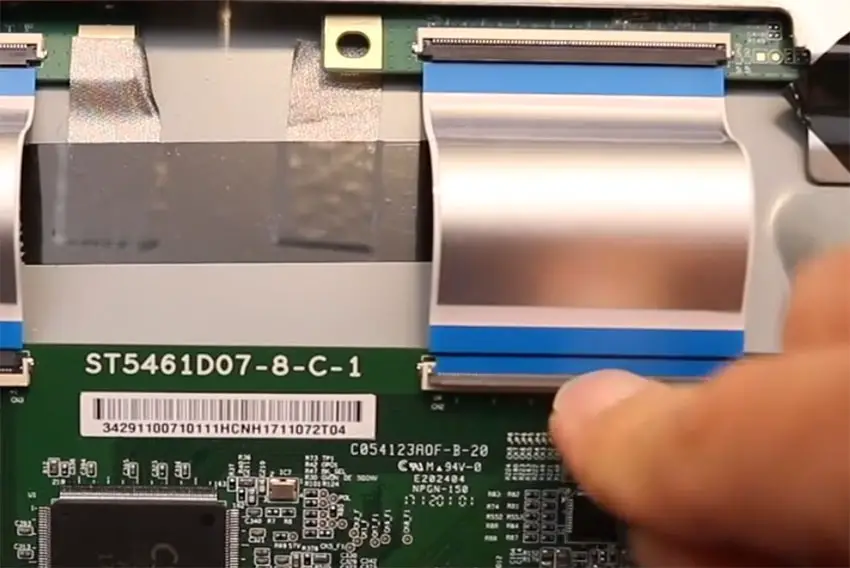
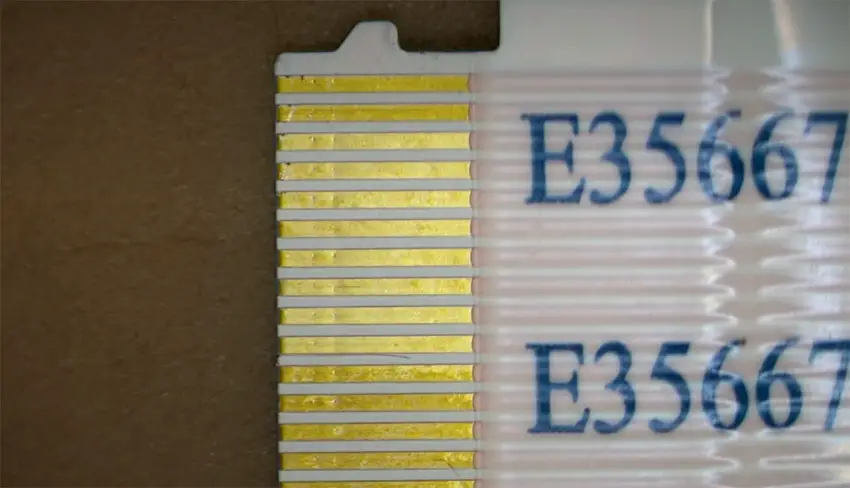
After removing the ribbon cable, take a look at the individual connectors on the ends of the cables, and the connectors in the socket. You are looking for any signs of corrosion, damage or dust.
The contacts should be a shiny gold or silver color. If they are dull and appear to have a rough, copper-like layer over them, this would indicate oxidation and therefore a new cable is recommended.
Give the cable and socket a good clean with compressed air, then put the cable back in, put the back panel back on your TV and fire it up.
If half the screen is still black, there’s a good chance that there is a fault somewhere on the T-Con board itself. These can be replaced for around $30 from eBay.
To get the correct board, note the T-Con model number written on the label on the board, and put this into eBay.
But before you replace the T-Con Board, try the final step which can fix faulty boards without you needing to replace them.
8. Block the T-Con Signal with Tape
This might seem like a bit of a hacky approach, but it is possible to use small pieces of non-conductive tape to block the indiviual contacts on the T-Con cable.
This blocks the “bad” signal getting sent through that contact, and can actually clear up the image.
This works because the T-Con cable sends a clock signal through a handful of the pins (usually 8 pins per cable) which is implicated in the most common issues of half your screen going black.
And with two cables, one for each side of the TV, you can use the signal from the working side of the T-Con board to fill in for the faulty clock signals on the other side.
This method can also work well for fixing horizontal lines on a Samsung TV.
It can take some trial and error to get this right, so I recommend you check out the video below for a good demonstration of how to follow this approach.
Samsung TV Support and Warranty
You can check your current warranty status at Samsung’s warranty site.
Unfortunately, warranties typically only last a year unless you have already paid to extend it.
Although you are unlikely to see a half black screen on a Samsung TV under one year old, this can happen. If so, return your TV under warranty and get it fixed.
You can also try to contact Samsung support directly to see if they can offer any help.
You can use the Samsung support site to help diagnose your problem, but if you are at this stage, then you are better off calling them direct on:
- 1-800-SAMSUNG (726-7864)
They are in office 7am – 12am EST, 7 days a week, but their automated chatbot is available on their site 24/7.
Even if Samsung won’t fix your TV, they might still offer you a discount off a future model if you pester them hard enough! Always worth a try!
Final Thoughts on How to Fix a Samsung TV With a Half Dark Screen
There are a couple of main causes for a half dark screen on your Samsung TV, but these can be fixed by following the steps below.
- Cold boot your Samsung TV.
- Unplug your HDMI cables.
- Confirm your wall socket is supplying consistent power.
- Update your firmware.
- Change your picture settings.
- Factory reset your TV.
- Replace any burned out LEDs in the backlight, and re-solder any poor connections in the backlight strips.
- Clean and replace the T-Con board if half the screen is totally black.
- Block the T-Con signal with tape.
If you still are having problems with your TV, then try Samsung support, but otherwise you should be looking at a new TV.
Read More:
Samsung TV blue tint? Try this easy fix


7 Responses
Rose
Hi Tim,
This article you’ve provided on fixing tv with half black screen is so very helpful and I want to thank you. You have provided really good advice in a way that is easy to follow plus going through each step until resolving the problem.
I have a question I hope you will see this post and help me with please.
I have a Samsung 4HD 43inch just 3 years old when this problem began in January 2023.
The right hand side went black. Not like in a definite line as one of the images show but in a fuzzy black way. I can still see some of the picture behind the darkness but it makes viewing really difficult. Anyway, last night I went through and performed all of the tests you recommend as well as downloading the latest version of the software. Still the same problem.
Then tonight suddenly the right side was lit up again! wonderful I thought. It’s fixed and just taken awhile to react to the updates etc I performed last night. Then, within half an hour, the left hand side went dark and the right hand side stayed lit up!
What do you think this means please? Because the leds on the rhs are now alight when they haven’t been for six months.
Is it more likely to be the T con board not getting sufficient power into the backlights?
Before this happened I was resolved to replace all of the back lights. Now I don’t know.
Can you comment please? Good luck with all of your work by the way 🙂
Tim Daniels
Hi Rose,
Glad you found this helpful.
If you can see the picture even in the darker areas, then it must be a backlight issue rather than a T-con issue, as the latter would give no picture at all.
It’s most likely a failing component on the power board or voltage inverter for the backlight (which may be on the same board for your model).
I would find the cable going to the backlight from the power board / inverter, remove it and check the contacts on the board with a multimeter. The board should have the expected voltages printed next to the connector, so make sure each pin hits this.
I suspect at least one pin will show an unexpected voltage, so you can then trace the problem to a specific component on the power board, or just replace the board for an easier solution.
If the voltages are all correct, then it could be a failure within the connectors linking the LED strips together or to the power board, so check those with a multimeter and replace if necessary.
Reading this again though, it could just be a loose connector somewhere between the power board and LEDs, so try removing them and cleaning them all first.
Rose
Thanks Tim, will try all of that and let you know. cheers Rose
Linda
Hi Tim
Thank you for this detailed post . You have made it so easy to follow the directions. I’ve never taken a TV apart but I’ve always liked my TV. It’s about eight years old now and it always worked great until about a month ago when the top half of it became dark. And like Rose mentioned above in her post, you can still see the picture behind it it’s kind of a grainy black. So I’m going to try all the plugging and unplugging etc. and see if that works and then when I have time I might try to take the TV apart. It actually looks interesting and fun to me. I just have to find the time to be able to spend a whole day on it but thank you so much. I love what you did here and I’m sure it’s such a great resource that is unbelievably valuable to so many people.
Tim Daniels
Thanks Linda, I appreciate the kind words!
Adeel
Hi Tim,
I was facing an issue of semi dark top half of my Samsung LED since last 3 yrs but it wasn’t that bad and varied with temperature of the room. It was more darker/ severe in winter then summers. However, today while changing channels suddenly whole screen went black while sound could still be heard. Any advice regarding what could be the issue and how can I remove it? Or should I just dump it and not waste my time / resources on it
Tim Daniels
That sounds like its most likely to be a problem with the T-Con or main board, but it’s hard to diagnose from a distance.
Personally, I always think it’s worth trying to fix – at the very least you’ll learn a new skill.
I have a more up-to-date guide that will take you through the steps to try to diagnose and fix this -> https://www.lapseoftheshutter.com/samsung-tv-sound-but-no-picture/